Manage IoT Connectors
OT Security allows you to map all managed Internet of Things (IoT) devices to their respective application server by configuring the IoT Connector engine and synchronizing assets from the specific application server.
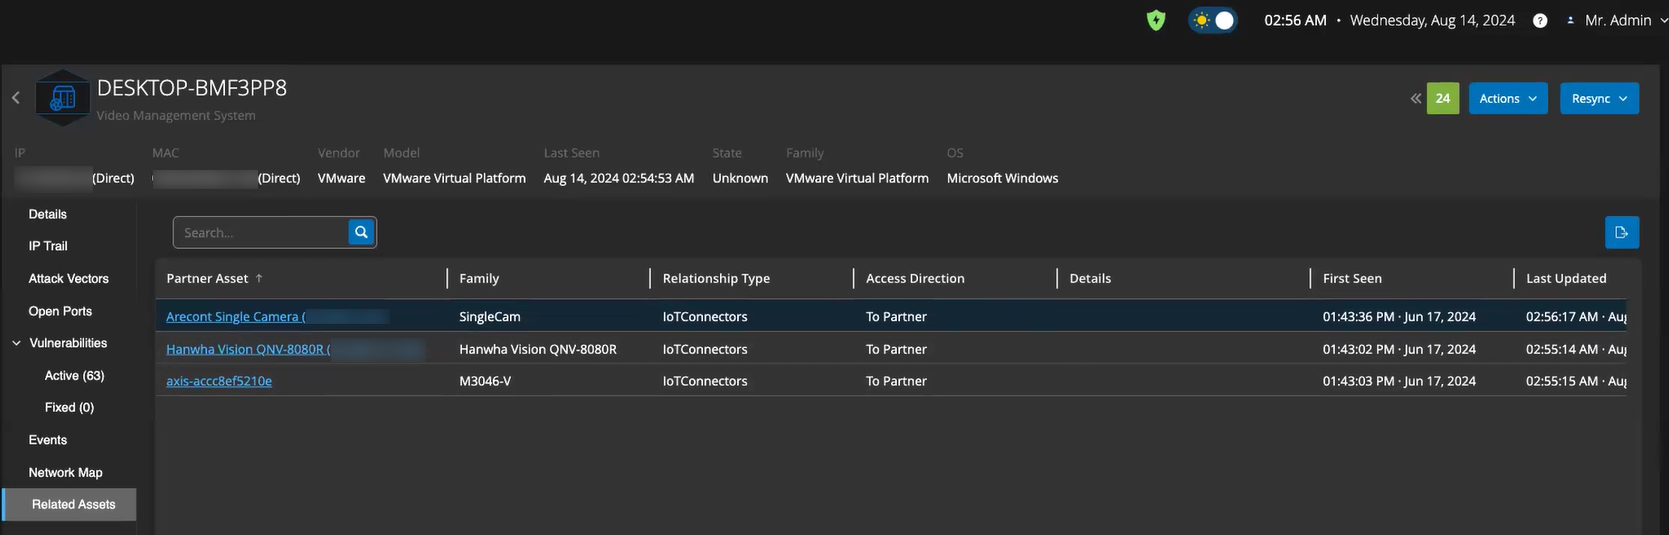
In the example of an IP camera, you can see the Video Management System (VMS) server that manages it. On the OT Security Inventory page, navigating to the VMS application server shows all the cameras that it manages on the Inventory > Related Assets page.
Requirements for IoT Connector Agent
| Requirement Category | Minimum Requirement |
|---|---|
| Operating System |
|
| Memory | 1 GB |
| Disk Space | 1 GB |
| CPU | Any hardware with a minimum of 10% dedicated CPU capacity. |
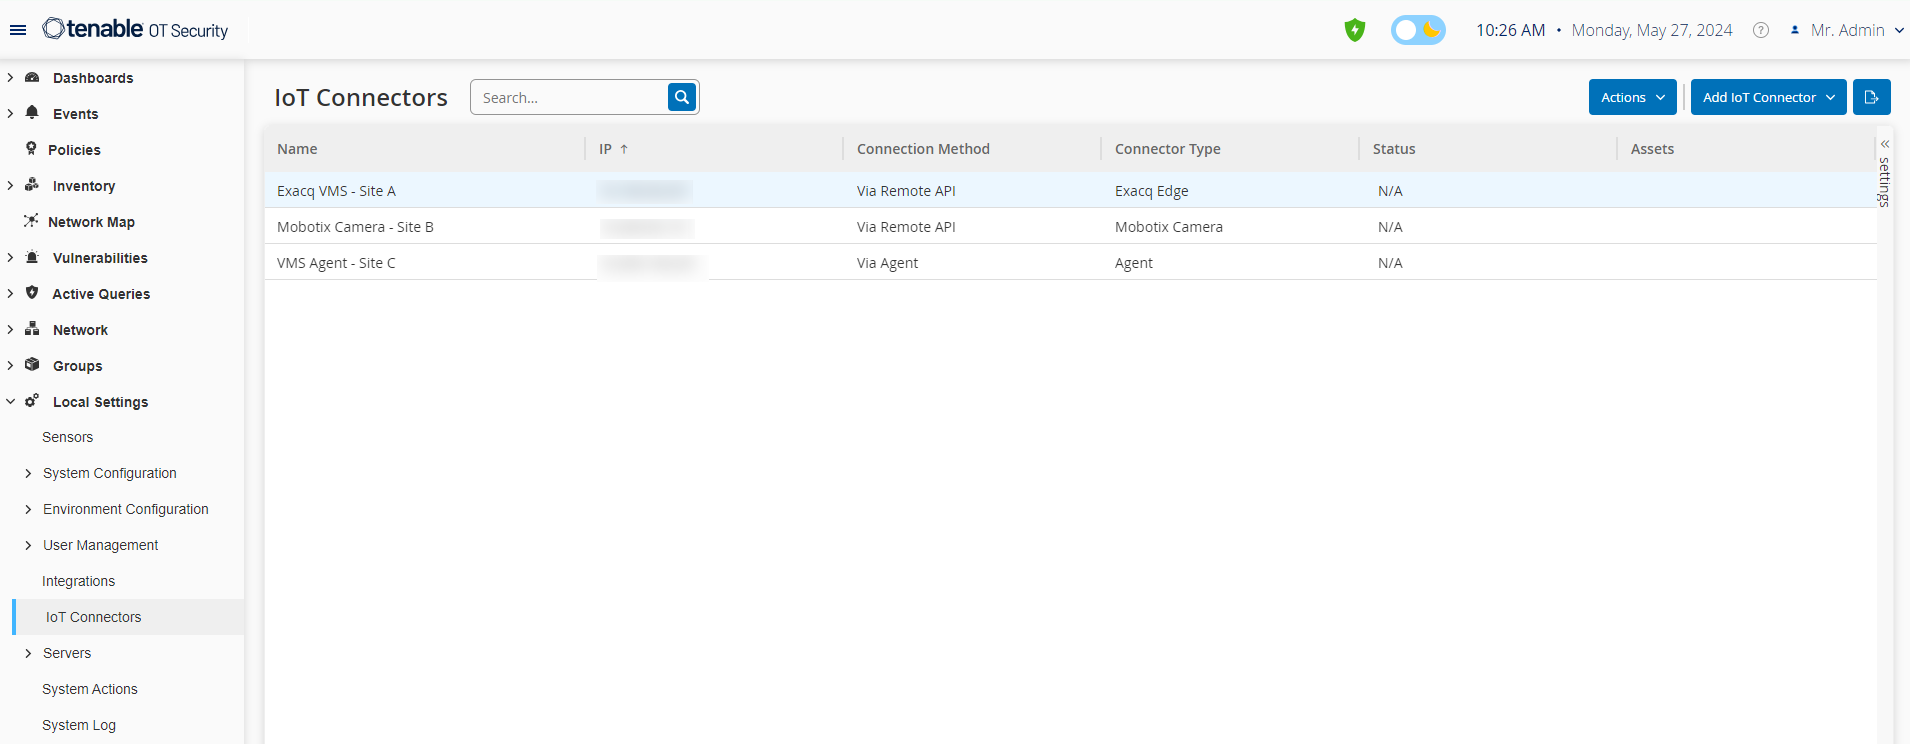
IoT Connectors Engine
OT Security includes an IoT Connector engine that you can integrate with your IoT/VMS servers.
This engine supports two connection methods: authenticating with a remote application API service or connecting via an agent. After integrating your application servers with the engine, OT Security imports all managed devices such as cameras, badge access systems, and fire panels.
You can perform the following tasks for IoT connectors:
Add IoT Connectors
-
In the left navigation bar, go to Local Settings > IoT Connectors.
The IoT Connectors page appears.
-
In the upper-right corner, click Add IoT Connector.
A drop-down menu appears.
-
Select one of the following options:
-
 Via Agent
-
In the Connector Name box, type a name for the connector.
-
In the IP Address of the Server box, type the IP address of the connector to add.
-
Click Save.
Note: If your application server does not have the OT Security IoT Connector Agent installed, the connection fails and OT Security displays an error message.
-
-
Via Remote API
-
In the Connector Type section, select the IoT connector to add.
-
Click Next.
The Connector Details section appears.
-
In the Connector Name box, type a name for the connector.
-
In the IP box, type the IP address of the connector.
-
In the Port box, type the port number through which OT Security can connect. The default port number is 22609.
-
In the Username box, type the username to log in to the connector.
-
In the Password box, type the password for the connector.
-
Click Save.
-
OT Security saves the connector and it appears on the IoT Connectors page.

-
View Assets Linked to the IoT Connector
After you connect to the application server, you can view the related assets or services managed by the application server.
To view all devices managed by the server:
-
Go to Inventory > All Assets.
The All Assets page appears.
-
Use the Search box to search for the application server.
The selected application server page appears with the list of devices that it manages.
Test the IoT Connection
After adding an IoT connector, you can test if OT Security can reach it.
-
In the IoT Connectors table, do one of the following:
-
In the row of the IoT connector you want to test, right-click and select Test Connection.
-
Select the IoT connector you want to test, then click Actions > Test Connection.
OT Security runs the test to verify if it can reach the connector.
-
Edit IoT Connector
-
In the IoT Connectors table, do one of the following:
-
In the row of the IoT connector you want to edit, right-click and select Edit.
-
Select the IoT connector you want to edit, then click Actions > Edit.
The Edit IoT Connector via Agent/Remote API panel appears.
-
-
Modify the details as needed.
-
Click Save.
OT Security saves the updates to the IoT Connector.
Delete an IoT Connector
-
In the IoT Connectors table, do one of the following:
-
In the row of the IoT connector you want to delete, right-click and select Delete.
-
Select the IoT connector you want to delete, then click Actions > Delete.
OT Security deletes the IoT connector.
Note: After you delete an IoT connector, OT Security uninstalls the IoT Connector Agent from the application server. If you want to connect to the same application server via Agent, you must reinstall the OT Security IoT Connector Agent. -