Set up Tenable Core
You can do the initial configuration of Tenable Core from both the CLI and the Tenable Core user interface.
Using the Tenable Core user interface is mandatory to finish the configuration for virtual appliance deployments.
Initial Configuration via Tenable Core User Interface
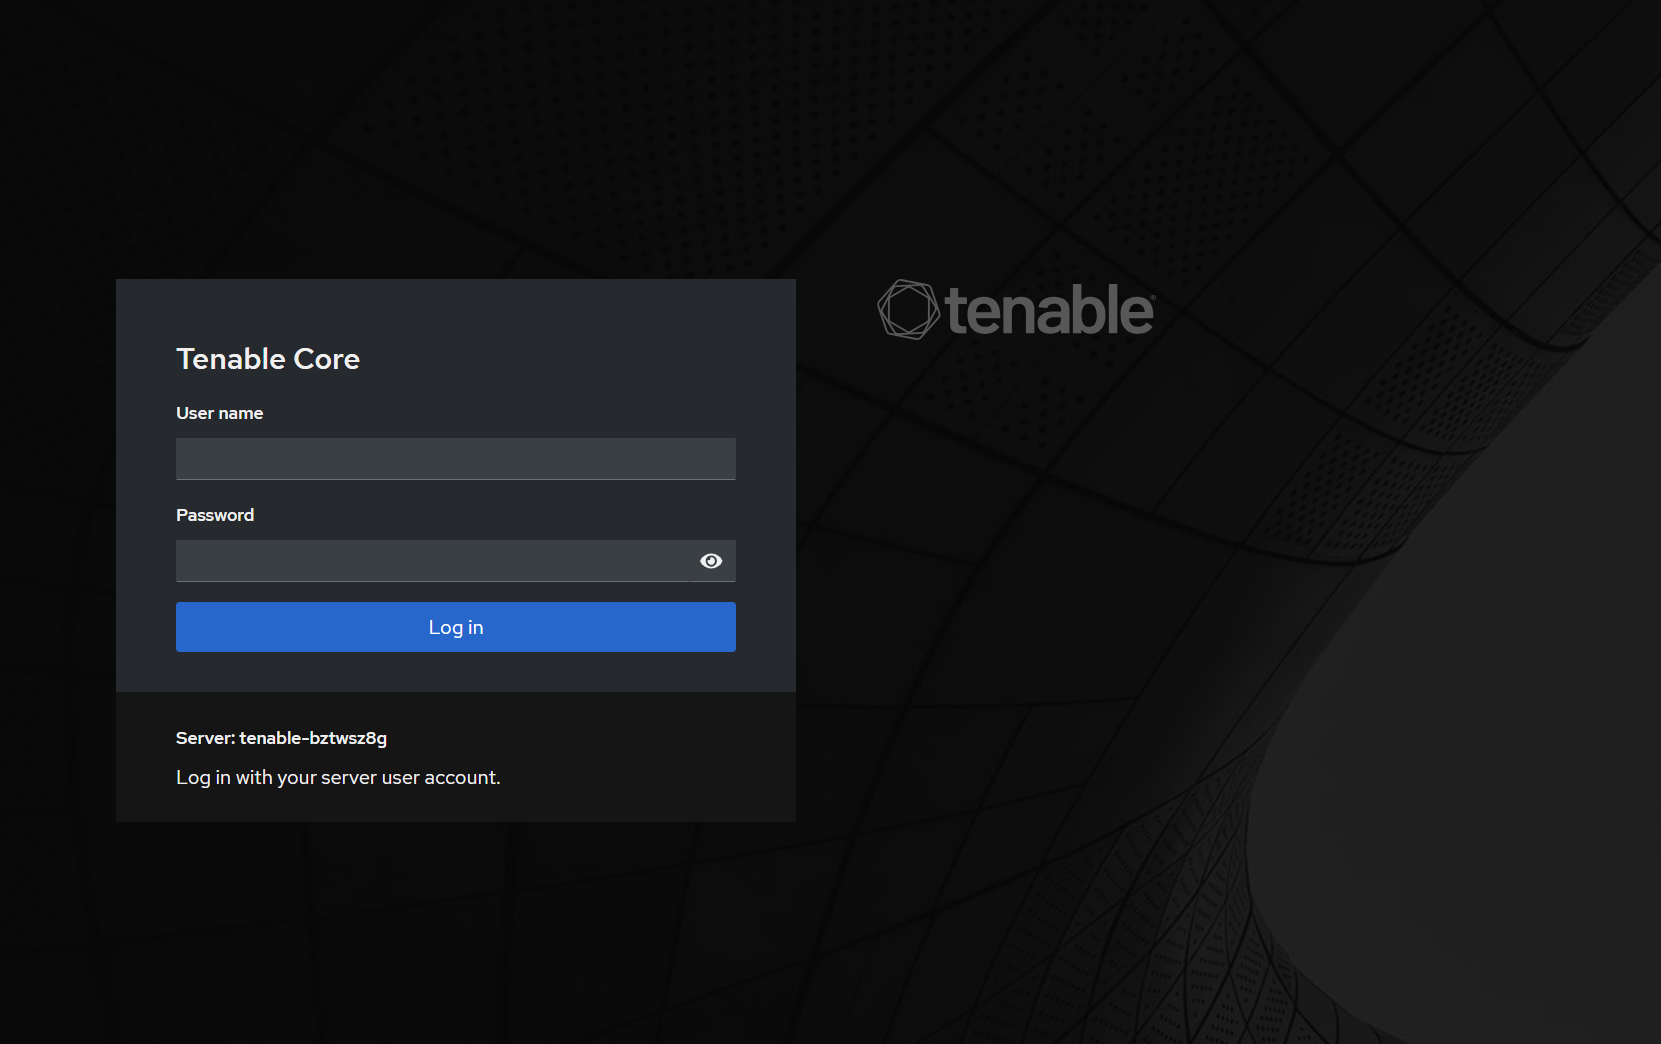
To complete the initial configuration via the Tenable Core user interface (available on https://<mgmt-IP>:8000) you need a working network connection to the appliance.
If you have not configured the management IP address, you can use either a directly connected PC or an appropriately configured network to reach the Tenable Core user interface on either of the following:
To connect to Tenable Core directly via your PC or laptop:
-
Connect an Ethernet cable between your PC and one of the pre-configured ports on the OT Security appliance.
-
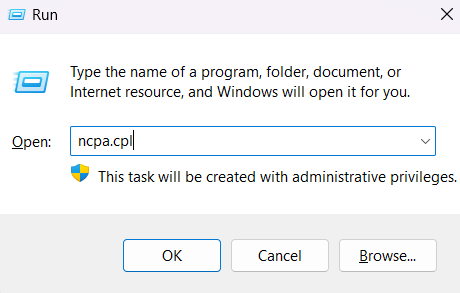
On Windows, use win+R to open Run and type ncpa.cpl to open Network Connections.
-
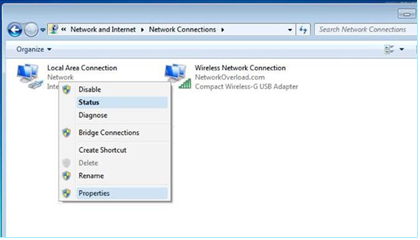
Right-click on your network connection (named Local Area Connection) and select Properties.
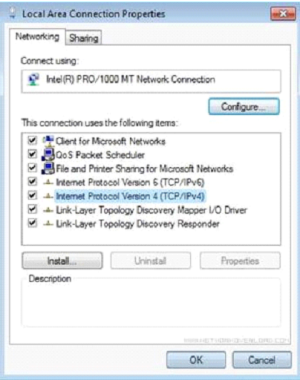
The Local Area Connection Properties window appears.
-
Select Internet Protocol Version 4 (TCP/IPv4) and click Properties.
The Internet Protocol Version 4 (TCP/IPv4) Properties window appears.
-
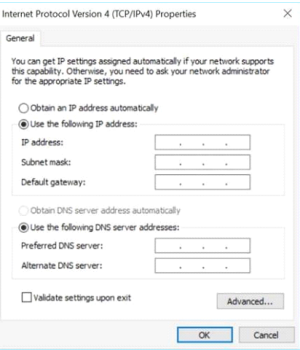
Select Use the following IP address.
-
In the IP address box, type an appropriate IP address for the interface you are connecting to. For example, 192.168.1.10 for the default address of
-
In the Subnet mask box, type 255.255.255.0.
-
Click OK.
-
From your Chrome browser, navigate to https://<mgmt-ip>:8000.
-
If you have not yet configured the administrator user account, the system prompts you to do so now, then re-login with your newly created user. For more information, see Create an initial Administrator Account.
After creating the administrator account, Tenable recommends that you configure the management IP address. If you intend to use the split-port configuration, make sure the interfaces can reach the appropriate networks. For more information, see Network Considerations.
Note: To configure or change the management IP address, log in to Tenable Core and enable administrative access and edit the network configuration.
Initial Configuration via CLI (Optional)
To configure Tenable Core using CLI:
-
Connect to the OT Security appliance using the serial console as described in Clean Install Tenable Core + OT Security.
-
Log in with username wizard and password admin.
The Network Manager terminal interface appears.

-
(Optional) To configure the management IP address, type y.
Note: If you choose to skip this step, you can always access this option using the sudo nmtui command.-
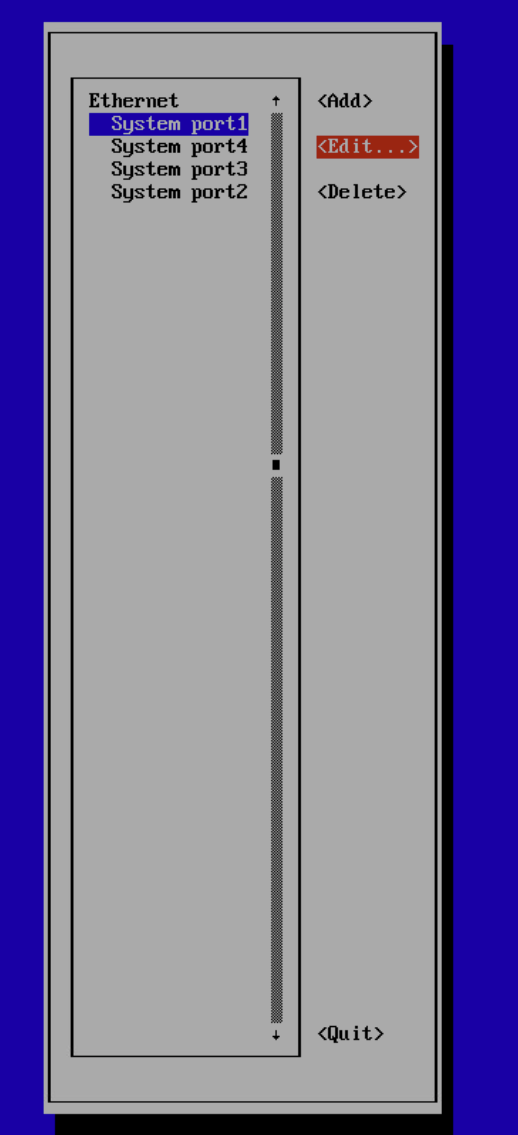
Select System Port 1 (or System Port 3 if using the split-port configuration).
-
Press Enter.
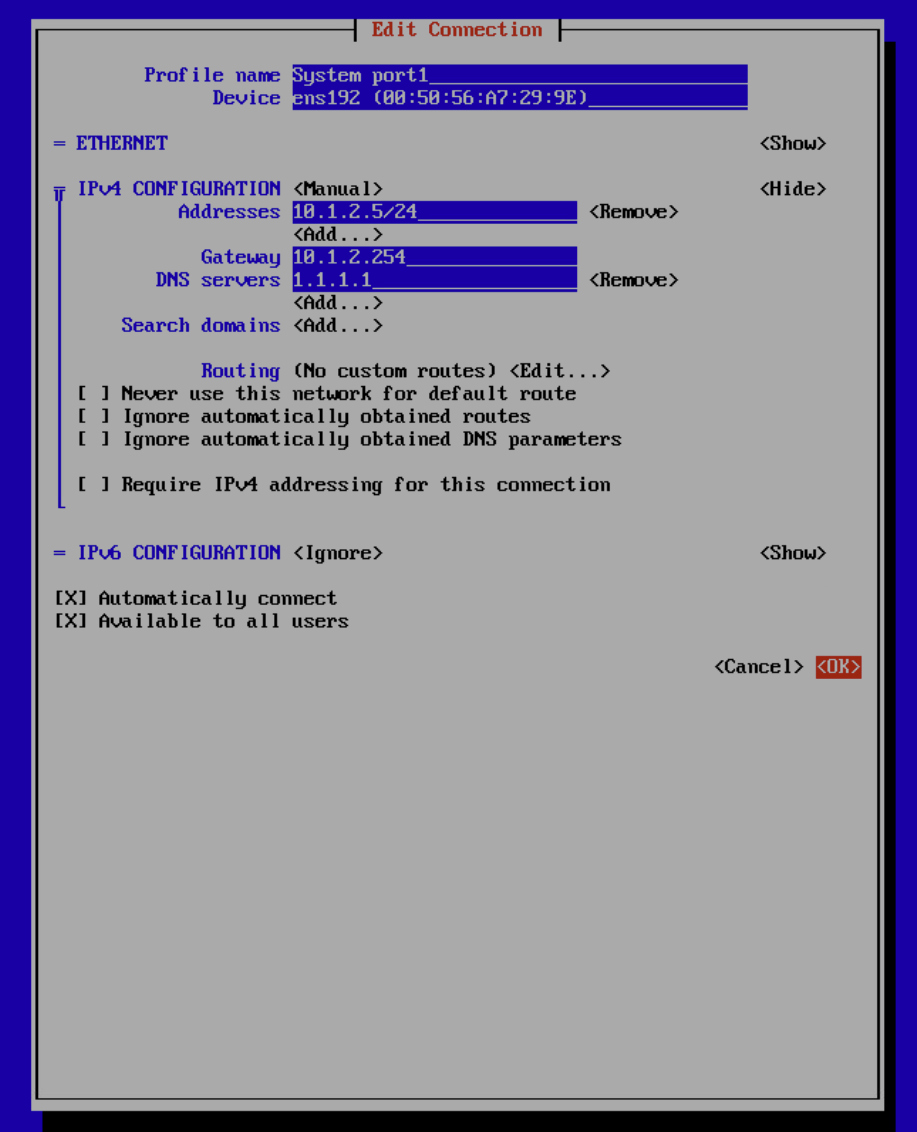
The Edit Connection window appears.
-
In the IPV4 Configuration box, change the option from <Automatic> to <Manual>.
Note:On virtual machines and non-Tenable provided Hardware, Port 1 is preset to Automatic IPv4 configuration (DHCP).
On Tenable-provided appliances, Port 1 is preset to 192.168.1.5/24. You can use this port to set up and directly connect the appliance for initial configuration, then change it later via the Tenable Core UI Networking tab or the sudo nmtui command from the CLI.
-
Navigate using the arrow keys and configure your required IP address, Default-Gateway, DNS Servers. You can change this configuration later.
-
Using the down-arrow, navigate to the bottom of the screen and select <OK>.
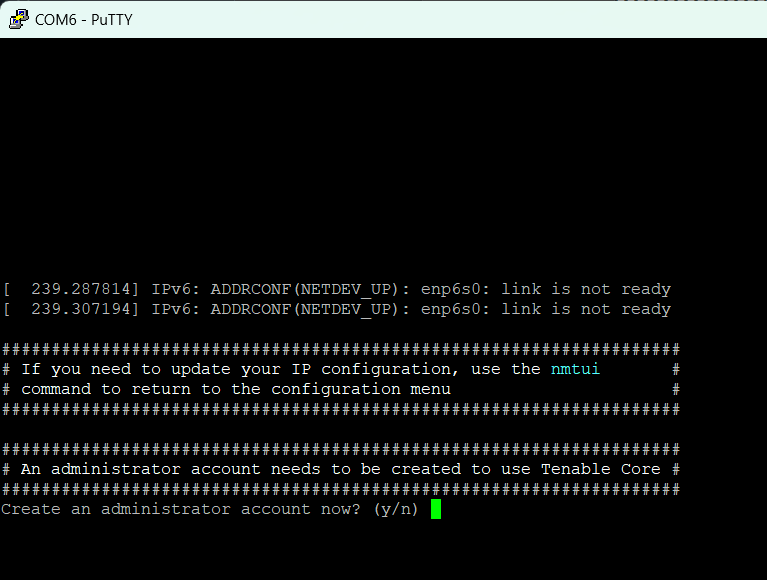
The Network Manager window appears.
-
-
Select <Quit>.
The Network Manager terminal window appears with the prompt to create an administrator account.
-
Type y and follow the prompts to create an administrator account. Use this account only to log in to Tenable Core (terminal console, SSH, and the Tenable Core user interface). Use separate accounts for the OT Security application.

-
After you create the account, access the terminal through the console or a network connection (SSH or the Tenable Core interface (https://<mgmt-IP>:8000)) to log in.

On virtual machines and non-Tenable hardware, a prompt appears on the Tenable Core > OT Security page to install OT Security.
What to do next