Log into the Tenable One OT Exposure Management Console
To log into the Tenable One OT Exposure management console:
-
Do one of the following:
-
Connect to the Management Console workstation (for example: PC and laptop) directly to Port 1 of the Tenable One OT Exposure appliance using the Ethernet cable.
-
Connect the Management Console workstation to the network switch.
Note: Ensure that the Management Console workstation is either part of the same subnet as the Tenable One OT Exposure appliance (192.168. 1.0/24) or routable to the unit. -
-
Set up a static IP to connect to the Tenable One OT Exposure appliance as follows:
-
Go to Network and Internet > Network and Sharing Center > Change adapter settings.
The Network Connections screen appears.
 Note: Navigation may vary slightly for different versions of Windows.
 -
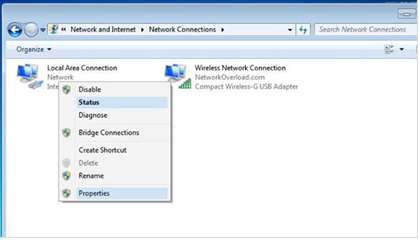
Right-click on Local Area Connections and select Properties.
The Local Area Connections window appears.
-
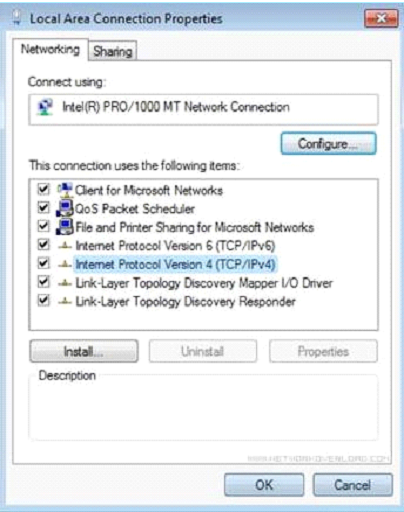
Select Internet Protocol Version 4 (TCP/IPv4) and click Properties.
The Internet Protocol Version 4 (TCP/IPv4) Properties window appears.
-
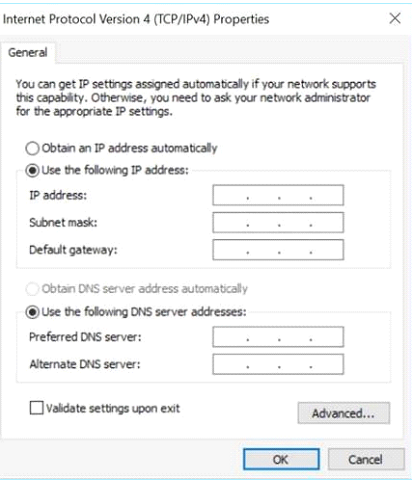
Select Use the Following IP address.
-
In the IP address box, type 192.168.1.10.
-
In the Subnet mask box, type 255.255.255.0.
-
Click OK.
Tenable One OT Exposure applies the new settings.
-
From your Chrome browser, navigate to https://192.168.1.5.
The Welcome screen of the setup wizard opens.
 Note: Access to the user interface requires the latest version of Chrome.
 -
Click Start Setup Wizard.
The setup wizard opens with the User Info page.
-
What to do next