Attack Vectors
An attacker can compromise a critical access by taking advantage of a vulnerable “weak link” in the network to gain access to the critical asset. The critical asset is the target (destination) of the attack, and the Attack Vector is the route the attacker uses to gain access to that asset.
How do we determine the attack vector?
Once the target asset is specified, the system calculates all of the potential attack vectors that could enable access to this asset and identify the path that has the highest risk potential for compromising this asset. The calculation factors in multiple parameters and uses a risk-based approach in order to identify the most critical attack vector. The parameters include:
-
Asset risk level
-
Length of the path
-
Asset to asset communication method
-
External communication (Internet/Corporate) vs. internal communication
Recommended Mitigation Steps
In order to minimize the risk of a potential attack using the selected vector, the recommended mitigation steps include the following:
-
Reducing the associated and individual risk scores of the assets which are included in the attack vector.
-
Minimizing or removing network access to external networks (Internet or corporate networks)
-
Examining the communication paths along the chain and validating their relevance to the process. In case they are not vital, they should be removed (for example Port closing or service removal) in order to eliminate the potential attack path.
Generate Attack Vectors
Attack Vectors need to be generated manually for each relevant target asset. This is done on the Attack Vectors tab for the desired target asset. There are two methods for generating Attack Vectors:
-
Automatic – OT Security assesses all potential attack vectors and identifies the most vulnerable path.
-
Manual – You specify a particular source asset and OT Security shows you the potential path (if any) that can be used to access your target asset.
To generate an automatic Attack Vector:
-
Navigate to the Asset Details page for the desired target asset and click on the Attack Vector tab.
-
Click Generate and then click Select Source Automatically from the drop-down list.

The Attack Vector is generated automatically and is displayed in the Attack Vector tab.
To generate a manual Attack Vector:
-
Navigate to the Asset Details page for the desired target asset and click on the Attack Vector tab.
-
Click Generate and then click Select Source Manually from the drop-down list.
The Select Source window appears.
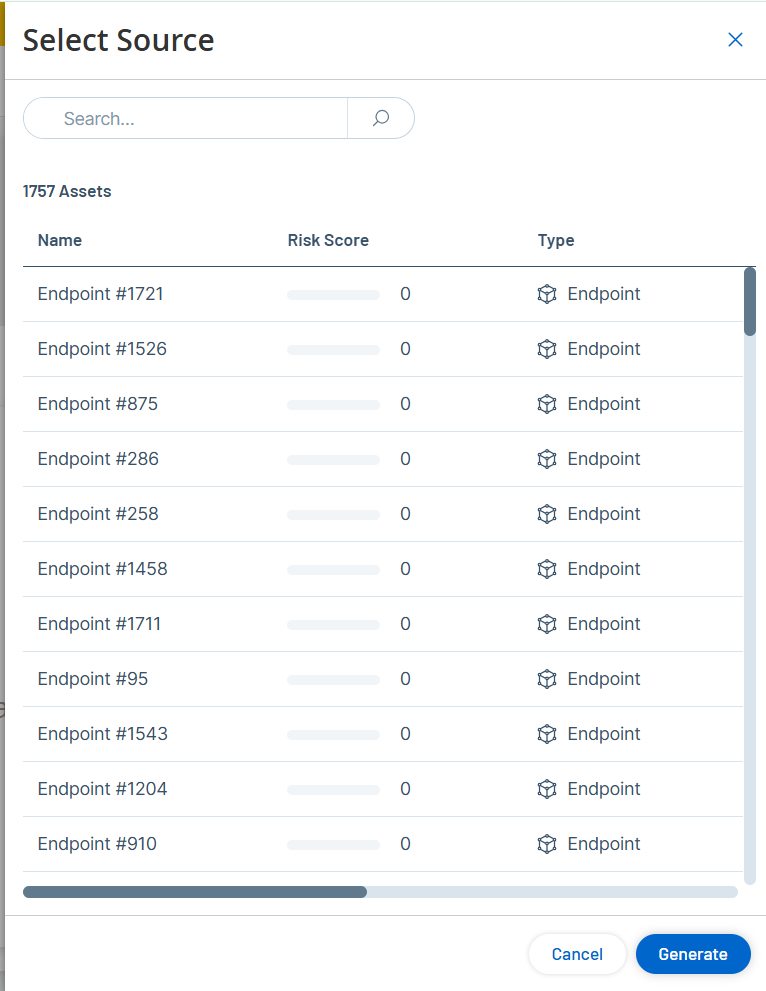 Note: By default, the source assets are sorted by Risk score. You can adjust the display settings or search for the desired asset.
 -
Select the required source asset.
-
Click Generate.
The Attack Vector is generated and is displayed in the Attack Vector tab.
Viewing Attack Vectors
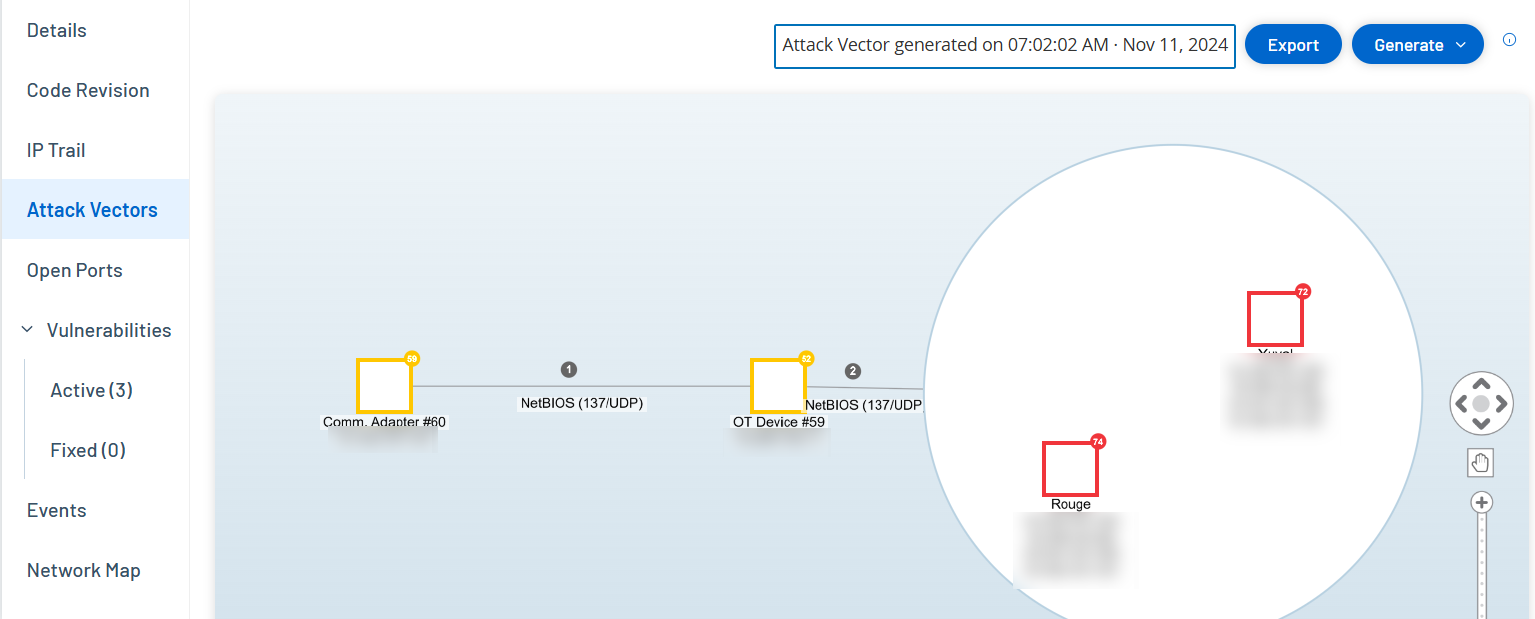
The Attack Vectors tab shows a diagram of the most recently generated Attack Vector for the specified target asset. The box next to the Generate button shows the date and time that the displayed Attack Vector was generated. The Attack Vector diagram includes the following elements:
-
For each asset that is included in the Attack Vector, the risk level and IP addresses are shown. Click on an asset icon to show additional details about its risk factors.
-
For each network connection, the communication protocol is shown.
-
For assets that share a backplane, the assets are surrounded by a circle.
Note: Click on the help button in the top right corner of the Attack Vectors tab for an explanation of the Attack Vector feature.