Prioritize Endpoint Vulnerabilities
The Challenge
Fragmented Visibility Across Domains
Managing endpoint exposure requires clear, unified visibility across environments and security domains. However, identifying and prioritizing vulnerabilities is difficult when data is scattered across disparate tools. Without a single source of truth, teams struggle to consolidate asset inventory, vulnerability intelligence, and identity signals into a cohesive risk strategy.

The Solution
Unified Risk View via Connectors
To bridge this gap, Tenable Exposure Management consolidates asset inventory, vulnerability intelligence, configuration data, and identity signals into a single, actionable risk view. By utilizing connectors—such as the CrowdStrike Connector—you can unify your asset view, strengthen risk insights, and accelerate remediation across your organization.
Core Benefits
Following this best practice allows you to:
-
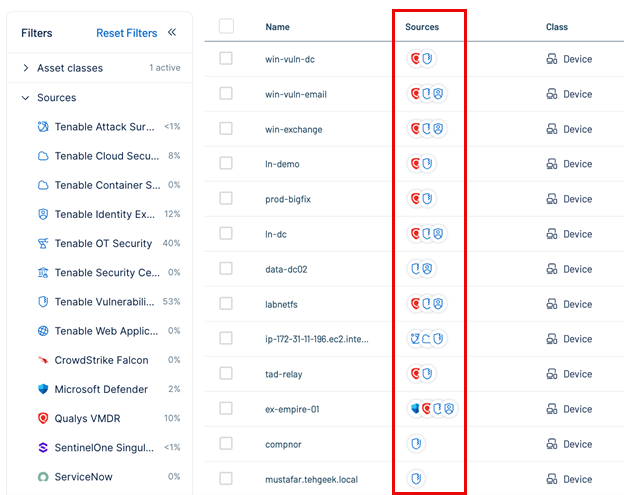
Unified asset visibility: Consolidate data from third-party connectors and Tenable Vulnerability Management to create a single source of truth for all endpoints, regardless of their source.
-
Automated context: Automatically synchronize custom asset tags—such as combinations of operating system and device type—to maintain complete coverage without manual effort.
-
Accelerated remediation: Reduce exposure by pinpointing the highest risk endpoints and prioritizing fixes based on business criticality and exposure scores.
What You Can Achieve with Integrated Data
Seamless Deduplication
Identify and combine duplicate assets automatically.
-
Automated Merging: Tenable Exposure Management uses a default merge strategy (Cloud IDs, MAC addresses, Hostnames) to combine duplicate assets into a single record.
-
Unified Attributes: Automatically applies tags and attributes across the merged record for a complete asset profile.
Contextual Segmentation
Classify assets by ownership and system type.
-
Granular Filtering: Segment endpoints by ownership or system type using connector tags (e.g., product_type:endpoint).
-
Owner Identification: Quickly analyze vulnerabilities by platform (e.g., host_group:windows) or asset owner group.
Risk-Based Prioritization
Focus on the vulnerabilities that matter most.
-
Exposure Signals: Create custom signals to track high-risk scenarios, such as external-facing endpoints affected by CISA KEV vulnerabilities.
-
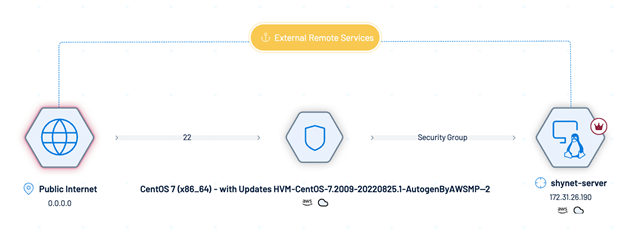
Attack Path Analysis: Visualize potential attack paths to understand how an endpoint vulnerability could lead to critical asset compromise.
Best Practices for Endpoint Management
Follow the step-by-step workflow below to prioritize endpoint vulnerabilities using Tenable Exposure Management and third-party connectors.
Step 1: Identify and Deduplicate Endpoints
Tenable Exposure Management uses a default merge strategy to identify and combine duplicate assets ingested from multiple sources.
Deduplication criteria include:
-
Cloud Instance ID, MAC Addresses, Hostnames
-
External IPs, FQDNs, IP Addresses
Step 2: Classify Endpoints Using Tags
Use built-in tagging systems to classify assets and isolate your endpoints.
-
Ensure asset deduplication is complete.
-
Filter assets by the connector's tag, such as product_type:endpoint.
This provides a consolidated list of endpoints, regardless of their source.
Step 3: Determine Endpoint Owners
Segment your endpoints by ownership or system type to streamline remediation assignments.
Action: Filter assets using a combination of product_type:endpoint and the appropriate group tag, such as host_group:windows.

Step 4: Identify Vulnerabilities
Once identified, filter your endpoints to find associated vulnerabilities.
-
Navigate to Weaknesses.
-
Apply filters:
- Tag = product_type:endpoint
- Weakness Type = Vulnerability

Step 5: Create Exposure Signals
Create custom Exposure Signals to track and monitor endpoint vulnerabilities based on your segmentation.
-
Create Signal: Navigate to Exposure Signals and create a new signal (e.g., "External Endpoints with KEVs").
-
Monitor Trends: Track remediation trends over time to ensure progress.
-
Visualize Paths: Click View Graph in the Inventory view to visualize attack paths.
Step 6: Prioritize and Share
Use the Exposure View to prioritize risk and share insights with stakeholders.
-
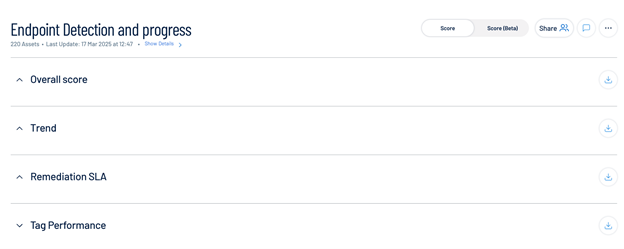
Prioritize: Create a custom card (e.g., Endpoint Detection and Progress) to monitor scores and SLA performance.
-
Report: Export dashboards or share tailored views with stakeholders to track remediation efforts against regulatory and compliance requirements.
Summary Checklist
| Stage | Action |
|---|---|
| Discover | Deduplicate assets using Cloud IDs, MAC addresses, and Hostnames. |
| Classify | Apply tags (e.g., product_type:endpoint) to segment assets. |
| Assess | Filter for Weakness Type = Vulnerability on tagged assets. |
| Prioritize | Create Exposure Signals and monitor SLA performance in Exposure View. |
| Report | Share dashboards with stakeholders to demonstrate risk reduction. |