Software
Required User Role: Basic User, Scan Operator, Standard User, Scan Manager, Administrator, or Custom Role
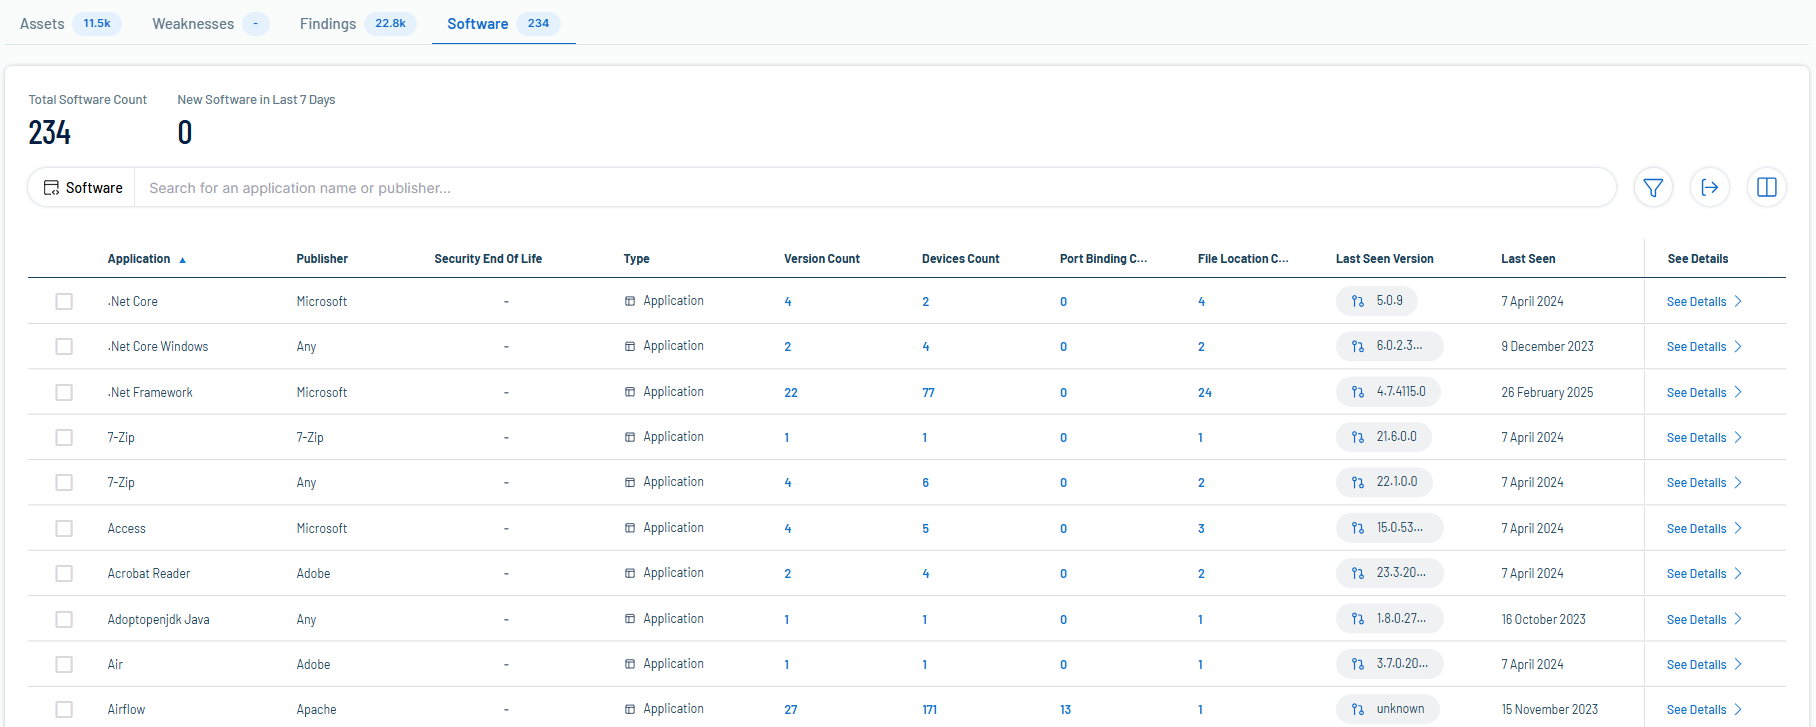
The Software tab on the Inventory page highlights the installed software on your assets. Here, you can gain full visibility of the software deployed across your business and better understand the associated risks.
To access the Software tab:
-
Do one of the following:
-
In the left navigation menu, click Inventory > Software.
-
At the top of the Inventory page, click the Software tab.
The Software tab appears.
-
On the Software tab, you can:
-
View the total number of installed software applications on assets within your container.
-
View the total number of new software applications discovered within the last 7 days.
-
Use the Search box to search for a specific software application in the list.
-
View a list of installed software, including the following information:
Tip: Click on any interactive number in the table to navigate directly to the Software Details view automatically filtered by the selected application and its related information.-
Application — The name of the software application installed on the asset.
-
Publisher — The group or company that published the software application.
-
Security End of Life — If applicable, the time frame after which the software becomes End of Life (EOL). After this date, no support or updates are provided for this software version, and users are encouraged to migrate to the latest version to ensure security and functionality.
-
Type — The type of installed software, for example, Application.
-
Version Count — The number of individual versions of the software detected on the asset.
-
Devices Count — The number of individual devices with this software actively installed.
-
Port Binding Count — The number of ports on the asset that are bound to the software application.
-
File Location Count — The number of locations on your machine where the software application stores files.
-
Last Seen Version — The version of the software that was most recently seen installed on an asset.
-
Last Seen — The date and time at which the software was most recently seen on an asset.
-
Click See details to view more details about a software application. For more information, see Software Details.
-
You can also manage the page in the following ways:
Filter the Software List
To filter the software list:
-
Click the
 button.
The Add filter
 button appears.
 -
Click Add filter
.A menu appears.
-
In the search box, type the criteria by which you want to search the list.
Tenable Exposure Management populates a list of options based on your criteria.
-
Click the property by which you want to filter the weakness list.
A menu appears.
-
Select how to apply the filter. For example, if you want to search for a software application whose name includes windows, then select the contains radio button and in the text box, type windows.
-
Click Add filter
.The filter appears above the list.
-
Repeat these steps for each additional filter you want to apply.
-
Click Apply filters.
Tenable Exposure Management filters the list by the designated criteria.
Export the Table or the Page
Required User Role: Administrator or Custom Role
To export the data on the table or the page:
-
(Optional) To export only specific table rows, in the table, select the check box next to the rows you want to export.
-
Click the
 button.
The Export window appears.
-
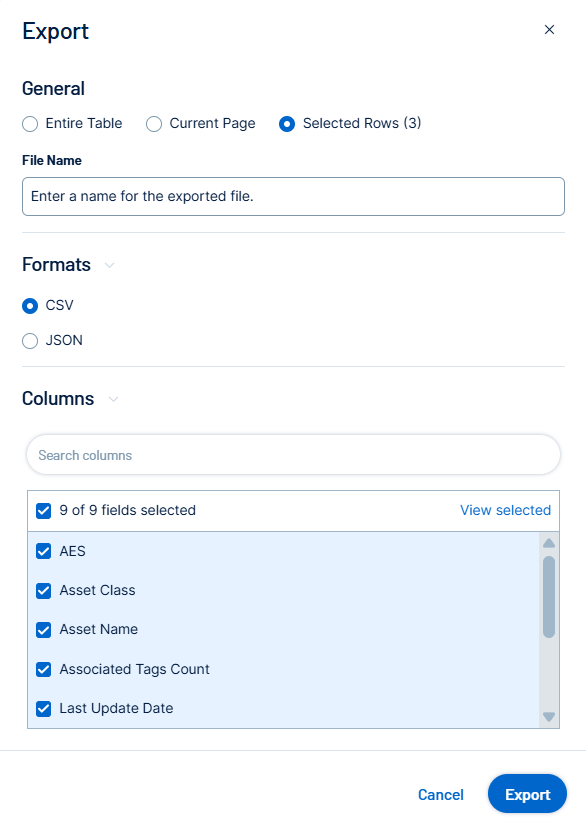
Do one of the following:
-
To export the entire table, select the Entire Table radio button.
Note: When you export the entire table, Tenable Exposure Management only includes the first 50 columns. To view asset data for a larger number of assets, use the Search Assets API call. -
To export the current page, select the Current Page radio button.
-
To export the selected rows, select the Selected Rows radio button.
Note: This option is only available if you select individual rows in the list before clicking the button.
-
-
In the File Name text box, type a file name to give the exported file.
-
In the Formats section, select the format in which you want to export the data.
-
In the Columns section, select the check box for each column you want to include in the export file.
-
Click Export.
Tenable Exposure Management downloads the export file to your computer. Depending on your browser settings, your browser may notify you that the download is complete.
Customize the Columns in the Table
Required User Role: Basic User, Scan Operator, Standard User, Scan Manager, Administrator, or Custom Role
To customize the columns in the table:
-
Click the
 button.
The Customize columns window appears.
-
(Optional) In the Reorder added columns section, click and drag any column name to reorder the columns.
-
(Optional) In the Show/Hide section, select/delesect the check boxes to show or hide columns in the table.
-
(Optional) In the Remove section, click the
 button to permanently remove a column from the table.
 -
(Optional) To add columns to the table, click Add Columns.
The Add columns to table window appears.
-
(Optional) Use the search bar to search for a column property.
The list of column properties updates based on your search query.
-
Select the check box next to any column or columns you want to add to the table.
-
Click Add.
The column appears in the Customize columns window.
-
-
(Optional) Click Reset to Defaults to reset all columns to their defaults.
-
Click
 Apply Columns.
Tenable Exposure Management saves your changes to the columns in the table.