Upgrade with Default TLS
This process upgrades the following Tenable Identity Exposure components in default TLS mode without peer verification and with self-signed certificates.
At each upgrade, Tenable Identity Exposure generates a new self-signed certificate. The validity period for the certificate is 3650 days. After the installation or upgrade, the certificates are located at C:\Tenable\Tenable.ad\DefaultPKI\Certificates.
Order of Upgrade
Upgrade the components in the following order:
After you upgrade the components, restart the machines in the following order:
-
Storage Manager
-
Security Engine Node
-
Directory Listener
-
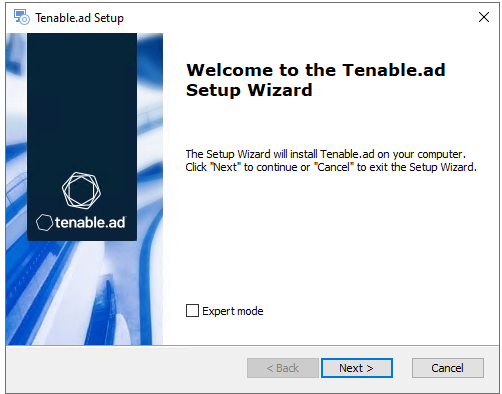
On the local machine, run the installation file Tenable.ad_v3.59.x.exe.
A welcome screen appears.
-
In the setup language box, click the arrow to select the language for the installation, and click Next.

The Setup Wizard appears.
-
Click Next.

Note: Do not select the "Expert Mode" checkbox.
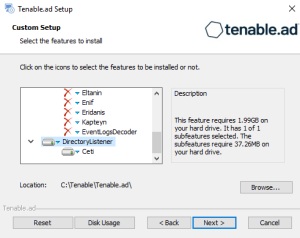
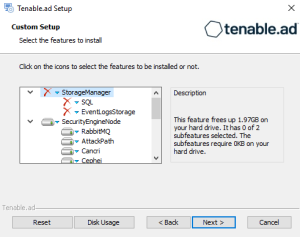
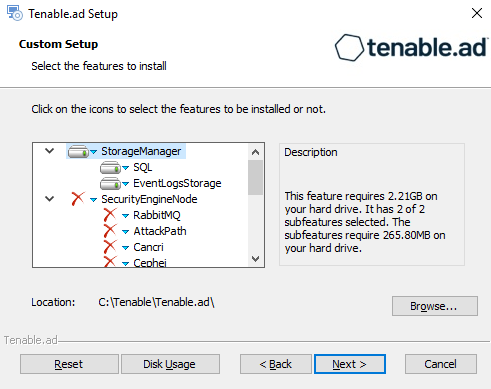
The Custom Setup window appears.
-
Click Next.
The Custom Setup window appears.
-
The installer preselects the Directory Listener component. If this is not the case, deselect the Storage Manager and the Security Engine Nodes components.
-
Click Next.
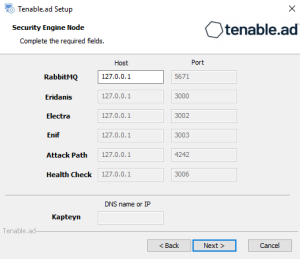
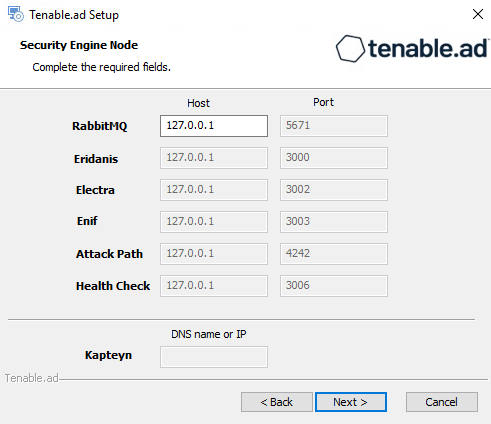
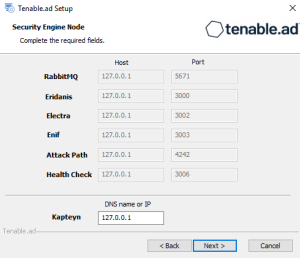
The Security Engine Node window appears.
-
In the Host box for RabbitMQ, the installer shows the address of the Security Engine Node machine based on your previous installation. Check that this information is still valid and correct if necessary.
-
Click Next.
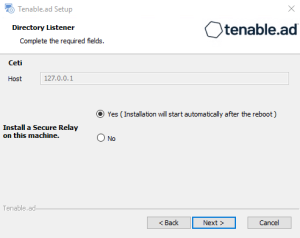
The Directory Listener window appears.
-
You have two options to install the Secure Relay on this Directory Listener:
-
Yes — After this installation completes, it launches the installer for the Secure Relay, which requires a linking key located in the Tenable Identity Exposure user interface under "Configuration > Relay". (See Secure Relay in the Tenable Identity Exposure Administrator Guide for more information.)
-
No — A message shows you the location of the Secure Relay installer to install it at a later time.
-


-
Click Next.
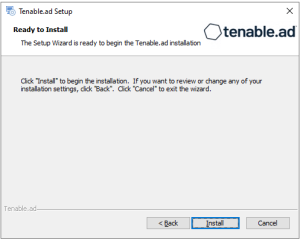
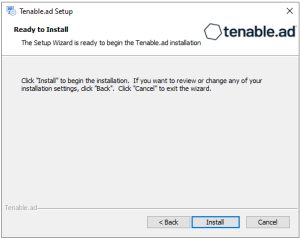
The Ready to Install window appears.
-
Click Install to begin the upgrade.

After the installation completes, the Completing the Tenable.ad Setup Wizard window appears.
-
Click Finish.
A dialog box asks you to restart your machine.
-
Click No.
Caution: Do not restart the machine until after you complete the upgrade of the Storage Manager. -
Upgrade the Security Engine Node.

-
On the local machine, run the installation file Tenable.ad_v3.59.x.exe.
A welcome screen appears.
-
In the setup language box, click the arrow to select the language for the installation, and click Next.
The Setup Wizard appears.
-
Click Next.
Note: Do not select the "Expert Mode" checkbox.
The Custom Setup window appears.
-
Click Next.
The Custom Setup window appears.
-
The installer preselects the Security Engine Node component based on your previous installation. If this is not the case, deselect the Storage Manager and the Directory Listener components.
-
Click Next.
The Storage Manager window appears.
 Caution: Remember to update the Event Logs Storage IP or hostname address during this step. Failing to do so leads to attack detection issues. If you have successfully completed this screen and upgraded the SEN, you must update the environment variables for ALSID_CASSIOPEIA_CYGNI_Service__EventLogsStorage__Host and ALSID_CASSIOPEIA_EVENT_LOGS_DECODER_Service__EventLogsStorage__Host from the current value to the accurate value for <Storage Manager hostname or IP address>. For more information, see the Troubleshooting knowledge base article.
 -
The installer shows the IP address of your MSSQL database from your previous installation. Check that it is still valid and correct if necessary. Click Next.
Note: If you change the SA password since the previous installation, the installer requires it to follow the syntax described in Strong Passwords for the SQL Server.The Security Engine Node window appears.

-
In the Host box, the installer shows the DNS name or IP address of the web server that end users enter to access Tenable Identity Exposure from your previous installation. Check that it is still valid and correct if necessary.
Note: By default, the installation process creates a self-signed certificate with the DNS name or the IP address that you entered. For more information, see Change the IIS Certificate.
-
Click Next.
The Directory Listener window appears.
-
In the Ceti box, type the IP address or configured FQDN for the machine hosting the service in charge of the initial collection of AD objects (crawling) and of subscribing to replication flows.
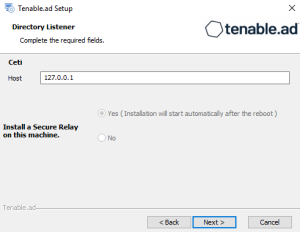
-
Click Next.
The Ready to Install window appears.


-
Click Install to begin the installation.

After the installation completes, the Completing the Tenable.ad Setup Wizard window appears.
-
Click Finish.
A dialog box asks you to restart your machine.
-
Click No.
Caution: Do not restart the machine until after you complete the upgrade of the Storage Manager. -
Upgrade the Storage Manager.

-
On the local machine, run the installation file Tenable.ad_v3.59.x.exe.
A welcome screen appears.
-
In the setup language box, click the arrow to select the language for the installation, and click Next.
The Setup Wizard appears.
-
Click Next.
Note: Do not select the "Expert Mode" checkbox.
The Custom Setup window appears.
-
Click Next.
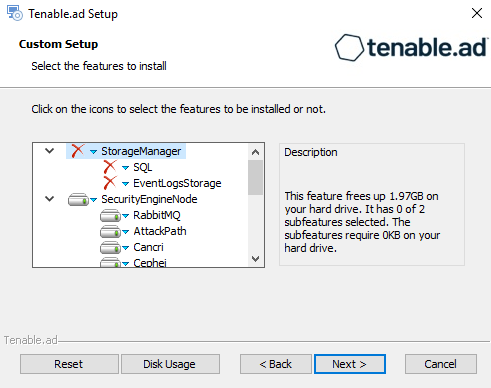
The Custom Setup window appears.

-
The installer preselects the Storage Manager component based on your previous installation. If this is not the case, deselect the Security Engine Node and Directory Listener components.
-
(Optional) Click Browse to change the installation folder location. Change only the drive letter.
-
Click Next.
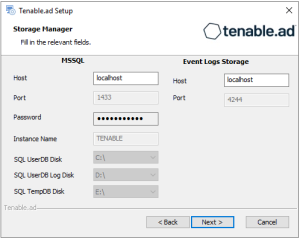
The Storage Manager window appears.
-
The installer reuses the information from your previous installation. Click Next.
Note: If you change the SA password since the previous installation, the installer requires it to follow the syntax described in Strong Passwords for the SQL Server.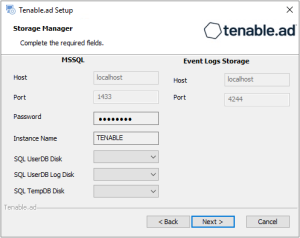

-
Click Next.
The Ready to Install window appears.
-
Click Install to begin the upgrade.

After the installation completes, the Completing the Tenable.ad Setup Wizard window appears.
-
Click Finish.
A dialog box asks you to restart your machine.
-
Click Yes.
The machine restarts.

See also