Upgrade Tenable Identity Exposure
Upgrade Path
To upgrade to the latest version of Tenable Identity Exposure, you must follow one of these installation paths:
-
2.7 -> 3.1 -> 3.11 -> 3.19 -> 3.29 -> 3.42
Upgrade Order
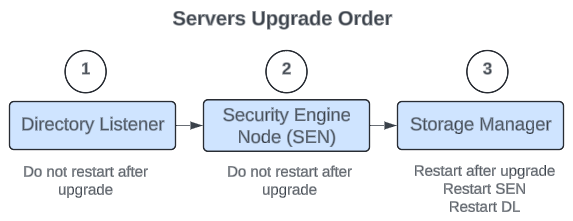
To upgrade to Tenable Identity Exposure 3.42, proceed in the following order:
Before you start
-
Take a snapshot of your environment before you upgrade. If the upgrade fails, Tenable Identity Exposure support cannot perform a rollback, and this results in a fresh installation and causes you to lose your previous data. See Backups for complete information.
-
Back up and restore the Storage Manager. Tenable strongly recommends that you back up the Storage Manager before you upgrade. For instructions on how to back up or restore MSSQL, see the official Microsoft documentation.
-
Consider the downtime: Depending on your environment and the magnitude of the upgrade, downtime can range from minutes to several hours. Factor this into your scheduling and communication plan. Inform impacted users of the scheduled downtime and potential service disruption.
-
Download the executable programs for Tenable Identity Exposure and Secure Relay from Tenable’s Downloads site.
-
Run the installer as a local user or a domain user who is a member of the Local Administrators group.
-
Restart your server before launching the Tenable Identity Exposure installer for each component.
Upgrade Procedures
The following procedures upgrade the Tenable Identity Exposure components in TLS with autogenerated and self-signed certificates (Default). For more information, see TLS Installation Types.
-
On the local machine, restart the server and run the Tenable Identity Exposure 3.42 On-Premises installer.
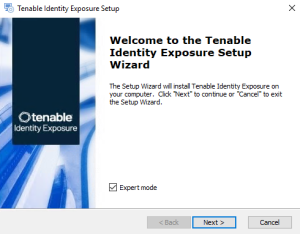
A welcome screen appears.
-
In the setup language box, select the language for the installation from the drop-down list and click Next.
The Setup Wizard appears. The Expert mode checkbox is selected by default.
-
Click Next.
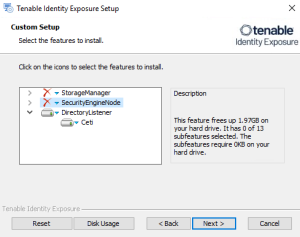
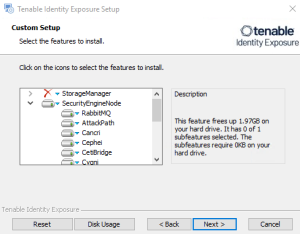
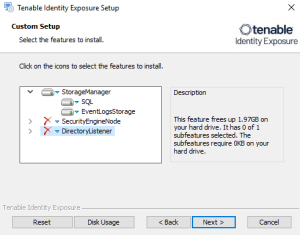
The Custom Setup window appears.
-
The installation program automatically preselects the Directory Listener component based on your previous installation. Click Next.
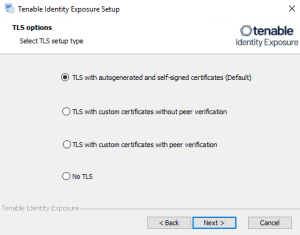
The TLS Options window appears.
-
Select the TLS with autogenerated and self-signed certificates (Default) option.
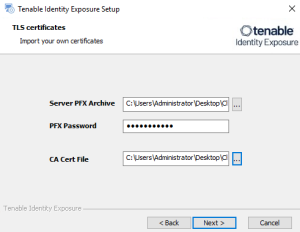
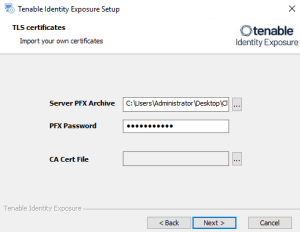
Optional: If you select TLS with custom certificates without peer verification or TLS with custom certificates with peer verification, the next TLS certificates screen asks you to provide the following information:
-
In the Server PFX Archive box, click ... to browse to your PFX archive.
-
In the PFX Password box, type the password for the PFX file.
-
In the CA Cert File box, click ... to browse to your CA certificate file.
-
-
Click Next.
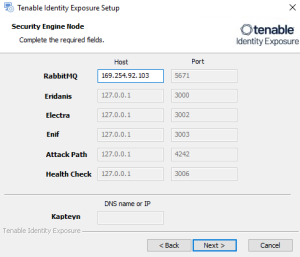
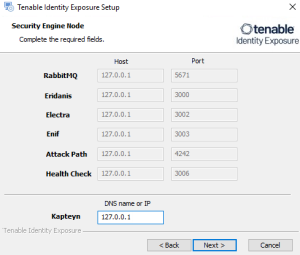
The Security Engine Node window appears.
-
In the Host box for RabbitMQ, type the IP address for the Security Engine Node (or the IP address for the Security Engine Node hosting RabbitMQ if you use a split architecture.)
Caution: If you leave the default value "127.0.0.1" and click "Next", the installer fails and rolls back.
-
Click Next.
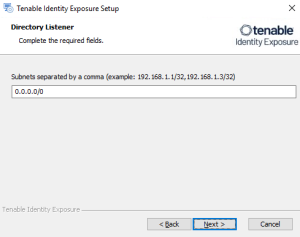
The Directory Listener window appears.
-
In the Subnets box (if applicable), type the subnet information for the Directory Listener.
-
Click Next.
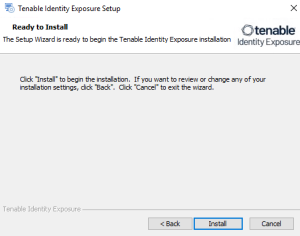
The Ready to Install window appears.
-
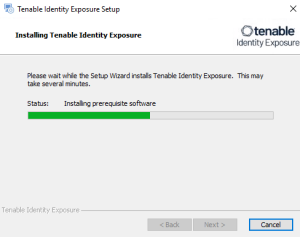
Click Install to begin the upgrade.
After the upgrade completes, the Completing the Tenable Identity Exposure Setup Wizard window appears.
-
Click Finish.
A dialog box asks you to restart your machine.
-
Click No.
Caution: Do NOT reboot the machine now. Follow the restart order after the upgrade of all servers. -
Upgrade the Security Engine Node (SEN).
-
On the local machine, restart the server and run the Tenable Identity Exposure 3.42 On-Premises installer.
A welcome screen appears.
-
In the setup language box, click the arrow to select the language for the installation, and click Next.
The Setup Wizard appears. The Expert mode checkbox is selected by default.
-
Click Next.
The Custom Setup window appears.
-
The installation program automatically preselects the SEN component based on your previous installation. Click Next.
The TLS Options window appears.
-
Select the TLS with autogenerated and self-signed certificates (Default) option.
Optional: If you select TLS with custom certificates without peer verification or TLS with custom certificates with peer verification, the next TLS certificates screen asks you to provide the following information:
-
In the Server PFX Archive box, click ... to browse to your PFX archive.
-
In the PFX Password box, type the password for the PFX file.
-
In the CA Cert File box, click ... to browse to your CA certificate file.
-
-
Click Next.
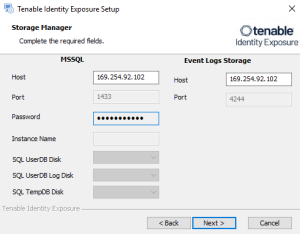
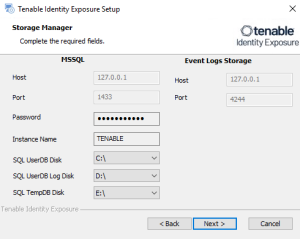
The Storage Manager window appears.
-
Verify or enter the following information:
-
In the Host box, check that your MSSQL database's FQDN or IP address from your previous installation remains valid and correct it if necessary.
-
In the Event Logs Storage box, type the IP address of the machine storing your event logs, which is typically the same as the MSSQL database IP address.
Note: If you changed the SA password since the previous installation, the installer requires that it follows the syntax described in Strong Passwords for the SQL Server.Caution: Remember to update the Event Logs Storage IP or hostname address during this step. Failing to do so leads to attack detection issues. If you have successfully completed this screen and upgraded the SEN, you must update the environment variables for TENABLE_CASSIOPEIA_CYGNI_Service__EventLogsStorage__Host and TENABLE_CASSIOPEIA_EVENT_LOGS_DECODER_Service__EventLogsStorage__Host from the current value to the accurate value for <Storage Manager hostname or IP address>. For more information, see the Troubleshooting knowledge base article. -
-
Click Next.
The Security Engine Node window appears.
-
In the DNS name or IP box, the installer shows the DNS name (preferred) or IP address of the web server that end users type to access Tenable Identity Exposure from your previous installation. Check that this remains valid and correct if necessary.
-
Click Next.
The Directory Listener window appears.
-
In the Ceti box, type the IP address for the Directory Listener.
-
Click Next.
The Ready to Install window appears.
-
Click Install to begin the upgrade.
After the upgrade completes, the Completing the Tenable Identity Exposure Setup Wizard window appears.
-
Click Finish.
A dialog box asks you to restart your machine.
-
Click No.
Caution: Do NOT reboot the server now. Follow the restart order after the upgrade of all servers. -
Upgrade the Storage Manager.
-
On the local machine, restart the server and run the Tenable Identity Exposure 3.42 On-Premises installer.
A welcome screen appears.
-
In the setup language box, click the arrow to select the language for the installation, and click Next.
The Setup Wizard appears. The Expert Mode checkbox is selected by default.
-
Click Next.
The Custom Setup window appears. The installation program automatically preselects the Storage Manager component based on the previous installation.
-
Click Next.
-
(Optional) Click Browse to change the installation folder location. Change only the drive letter.
The TLS Options window appears.
-
Select the TLS with autogenerated and self-signed certificates (Default) option.
Optional: If you select TLS with custom certificates without peer verification or TLS with custom certificates with peer verification, the TLS certificates screen asks you to provide the following information:
-
In the Server PFX Archive box, click ... to browse to your PFX archive.
-
In the PFX Password box, type the password for the PFX file.
-
-
Click Next.
The Storage Manager window appears.
-
The installer reuses the information from your previous installation. Click Next.
Note: If you changed the SA password since the previous installation, the installer requires that it follows the syntax described in Strong Passwords for the SQL Server.
