Install Tenable Identity Exposure
Tenable Identity Exposure's installation program installs the following components on different servers:
-
A Storage Manager (SM) to host all data based on MSSQL.
-
A Directory Listener (DL) to target audited domains.
-
A Security Engine Node (SEN) to perform security analysis and serve the user interface.
For more information about how to install the SEN on several machines, see Split Security Engine Node (SEN) Services.
-
A Secure Relay (a separate installer) to allow you to configure domains from which it forwards the data to the Data Listener component, which collects AD objects.
All machines and installed binaries support the application of any security update for the underlying OS, either through Windows Server Update Services (WSUS) or System Center Configuration Manager (SCCM).
Installation Order
To install Tenable Identity Exposure 3.59, proceed in the following order:

Before you start
-
Download the executable programs for Tenable Identity Exposure and Secure Relay from Tenable’s Downloads site.
-
Review the Pre-deployment Requirements.
Caution: From Tenable Identity Exposure version 3.59.5 onwards, ensure that your TLS certificates use OpenSSL 3.0.x. -
Review On-Premises Architectures and select the TLS Installation Types for your platform.
-
Reserve the following resources and have their information on hand before you install Tenable Identity Exposure:
-
Network — Private IP addresses.
-
Access — DNS name used to access Tenable Identity Exposure’s web portal.
-
Security — TLS certificate and its associated private key to secure access to the web portal.
For more information, see Network Requirements.
-
-
Run the installer as a local user or a domain user who is a member of the Local Administrators group.
-
Have account permissions: The account you use to deploy Tenable Identity Exposure must have these specific permissions: SeBackupPrivilege, SeDebugPrivilege, and SeSecurityPrivilege.
-
Restart your server before launching the Tenable Identity Exposure installer for each component.
Installation Procedures
The following procedures install the Tenable Identity Exposure components in TLS with autogenerated and self-signed certificates (Default). For more information, see TLS Installation Types.
-
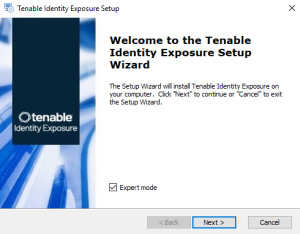
On the local machine, run the Tenable Identity Exposure 3.59 On-Premises installer.
A welcome screen appears.
-
In the setup language box, click the arrow to select the language for the installation, and click Next.
The Setup Wizard appears.
-
Click Next.
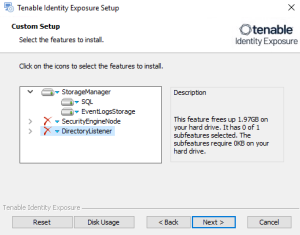
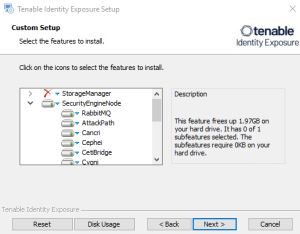
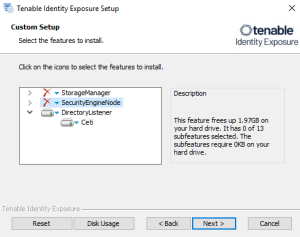
The Custom Setup window appears.
-
Deselect the Security Engine Nodes and Directory Listener components.
-
Click Next.
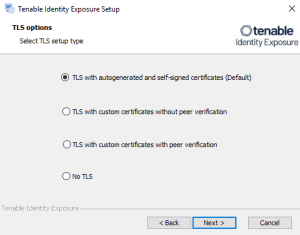
The TLS Options window appears.
-
Select the TLS with autogenerated and self-signed certificates (Default) option.
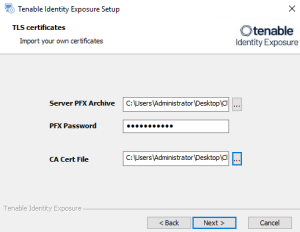
Optional: If you select TLS with custom certificates without peer verification or TLS with custom certificates with peer verification, the next TLS certificates screen asks you to provide the following information:
-
In the Server PFX Archive box, click ... to browse to your PFX archive.
-
In the PFX Password box, type the password for the PFX file.
-
In the CA Cert File box, click ... to browse to your CA certificate file.
-
-
Click Next.
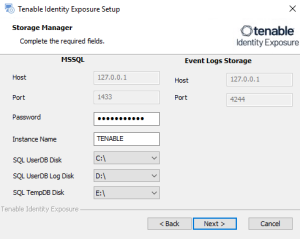
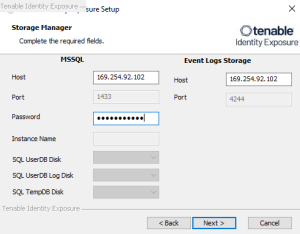
The Storage Manager window appears.
-
In the Password box, type a password for the MSSQL database.
Note: The installer requires an SA password with the syntax described in Strong Passwords for the SQL Server.
Note: Tenable strongly recommends that you keep the default TENABLE instance name.
-
On the local machine, run the Tenable Identity Exposure 3.59 On-Premises installer.
A welcome screen appears.
-
In the setup language box, click the arrow to select the language for the installation, and click Next.
The Setup Wizard appears.
-
Select the Expert Mode checkbox.
-
Click Next.
The Custom Setup window appears.
-
Deselect the Storage Manager and Directory Listener components.
Note: To install SEN services over several machines, see Split Security Engine Node (SEN) Services.
-
Click Next.
The TLS Options window appears.
-
Select the TLS with autogenerated and self-signed certificates (Default) option.
Optional: If you select TLS with custom certificates without peer verification or TLS with custom certificates with peer verification, the next TLS certificates screen asks you to provide the following information:
-
In the Server PFX Archive box, click ... to browse to your PFX archive.
-
In the PFX Password box, type the password for the PFX file.
-
In the CA Cert File box, click ... to browse to your CA certificate file.
-
-
Click Next.
The Storage Manager window appears.
-
Provide the following information:
-
In the MSSQL and Event Logs Storage boxes, type the FQDN or IP address of the Storage Manager.
-
In the Password box, type the service account password for the MSSQL database defined in the Storage Manager installation.
Note: The installer requires an SA password with the syntax described in Strong Passwords for the SQL Server.
-
-
Click Next.
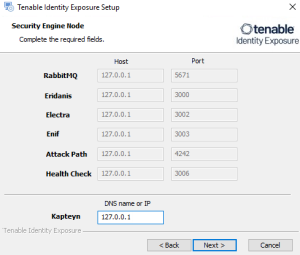
The Security Engine Node window appears.
-
In the Host box, type the DNS name (preferred) or IP address of the web server that end users enter to access Tenable Identity Exposure.
Note: By default, the installation process creates a self-signed certificate with the DNS name or the IP address that you entered. For more information, see Change the IIS Certificate.
-
Click Next.
The Directory Listener window appears.
-
In the Ceti box, type the IP address or configured FQDN for the Directory Listener machine.
Tip: If you plan to install the Secure Relay on the same machine as the Directory Listener, you must keep the default IP address "127.0.0.1" for Ceti on the SEN. If you install the Secure Relay on another machine, type the IP address of the Directory Listener for Ceti on the SEN.
-
Click Next.
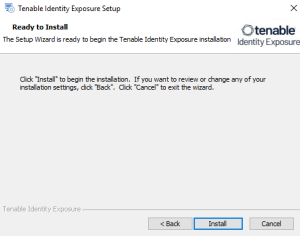
The Ready to Install window appears.
-
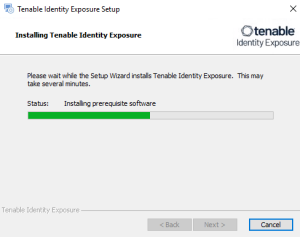
Click Install to begin the installation.
After the installation completes, the Completing the Tenable Identity Exposure Setup Wizard window appears.
-
Click Finish.
A dialog box asks you to restart your machine.
-
Click No.
Caution: Do not restart the machine now. -
Install the Directory Listener.
-
On the local machine, run the Tenable Identity Exposure 3.59 On-Premises installer.
A welcome screen appears.
-
In the setup language box, click the arrow to select the language for the installation, and click Next.
The Setup Wizard appears.
-
Click Next.
The Custom Setup window appears.
-
Deselect the Storage Manager and the Security Engine Nodes components.
-
Click Next.
The TLS Options window appears.
-
Select the TLS with autogenerated and self-signed certificates (Default) option.
Optional: If you select TLS with custom certificates without peer verification or TLS with custom certificates with peer verification, the next TLS certificates screen asks you to provide the following information:
-
In the Server PFX Archive box, click ... to browse to your PFX archive.
-
In the PFX Password box, type the password for the PFX file.
-
In the CA Cert File box, click ... to browse to your CA certificate file.
-
-
Click Next.
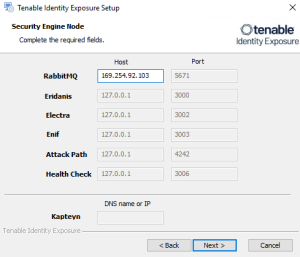
The Security Engine Node window appears.
-
In the Host box for RabbitMQ, type the address of the Security Engine Node hosting RabbitMQ.
-
Click Next.
The Directory Listener window appears.
-
You have two options whether to install the Secure Relay on this Directory Listener:
-
Yes — After this installation completes and the Directory Listener reboots, the Secure Relay installer launches.
-
No — You select to install the Secure Relay at a later time or on a separate server (see Secure Relay Architectures for On-Premises Platforms.) A message shows you the location of the Secure Relay installer. A Secure Relay is mandatory whether you install it on the Directory Listener machine or on a separate machine.
-
-
Click Next.
The Ready to Install window appears.
-
Click Install to begin the installation.
After the installation completes, the Completing the Tenable Identity Exposure Setup Wizard window appears.
-
Click Finish.
A dialog box asks you to restart your machine.
-
Click Yes.
The machine restarts.
-
Restart the SEN machine.
-
Restart the Storage Manager machine.
-
Install the Secure Relay for Tenable Identity Exposure 3.59 using a separate installer.
-
Type in your initial credentials with the username [email protected] and the password verySecure1.
