Launch Pre-Authorized Nessus Scanner
Caution: This version of the AWS pre-authorized scanner has been removed and is no longer available to new customers.
Note: You do not need SSH access or a key pair to launch the instance.
Note: You must use an Elastic IP address for the scanner to work properly. For more information, see the AWS Documentation.
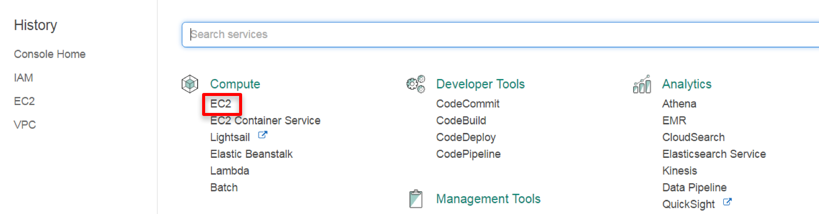
- In the top-menu bar, click Services.
- In the Compute section, click EC2 to begin launching the pre-authorized scanner instance.

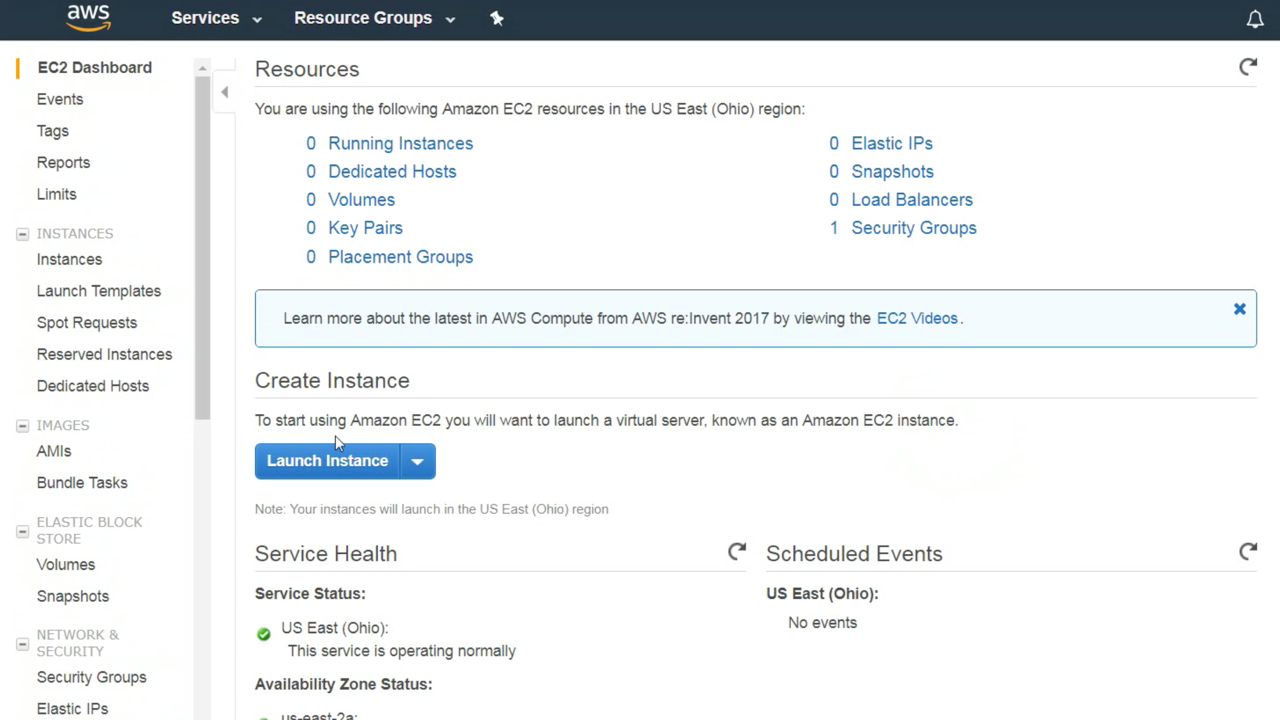
The EC2 Dashboard appears.
-
Click Launch Instance to create an Amazon EC2 instance (virtual server).

The Choose an Amazon Machine Image (AMI) page appears.
-
In the left panel, click AWS Marketplace.

- In the Search box, type Tenable.
- On your keyboard, press Enter.
- Select Nessus Scanner (Pre-Authorized).

- Click Continue.
The Step 2: Choose an Instance Type page appears.
-
Select the instance type for the scanner.
Note: The available instances meet the minimum product requirements, however, Tenable recommends selecting the instance that best suits your customer-specific needs. For more information, see Nessus General Requirements.
Tip: The instances offer various combinations of CPU, memory, storage, and network performance. Refer to Amazon EC2 Pricing for more details on Amazon’s pricing structure.
- Click Next: Launch an instance.
The Launch an instance page appears.

- In the Number of Instances field, type the number of AMI instances to deploy.
- In the Purchasing Option section, select the Request Spot Instances checkbox to launch an instance at spot prices rather than on-demand prices. Refer to Spot Instances for details.
Note: By default, this option is disabled.
- From the Network drop-down box, select the Amazon VPC in which to launch the instance.
Tip: To create a new VPC, click Create new VPC.
- From the Subnet drop-down box, select the subnet within the previously chosen VPC.
Tip: To create a new subnet, click Create new subnet.
- Choose an IP address/subnet that permits the scanner to access https://cloud.tenable.com and AWS APIs.
Note: (Optional) To request a public IP address from Amazon’s public pool, enable the Auto-assign Public IP option.
- From the IAM Role drop-down box, select the required IAM role.
Tip: To create a new role, click the Create new IAM role and follow the Create AWS IAM Role instructions in this document. For more information on IAM roles, refer to IAM Roles for Amazon EC2.
- From the Shutdown Behavior drop-down box, select either Stop or Terminate to determine the instance behavior when an OS-level shutdown is performed.
- (Optional) To prevent an instance from accidental termination, select the Enable termination protection checkbox.
-
(Optional) To monitor, collect, and analyze metrics about the instances, select the Monitoring checkbox.
- (Optional) To allow for improved performance for Amazon EBS volumes through the use of dedicated throughput between Amazon EC2 and Amazon EBS, ensure you select the EBS-optimized instance checkbox.
- From the Tenancy drop-down box, select whether you want the instance to run on a dedicated or shared host. For more information on dedicated hosts, refer to Amazon EC2 Dedicated Hosts.
Note: By default, the Shared option is selected.
- Click Advanced Details.

- In the User Data section, select the As Text radio button.
- In the text field, enter the scanner name, the Linking Key previously copied from Tenable Vulnerability Management, and the previously created IAM role in JSON format:{
"name": "AWS_Scanner",
"key":"d92a78e1177ff9ead79176b34c5de936ce00f0a7.......",
"aws_scanner": true,
"iam_role": "TenableIO",
"proxy": "10.11.12.13",
"proxy_port": "8080"
}Note: The key and aws_scanner are both required entries in the User Data field. The following table lists acceptable entries.
Parameter Description aws_scanner Configure the scanner in the pre-auth/AWS scanner mode. name The name of the scanner shown in the Nessus user interface (recommended). If a name is not specified, it defaults to the instance ID. key Linking key used to register the scanner with Tenable Vulnerability Management. Only used during initial registration (required). iam_role Name of the IAM role assigned to the scanner instance (required). proxy FQDN/IP address of proxy, if required. proxy_port Port used to connect to proxy, if required. - Click Next: Add Storage.
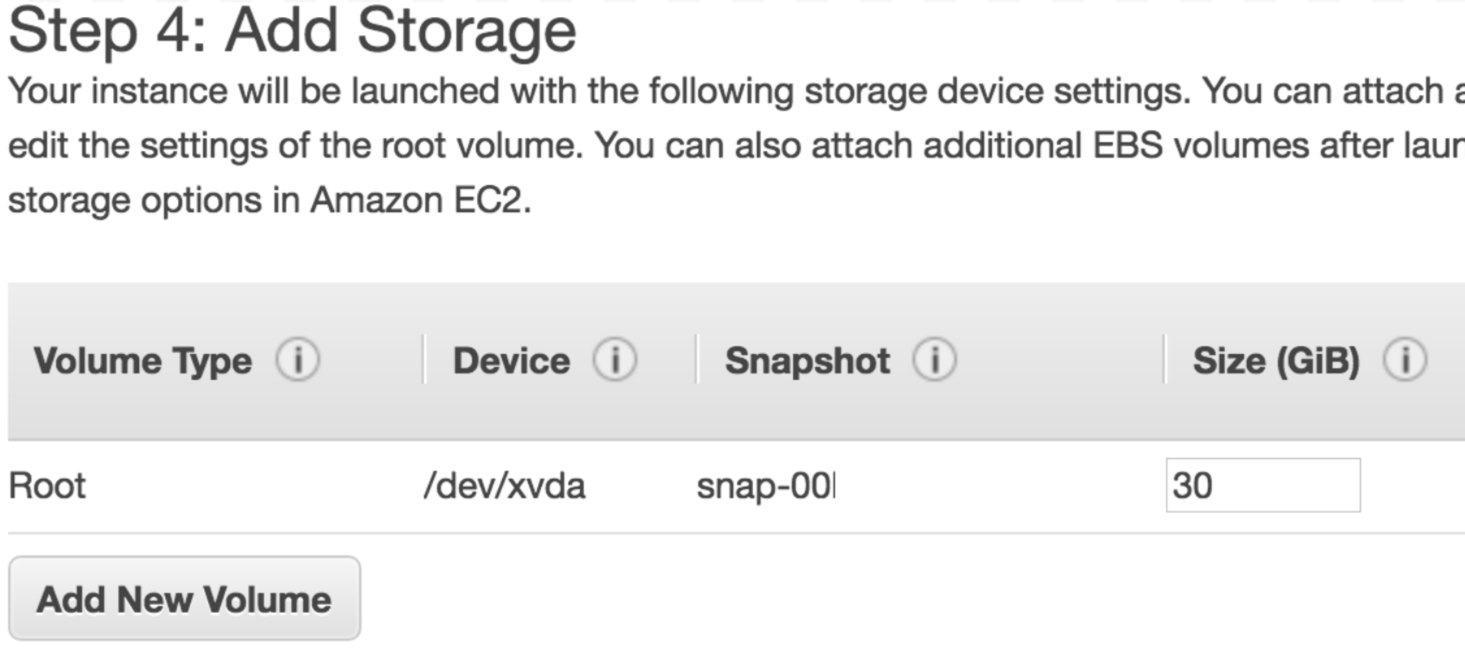
The Step 4: Add Storage page appears.
- In the Size field, enter a value of 30 or higher.

Note: Tenable Nessus Network Monitor requires the pre-authorized Nessus scanners to have a minimum of 30GB of storage.
- Select the Delete on Termination checkbox.
- Click Next: Add Tags.
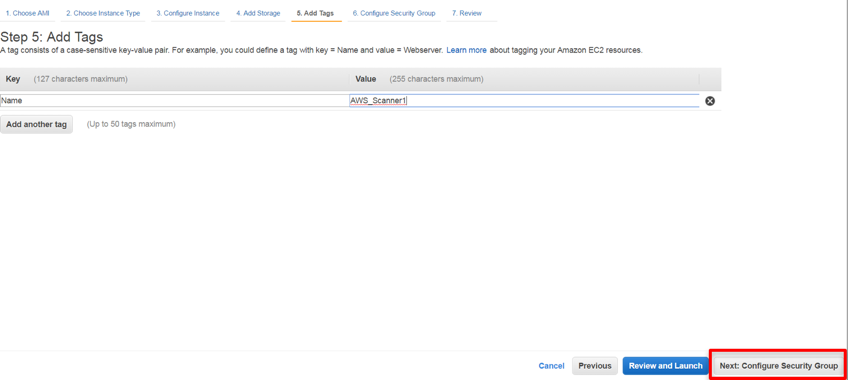
The Step 5: Add Tags page appears.
- Click Add another tag for as many tags as you want to create to help manage and categorize your AWS EC2 resources.
Note: Each tag requires both a Key and a Value, and each resource can have a maximum of 10 tags. For more information on tags, refer to Tagging Your Amazon EC2 Resources.

-
Click Next: Configure Security Group.
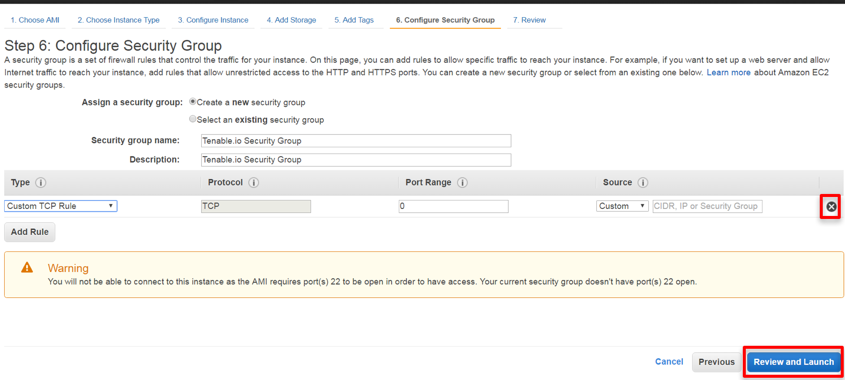
The Step 6: Configure Security Group page appears.
Tip: Here, you are creating a security group to which only the Nessus Scanner belongs. You create this to assign it as the source to scan target security groups.
- In the Assign a security group section, select the Create a new security group radio button.

- In the Security group name field, enter a descriptive name for the security group.
- In the Description field, enter a description of the security group.
-
In the following Rules section, click the X to the right of the Security Group rule to delete it.
Note: There is no way to access the AMI directly, so removing this rule prevents any inbound traffic and is essentially a deny-all firewall rule.
- Click Review and Launch.
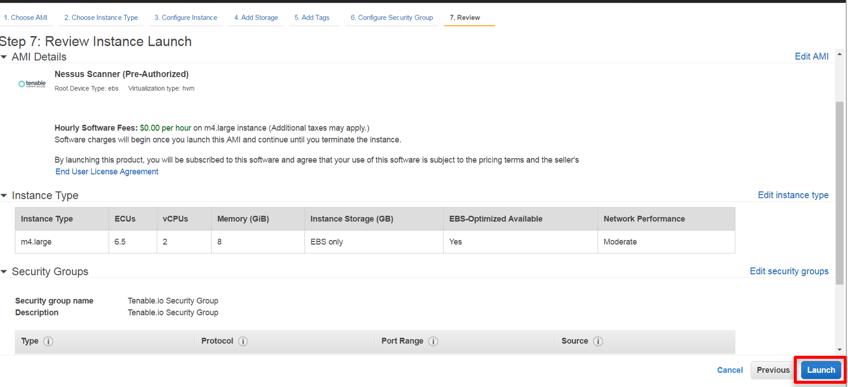
The Step 7: Review Instance Launch page appears.
- Once you have reviewed the instance, click Launch.

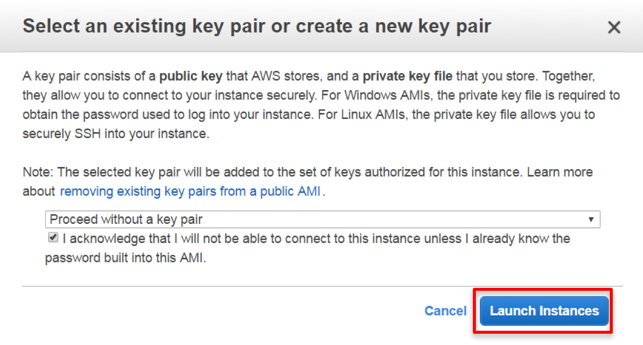
A key pair page appears.
- In the Select an existing key pair or create a new pair dialog box, from the drop-down box, select Proceed without a key pair.
Tip: No key pair is needed since the instance is not listening on any ports and there are no available connections to it.

- Check the Acknowledge checkbox.
- Click Launch Instances. The new instance displays in your instance list. Once the newly created instance finishes initializing, the Instance State appears as running.
Note: If any configuration information is incorrect, the scanner does not link. Stop the launch, edit the configuration information, and restart the launch.