Database (Legacy) Integration
Tenable Nessus Manager provides full database support for CyberArk. Complete the following steps to configure Tenable Nessus Manager with CyberArk Vault
Requirements:
- CyberArk account
- Nessus Manager account
To configure Database integration:
-
Log in to Tenable Nessus Manager‑.
-
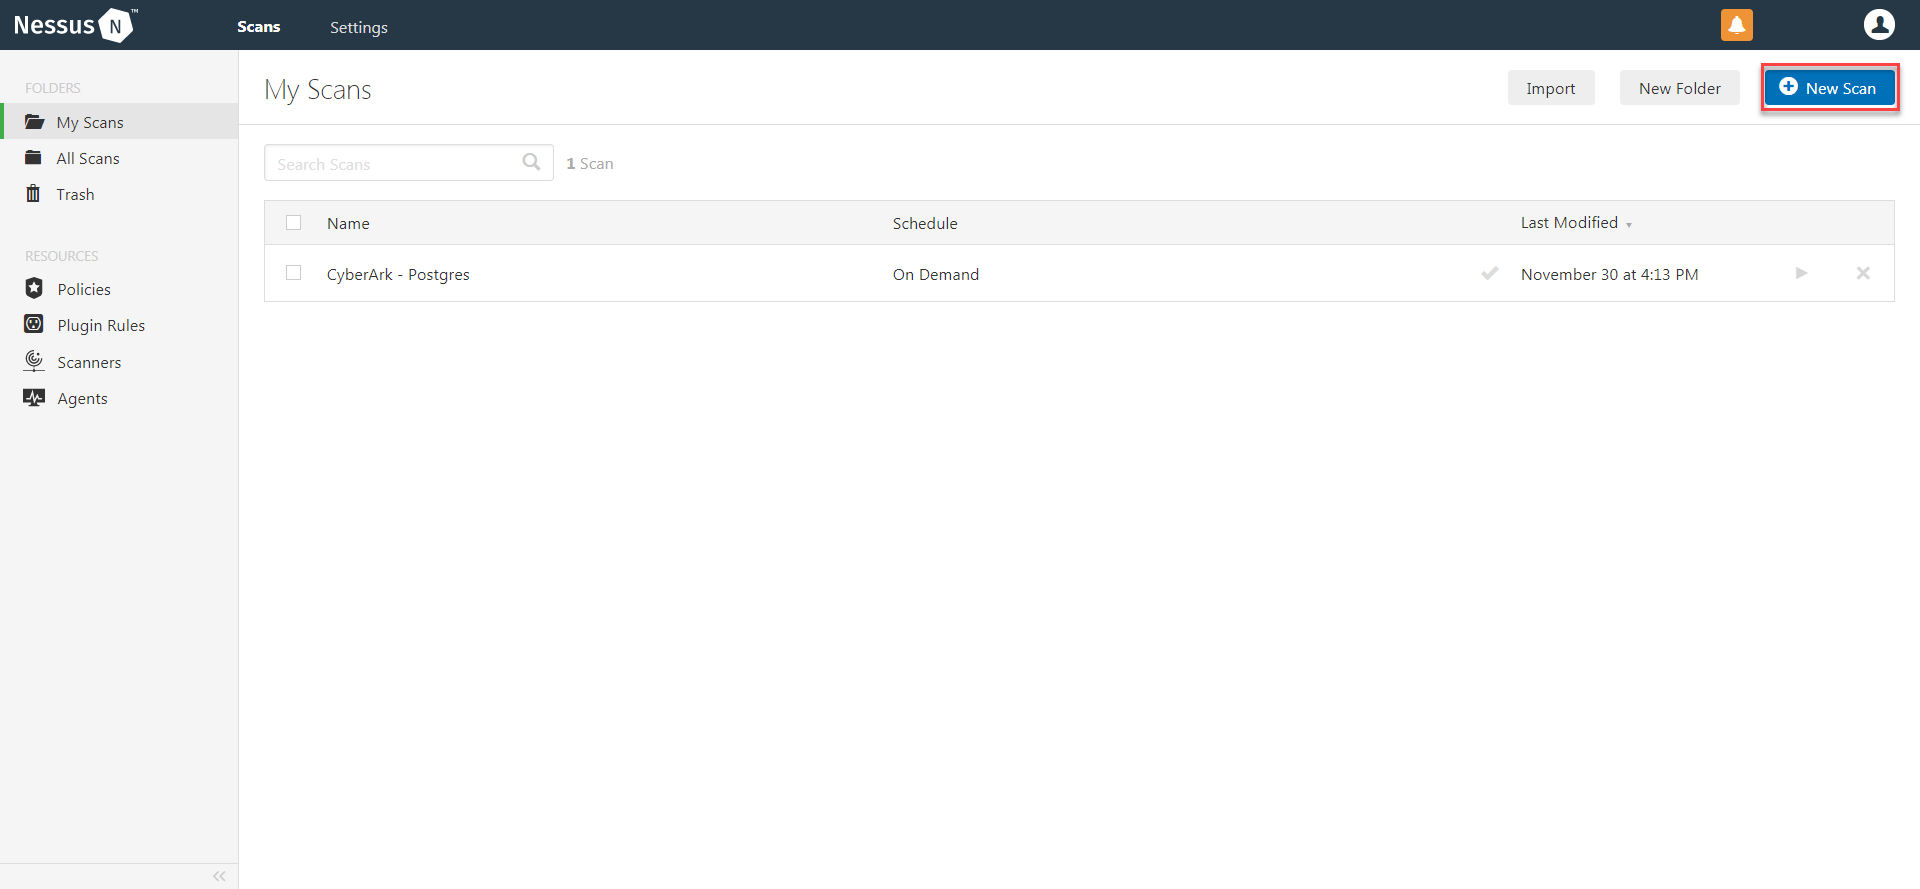
Click Scans.
The My Scans page appears.
-
Click + New Scan.
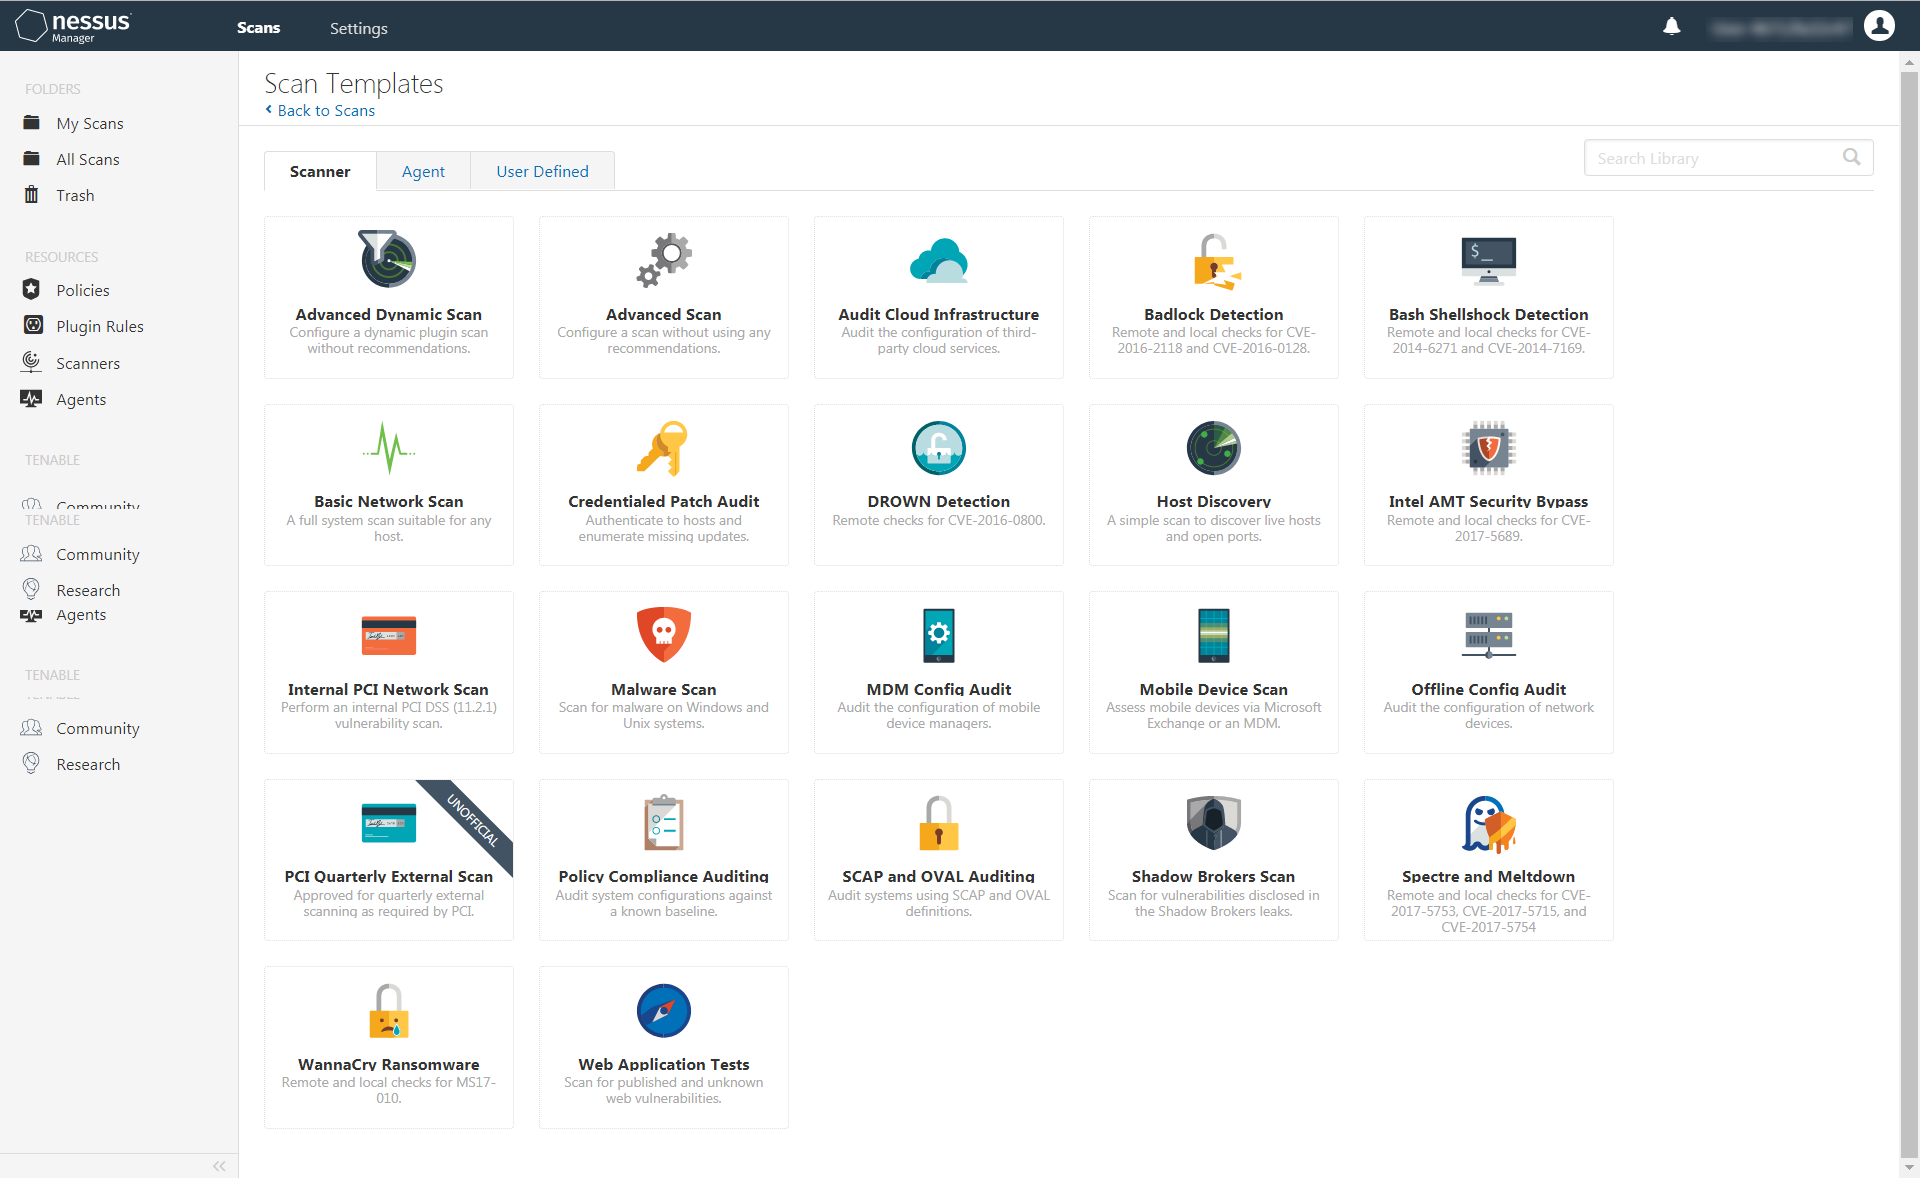
The Scan Templates page appears.
-
Select a Scan Template. For demonstration, the Advanced Network Scan template is used.
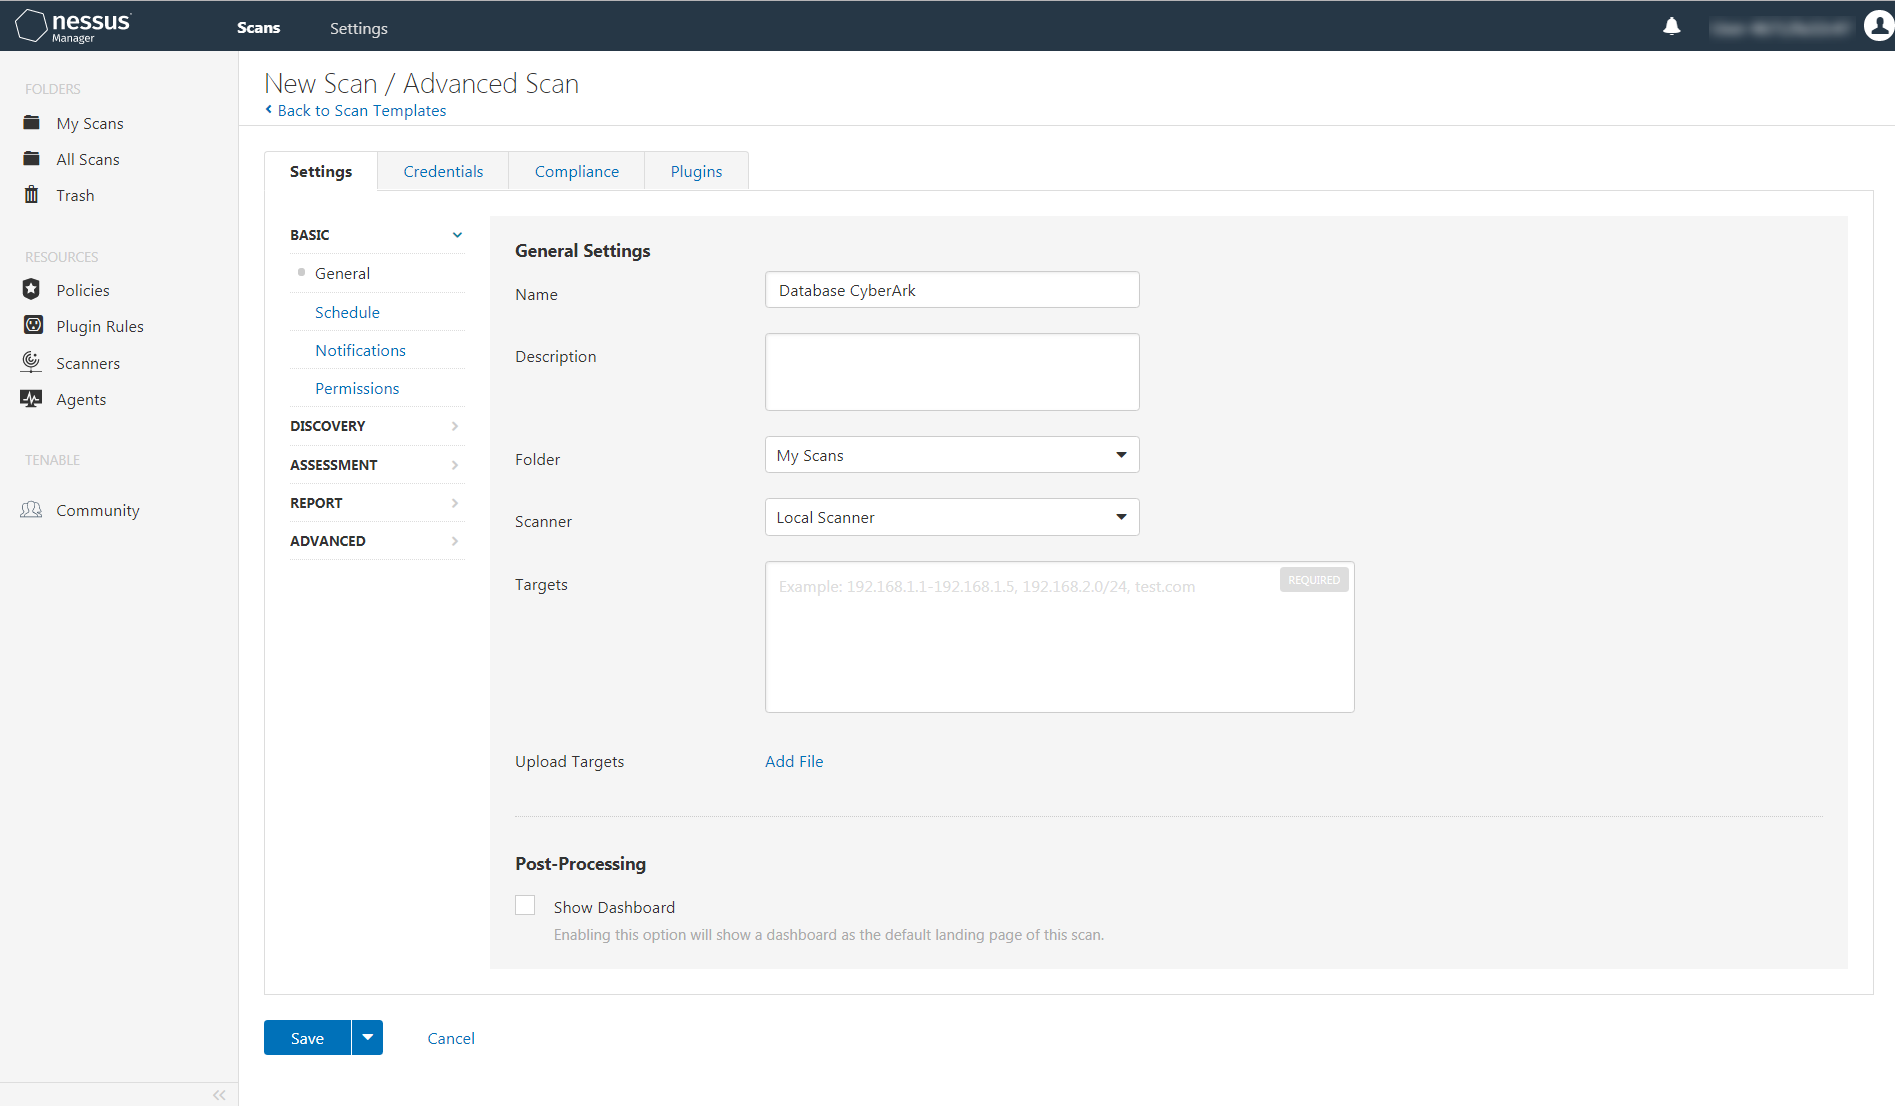
The scan configuration page appears.
- In the Name box, type a name for the scan.
- In the Targets box, type an IP address, hostname, or range of IP addresses
-
(Optional) You can add a description, folder location, scanner location, and specify target groups.
-
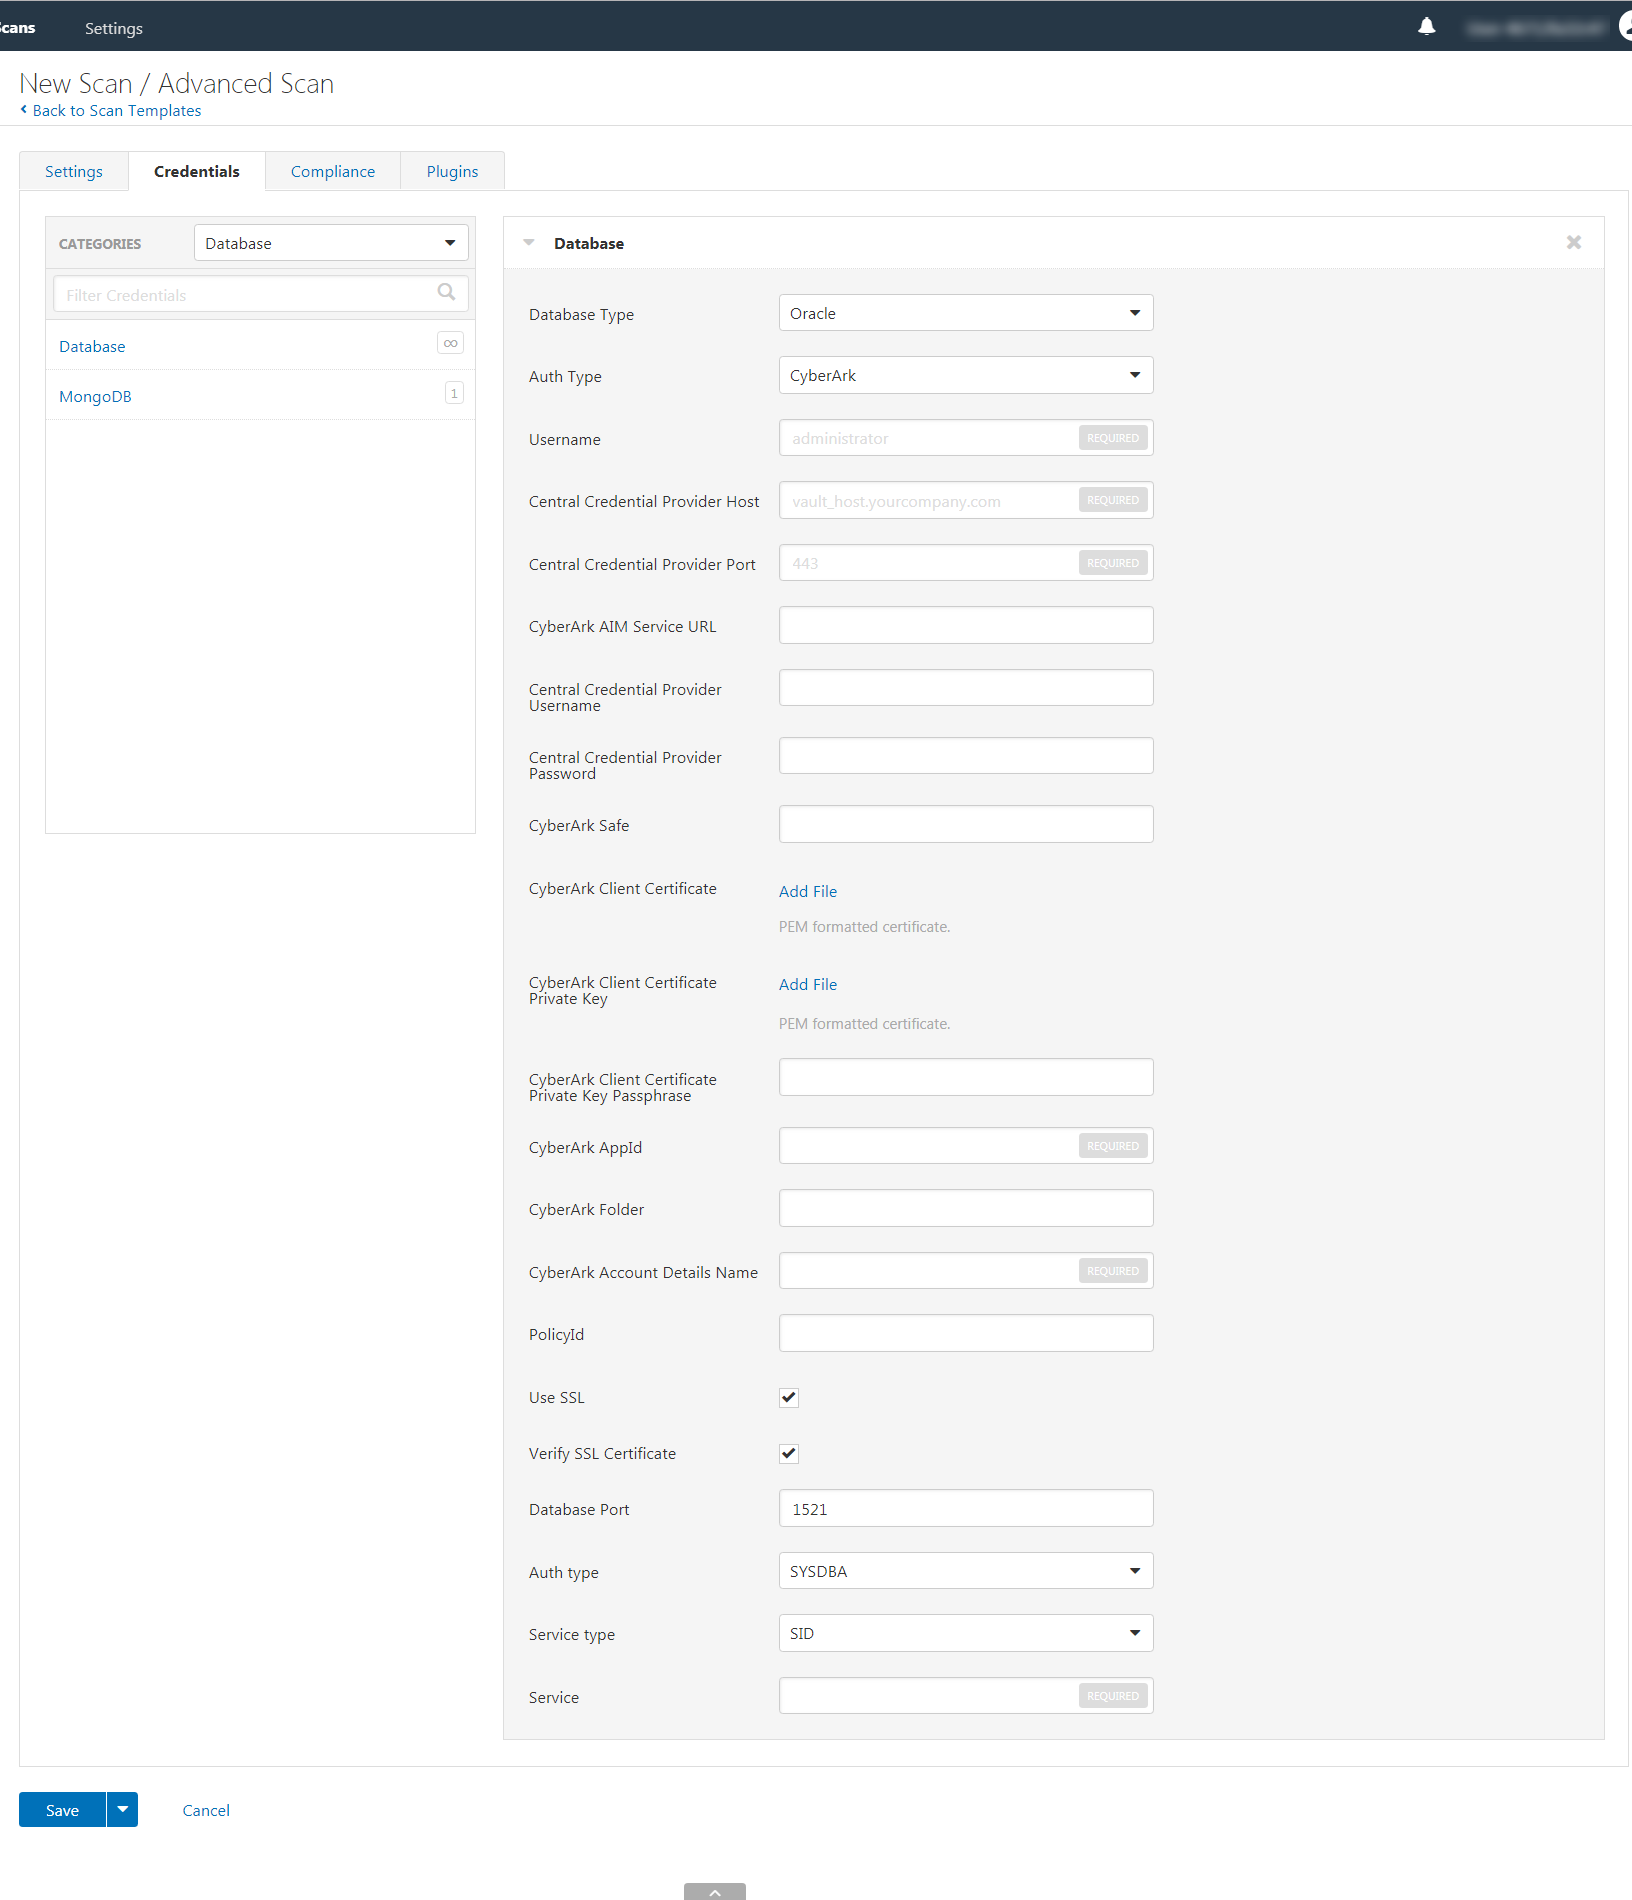
Click the Credentials tab.
The Credentials options appear.
-
In the Categories drop-down, select Database.
The Database options appear.
-
Click Database.
The Database options appear.
-
Click the Database Type drop-down.
-
The Database field options appear.
-
From the Database Type drop-down, select Oracle.
-
From the Auth Type drop-down, select CyberArk.
The CyberArk field options appear.
-
Configure each field for the Database authentication. See the Nessus User Guide to view detailed descriptions for each option.
Caution: Tenable strongly recommends encrypting communication between the Nessus scanner and the CyberArk AIM gateway using HTTPS and/or client certificates. For information on securing the connection, refer to the Nessus User Guide and the Central Credential Provider Implementation Guide located at cyberark.com (login required).
- Click Save.


