Database Integration
Required User Role: Standard, Scan Manager, or Administrator
Tenable Nessus Manager provides full database support for CyberArk.
Before you begin:
-
Ensure you have both a Tenable Nessus Manager and CyberArk account.
To configure Database integration:
-
Log in to Tenable Nessus Manager.
-
In the left navigation plane, click
 Scans.
The Scans page appears.
-
Click + New Scan.
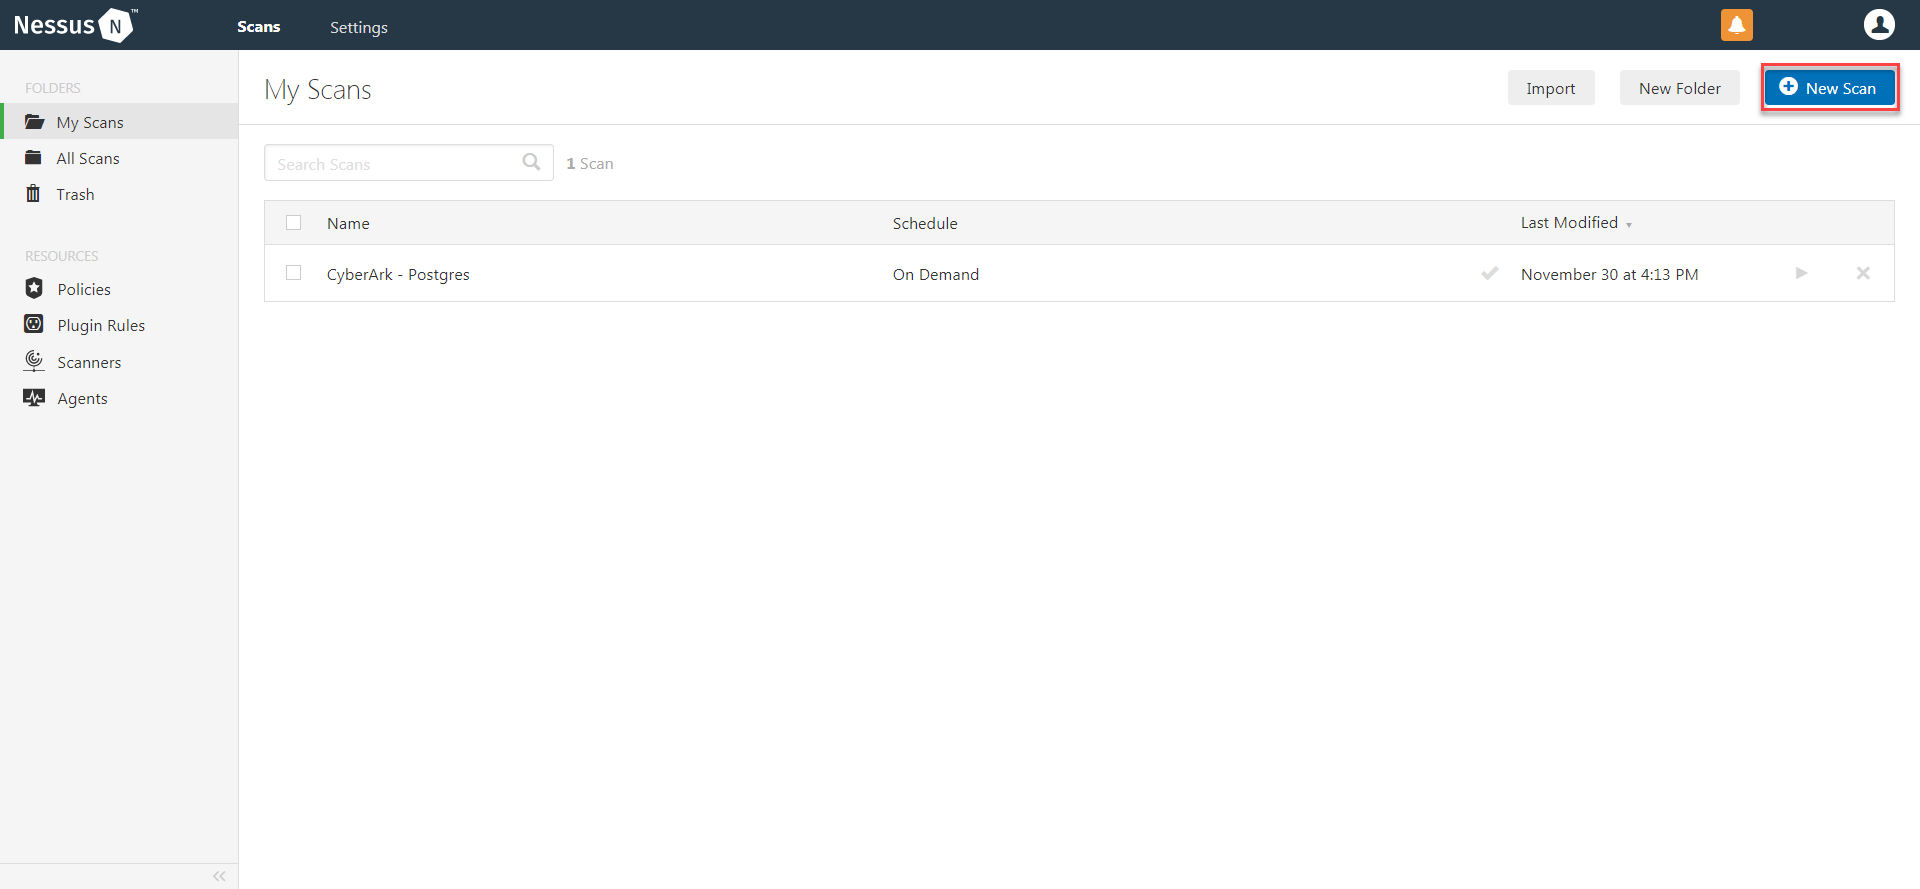
The Scan Templates page appears.
-
Select a Scan Template. For demonstration, the Advanced Network Scan template is used.
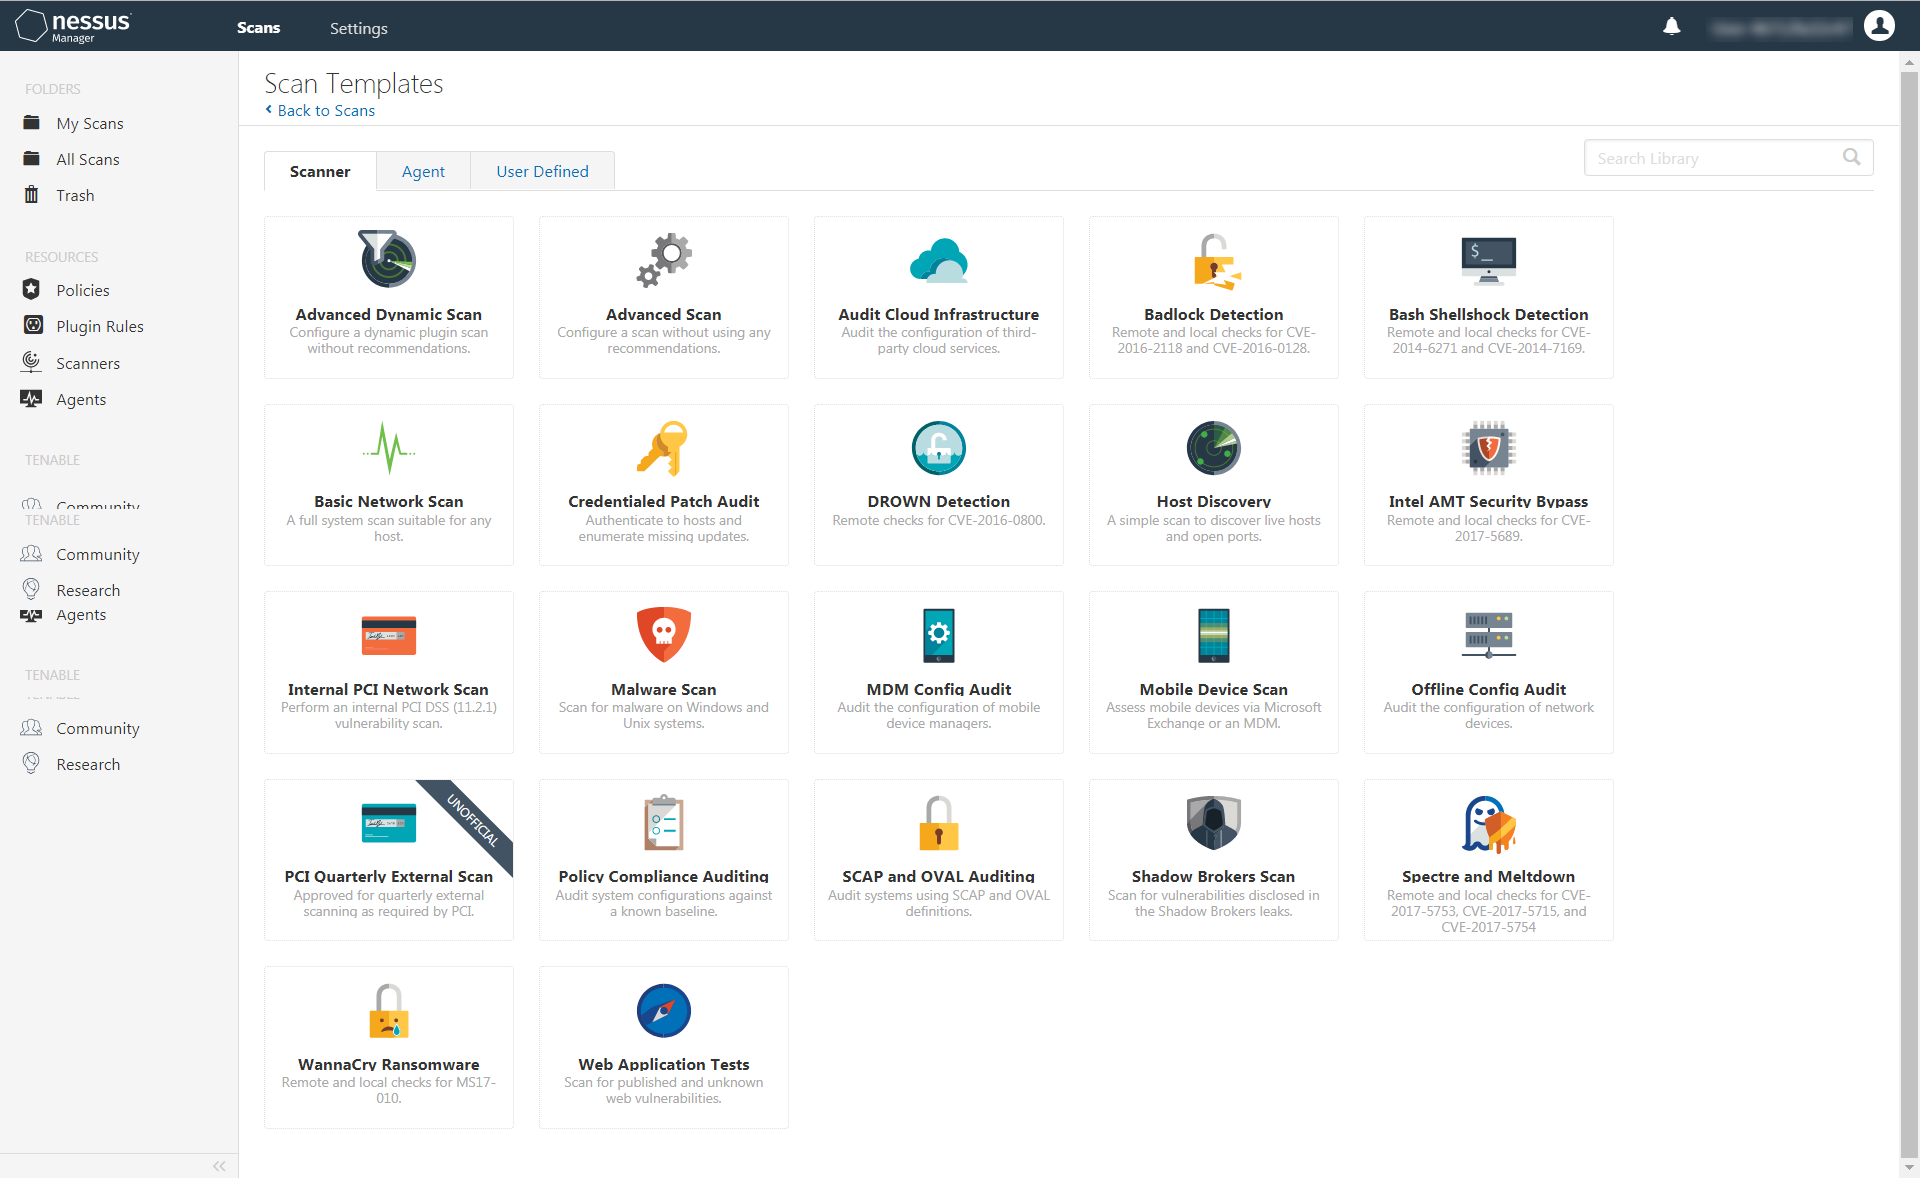
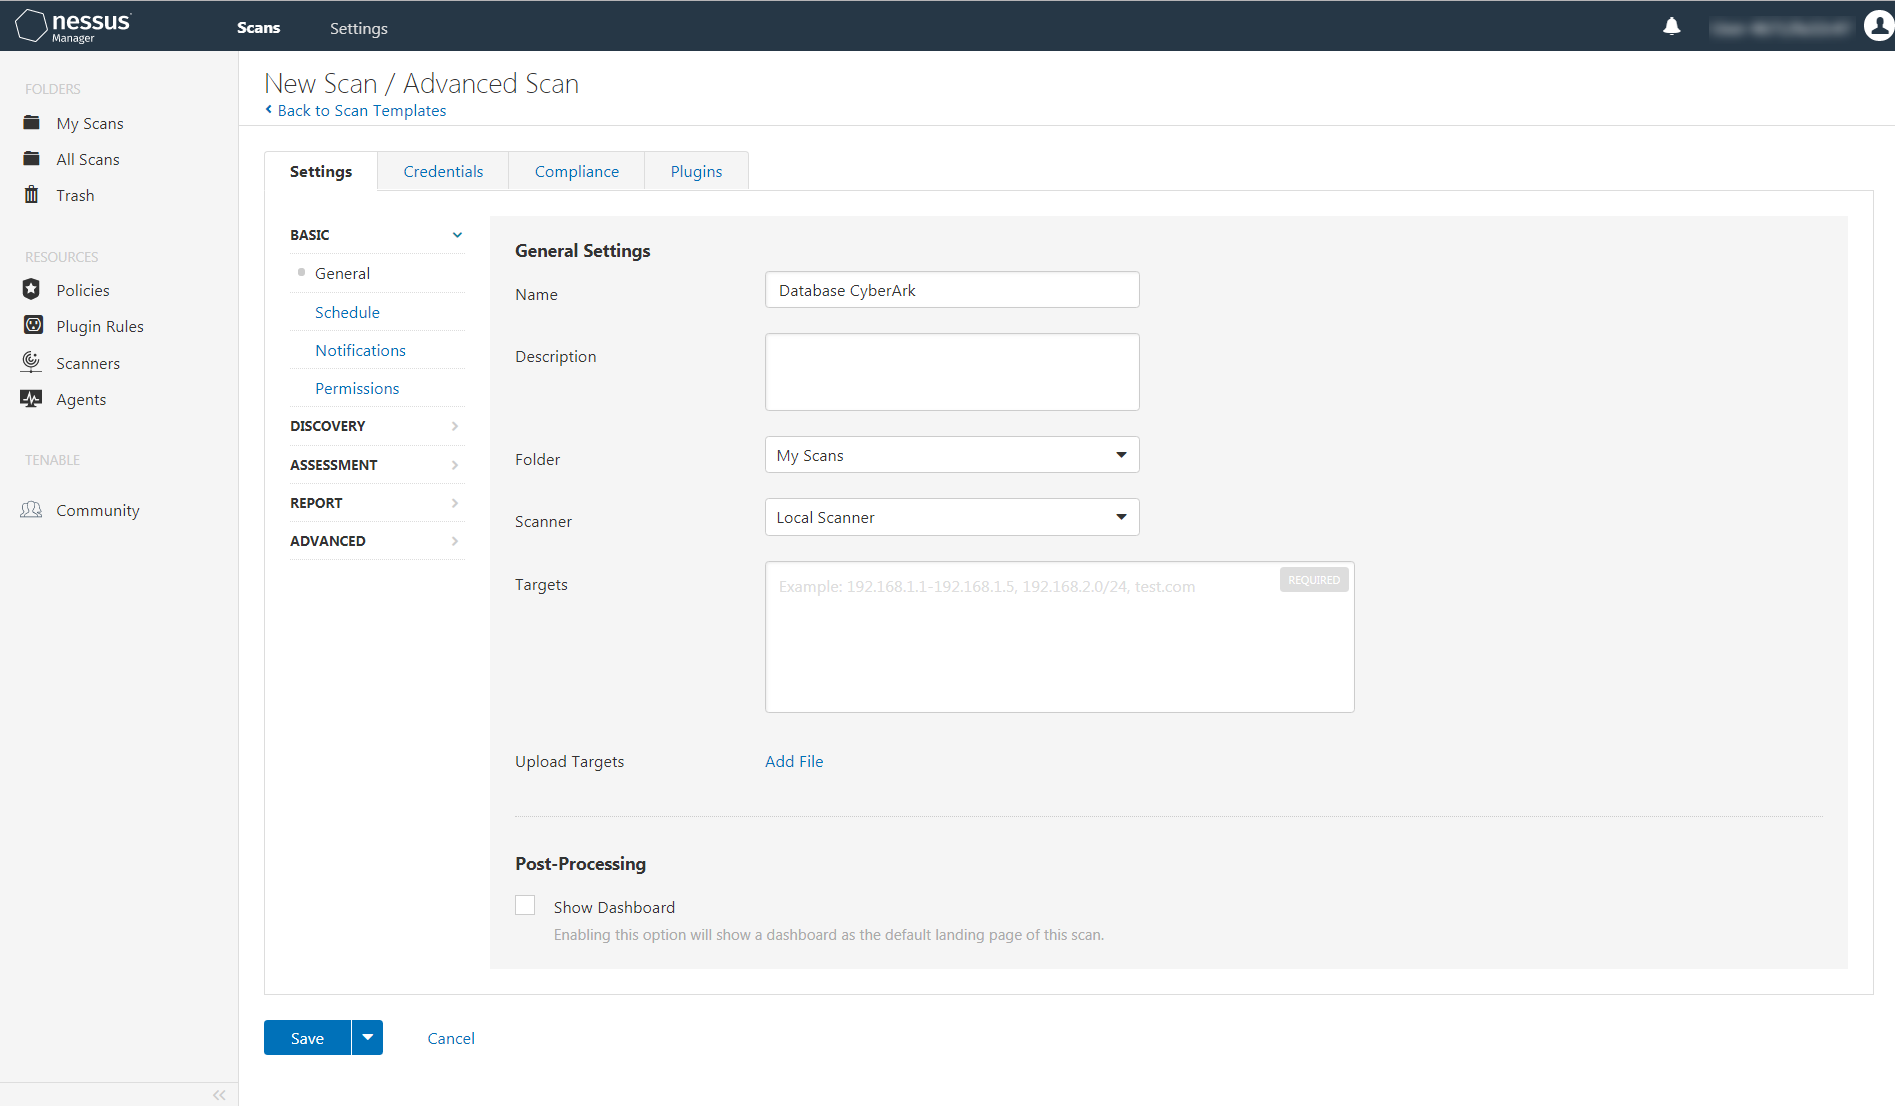
The scan configuration page appears.
- In the Name box, type a name for the scan.
- In the Targets box, type an IP address, hostname, or range of IP addresses
-
(Optional) You can add a description, folder location, scanner location, and specify target groups.
-
Click the Credentials tab.
The Credentials options appear.
-
In the Categories drop-down, select Database.
The Database options appear.
-
Click Database.
The Database options appear.
-
Click the Database Type drop-down.
-
The Database field options appear.
-
From the Database Type drop-down, select Oracle.
-
From the Auth Type drop-down, select CyberArk.
The CyberArk field options appear.
-
Configure each field for the Database authentication. Refer to the Nessus User Guide to view detailed descriptions for each option.
Option Description Required CyberArk Host
The IP address or FQDN name for the CyberArk AIM Web Service. This can be the host, or the host with a custom URL added on in a single string.
yes
Port
The port on which the CyberArk API communicates. By default, Tenable uses 443.
yes
AppID
The Application ID associated with the CyberArk API connection.
yes
Client Certificate The file that contains the PEM certificate used to communicate with the CyberArk host.
Note: Customers self-hosting CyberArk CCP on a Windows Server 2022 and above should follow the guidance found in Tenable’s Community post about CyberArk Client Certification Authentication Issue.
no
Client Certificate Private Key The file that contains the PEM private key for the client certificate. yes, if private key is applied
Client Certificate Private Key Passphrase The passphrase for the private key, if required. yes, if private key is applied
Get credential by The method with which your CyberArk API credentials are retrieved. Can be Address, Identifier, Parameters, or Username.
Note: For more information about the Parameters option, refer to the Parameters Options table.
Note: The frequency of queries for Username is one query per target. The frequency of queries for Identifier is one query per chunk. This feature requires all targets have the same identifier.
yes Username (If Get credential by is set to Username) The username of the CyberArk user to request a password from.
no Safe The CyberArk safe the credential should be retrieved from.
no Account Name (If Get credential by is Identifier) The unique account name or identifier assigned to the CyberArk API credential. no Use SSL
If enabled, the scanner uses SSL through IIS for secure communications. Enable this option if CyberArk is configured to support SSL through IIS.
no
Verify SSL Certificate
If enabled, the scanner validates the SSL certificate. Enable this option if CyberArk is configured to support SSL through IIS and you want to validate the certificate.
no
Parameters Options
The following options can be specified when Get Credential By is set to Parameters. These request parameters allow for advanced filtering of accounts based on their properties. The options correspond to the various options supported by the CyberArk REST API, as found in CyberArk documentation. These options can be specified in many different combinations to filter account results by their properties. For example, specifying Root as the Folder option results in a REST API query containing &Folder=Root.
Option Description Required Safe
The safe containing the credential.
no
Address
Limit the query to accounts matching the specified address.
no
Use Target IP Address
(Optional) When enabled, the integration appends the target address to the credential query, which limits the query to accounts matching the scan target’s address. This is ignored if Address is set.
no
Username The username of the credential. no
Account Name The unique identifier assigned to the credential. no
Folder The folder of the credential. no
Database
The database of the credential.
no
Query
Specify a custom “free query” using account properties. When this method is specified, all other search criteria are ignored.
no
Query Format
Defines the query format. allowed values are Exact and Regexp. The default is Exact. This value is ignored unless the Query option was specified.
no
CyberArk credential field mapping to the CyberArk Accounts detail view in the CyberArk console: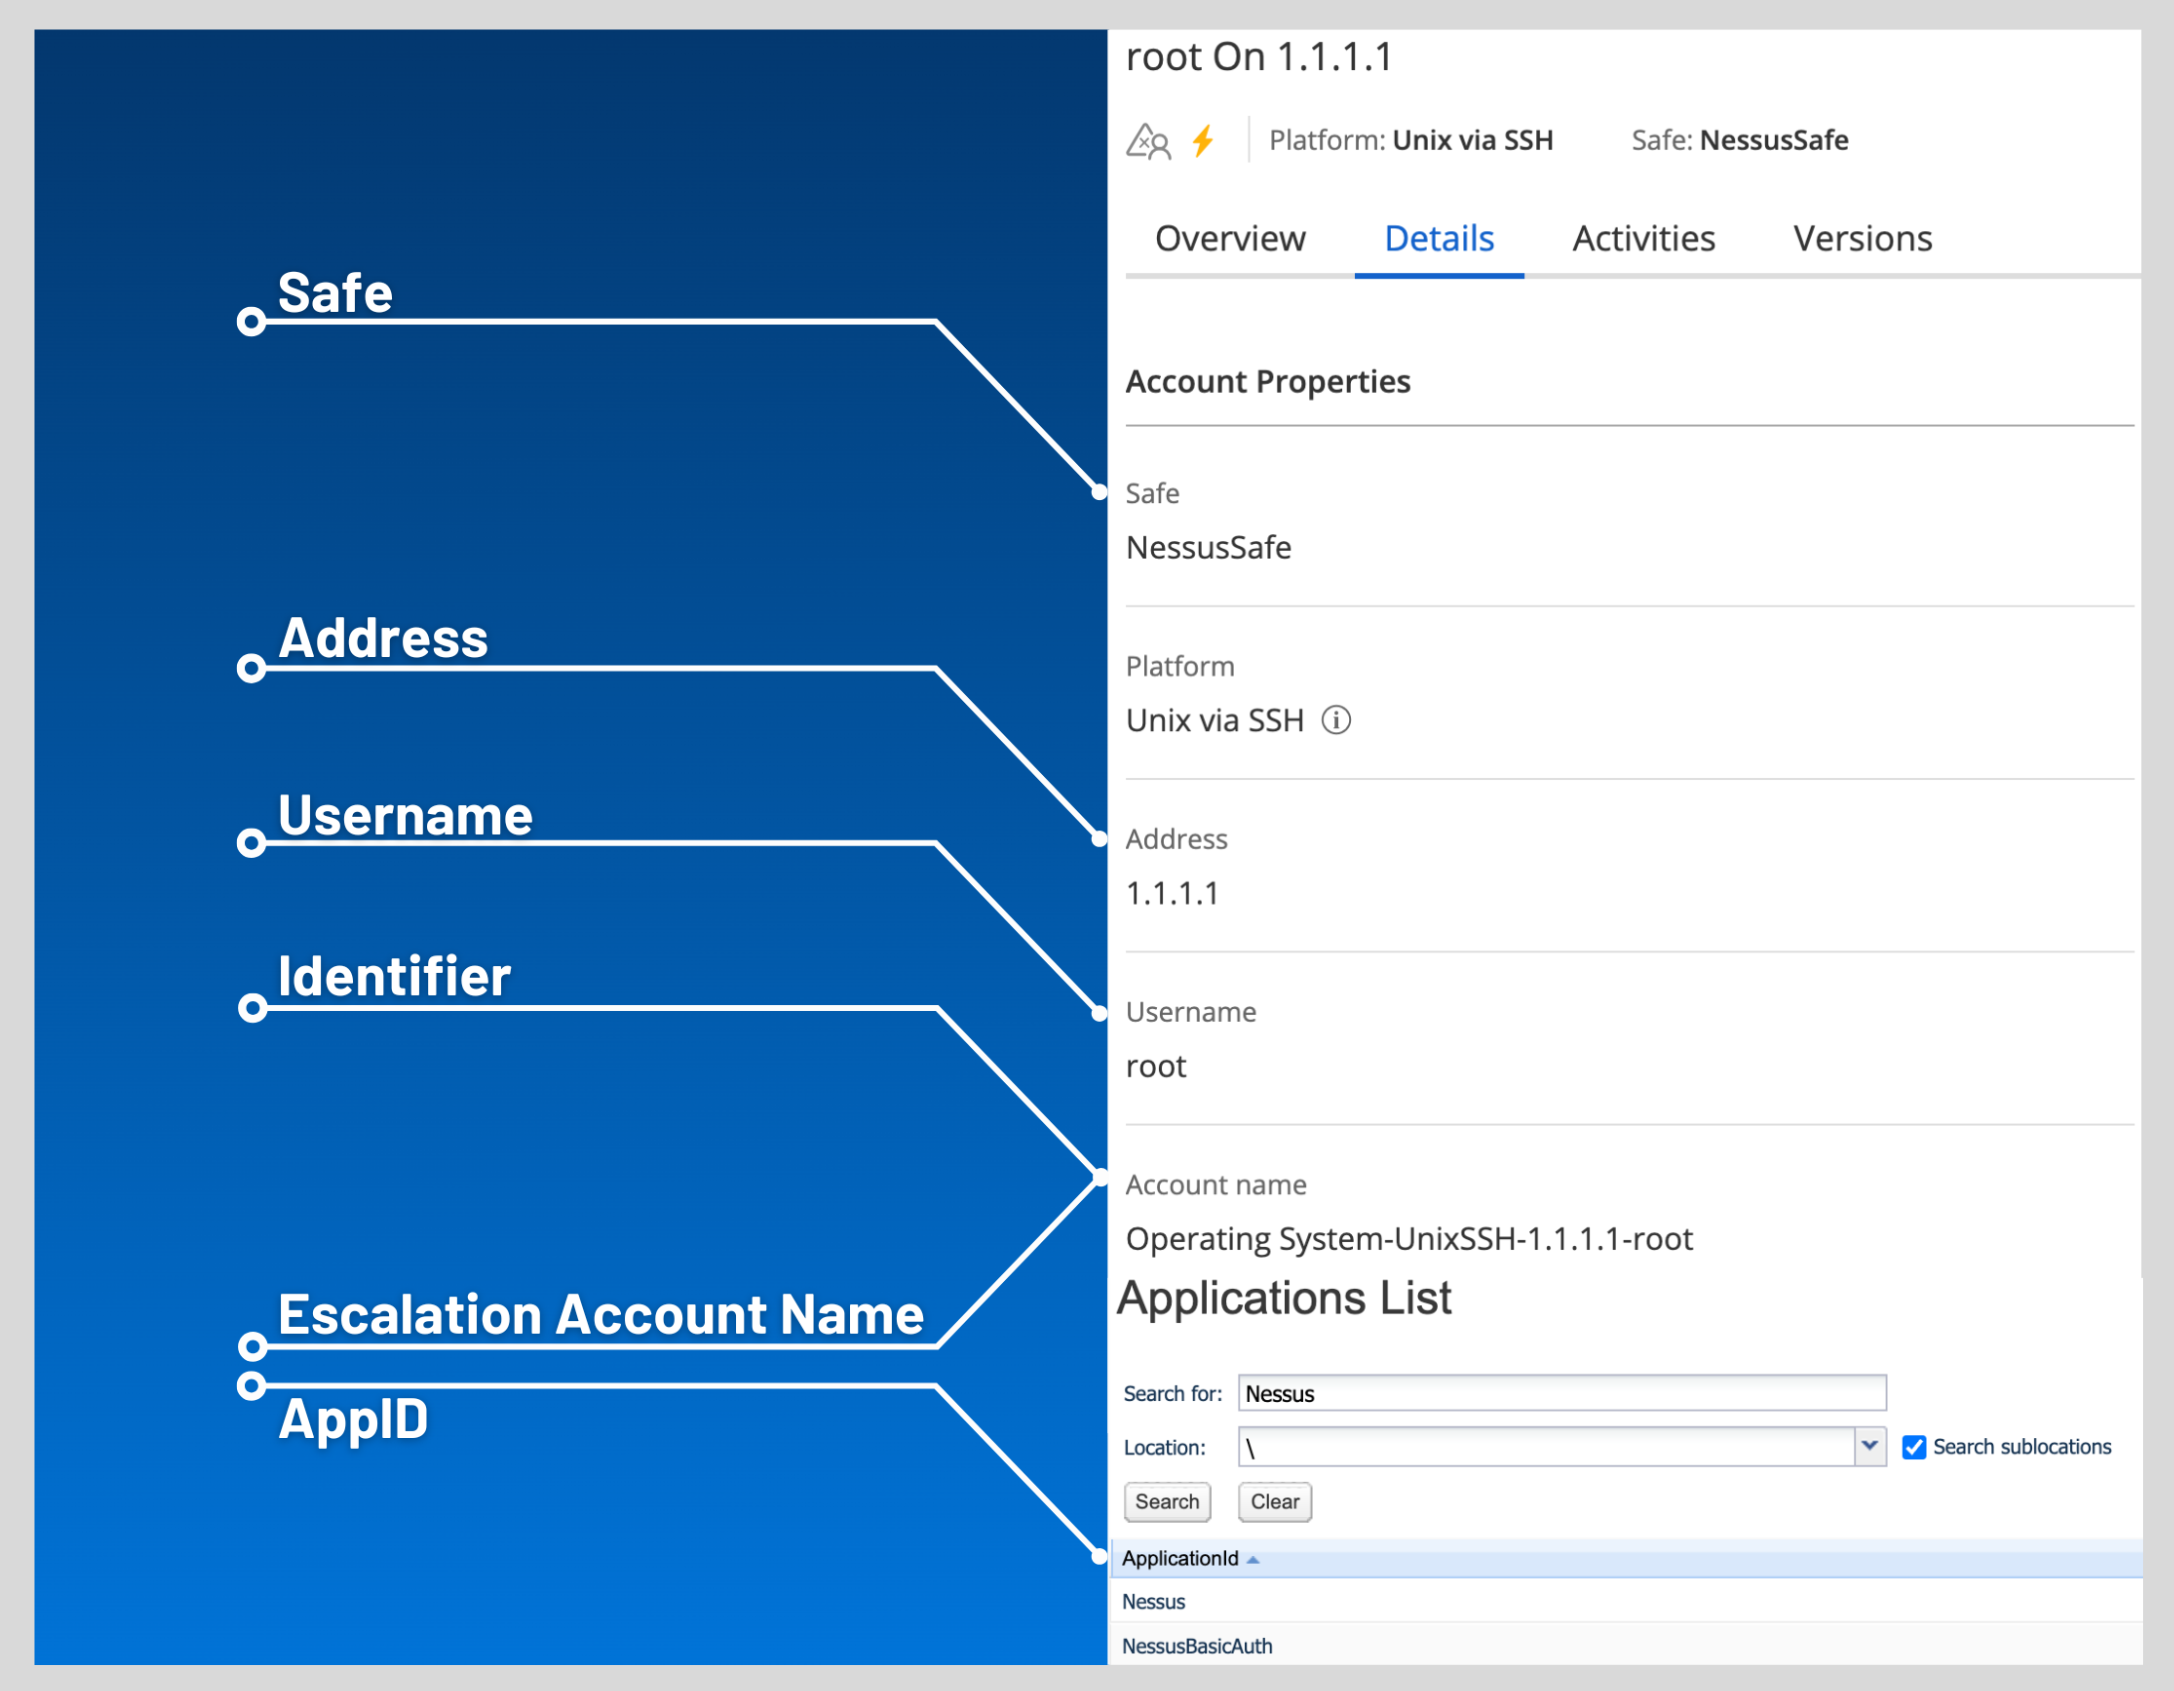
Caution: Tenable strongly recommends encrypting communication between the Nessus scanner and the CyberArk AIM gateway using HTTPS and/or client certificates. For information on securing the connection, refer to the Nessus User Guide and the Central Credential Provider Implementation Guide located at cyberark.com (login required).
Note: The Username option also adds the Address parameter of the API query and assigns the target IP of the resolved host to the Address parameter. This may lead to failure to fetch credentials if the CyberArk Account Details Address field contains a value other than the target IP address.
- Click Save.