SGC Central Guided Setup
Last Updated: July 17, 2026
You can create a connection alias with a guided setup.
Required User Role: Administrator
-
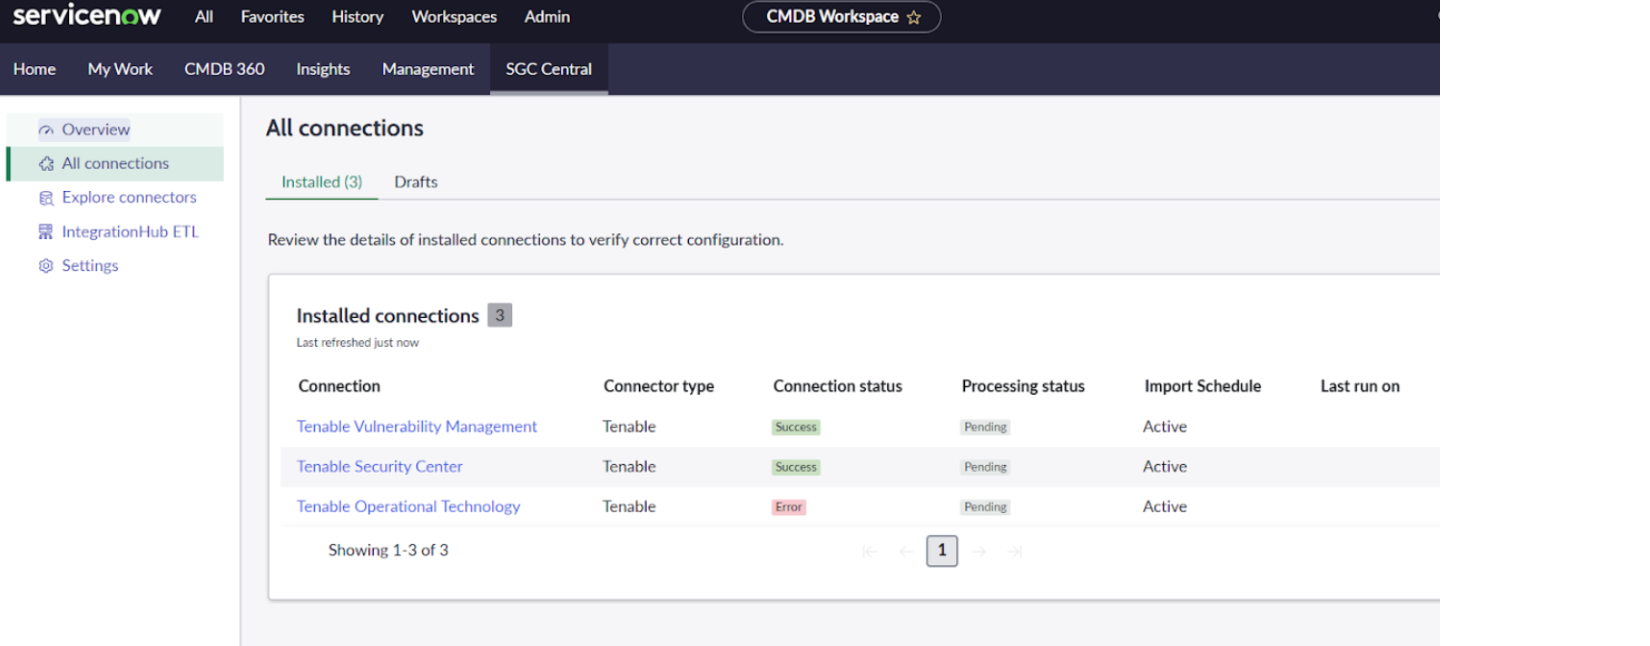
Navigate to Workspaces > CMDB Workspace > SGC Central.
-
Click All Connections.
View the installed connections list here.
-
Update the existing record.
Note: If the existing setup is in-progress, click the Drafts tab, resume your setup of "Tenable," and follow the same steps for configuring multi-instance as shown in the following multi-instance setup section.
-
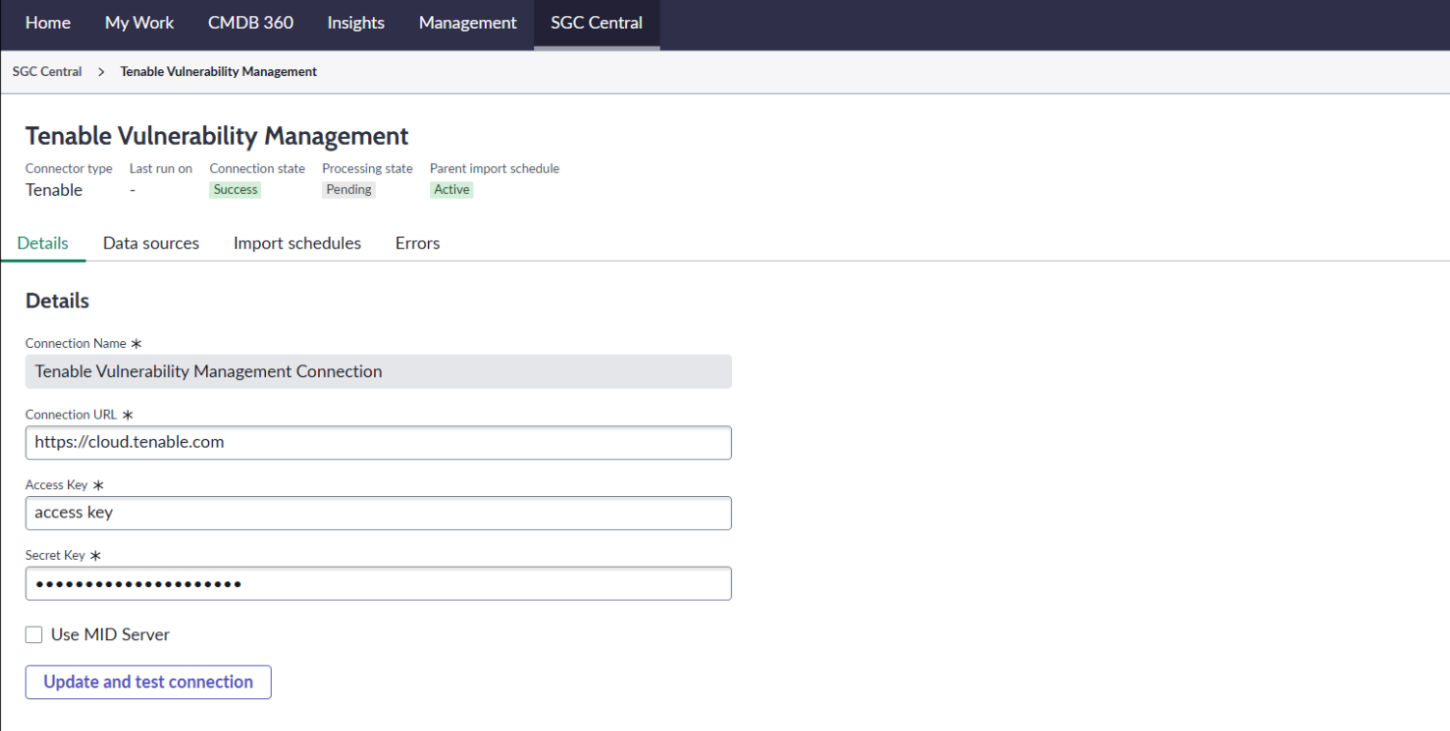
Click any of the connections..
-
Provide the URL, access key, and secret key.
-
Click Update and test connection
Once the connection test is completed, a Connection verified success message appears.
-
View the details of data sources by clicking the Data sources tab.

-
To execute the scheduler, click the Import Schedules tab.
-
Navigate to All Connections.
-
Click Create connection.
-
Select Tenable.
-
Click Create connection.
Note: As mentioned in the steps, perform the Prerequisite step of updating the max length of the credential field.(If already updated then Click on “Mark as Complete”).
-
Select the connection alias.
-
Click Continue.
-
Provide the connection name, URL, and tokens.
-
Click on the “Create and test connection” button.
A success message appears.
Note: While creating connection, if you get a "Save credential failed" alert, you can ignore it.
-
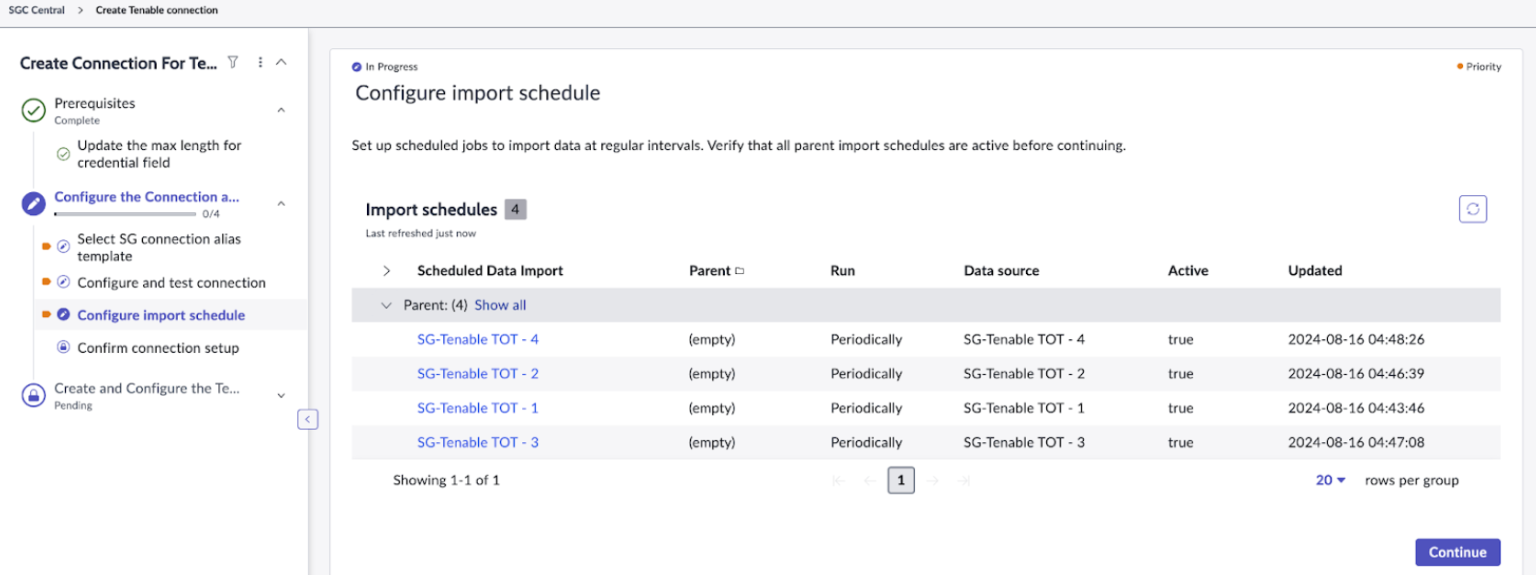
Review the four schedule data imports.
-
Click Continue.
-
Navigate to the Confirm Connection tab and click View All Connections to see all the added connections.
-
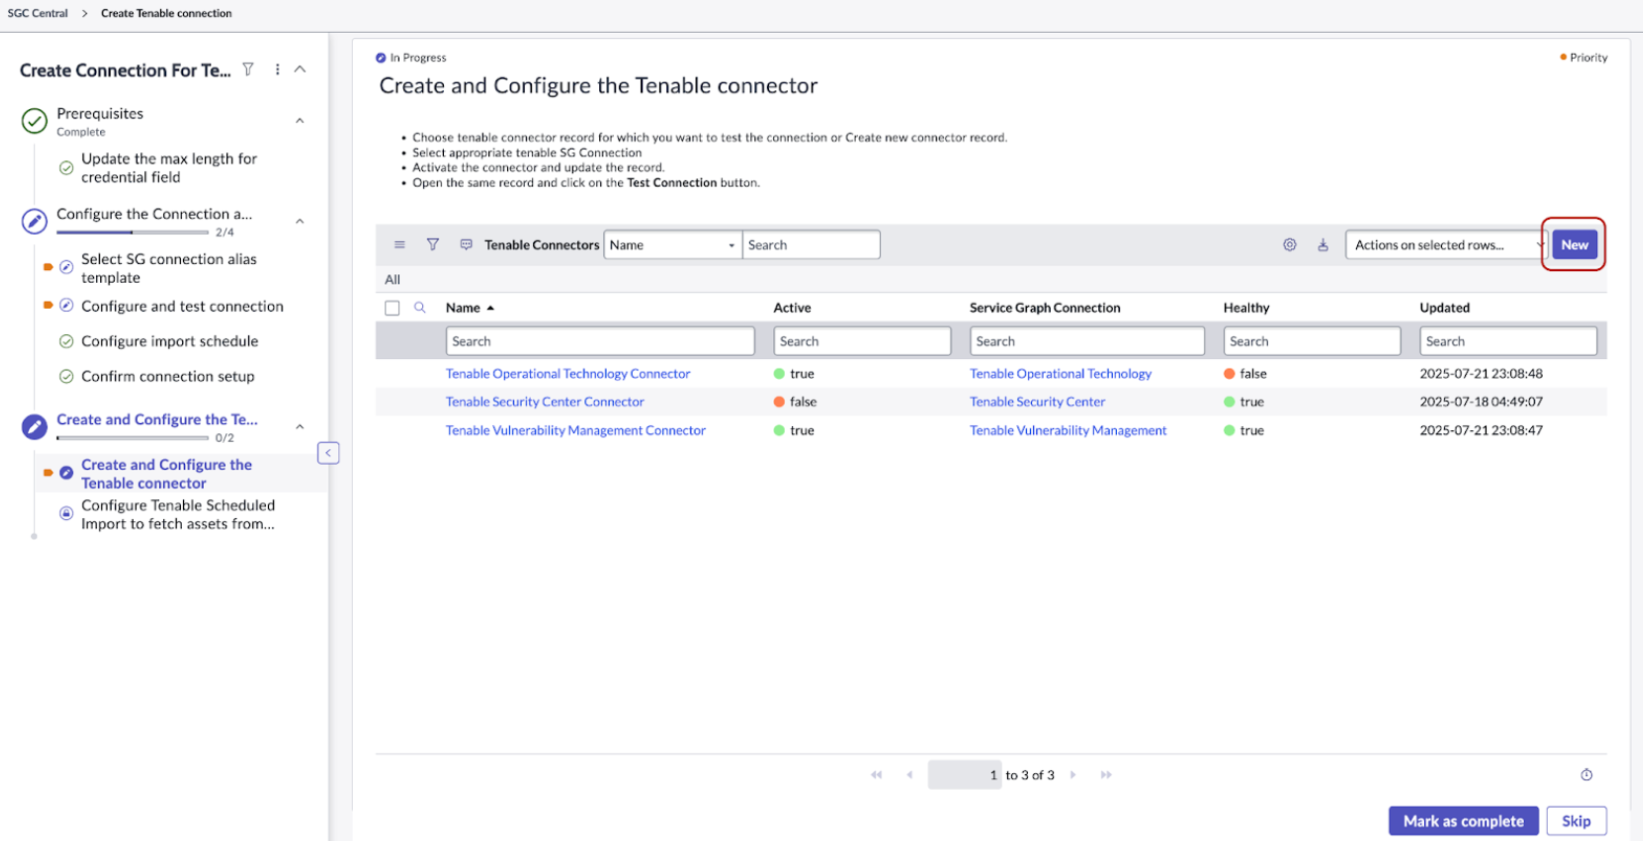
To create the Tenable Connector, navigate to the Next module and click New for the previously created SG Connection Record.
-
Provide the required configuration details.
-
Click Test Connection.
-
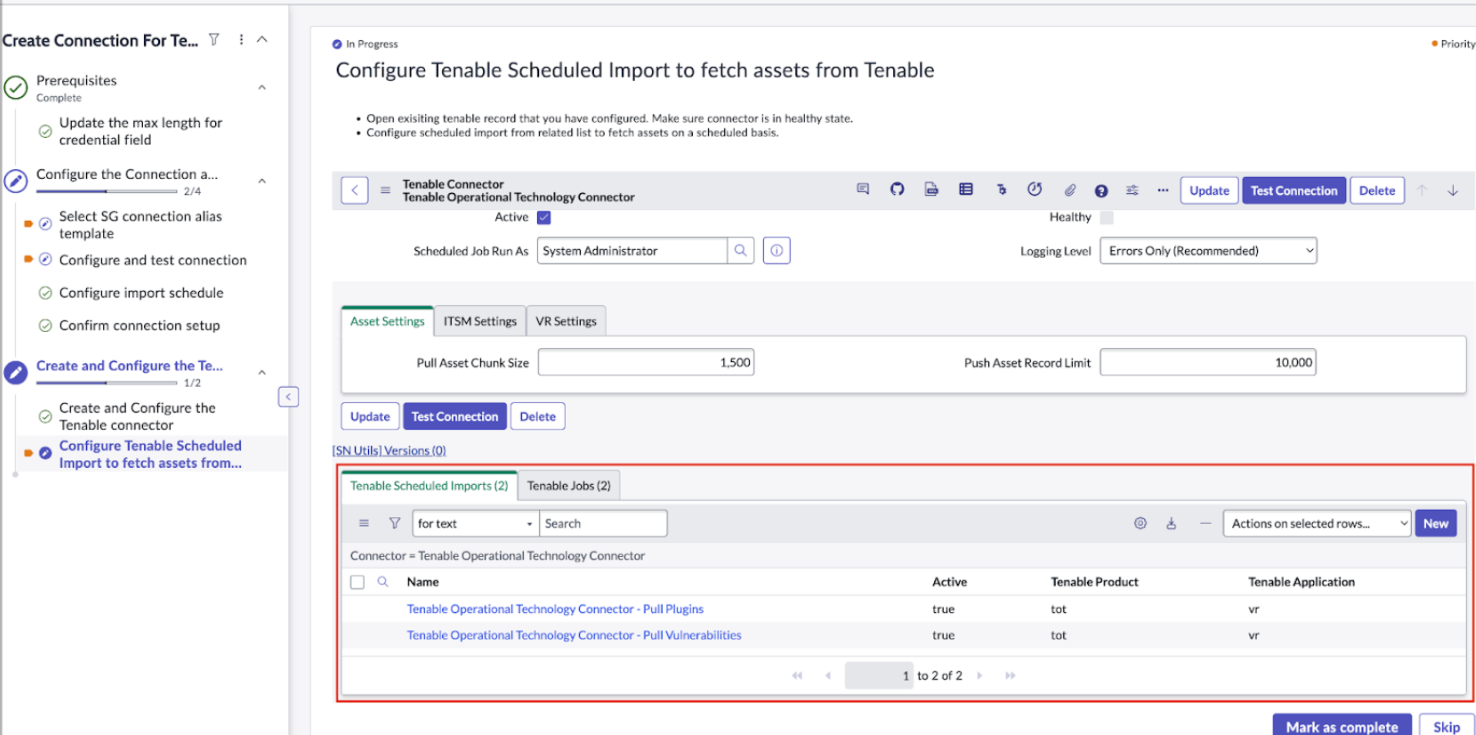
Create a Tenable Schedule Import Job by opening the Connector Record.
-
Click New.
-
Provide the required configuration details.
-
Click Execute Now to collect data manually.
-
Click Mark as Complete.