Customized Products
Software products and patches sometimes require user interaction when installing. Users enter details such as license information or request to show a menu at startup. Other default settings include auto update, or desktop shortcuts. Tenable Patch Management (TPM) uses Customized Product settings to include information or change defaults when installing products on managed devices.
Manage Settings for Customized Products
Open and Save a Customized Product Template
-
Select Customized Products on the left navigation menu of the Patch Dashboard.
-
Select + New in the upper-right to open a new template:
-
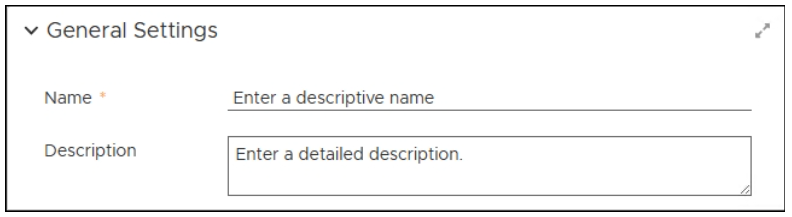
Enter a Name that identifies your template.
-
Enter a detailed Description, and then select Save on the upper-left of the dialog.
-
Continue with Add a Deployment Wave to a Customized Product Template.
Add a Deployment Wave to a Customized Product Template
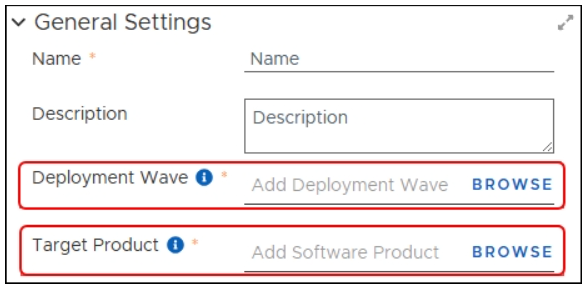
The Deployment Wave contains the Business Units that use the product you intend to target.
-
Select Browse next to Add Deployment Wave in an open Customized Product Template.
-
Select the Deployment Wave to which these Customized Product settings apply on the Deployment Waves dialog. See Deployment Waves for details.
-
Select Add Deployment Wave on the lower-left of the Deployment Waves dialog.
-
Select Save on the upper-left of the template to save your changes and continue editing.
-
Continue with Add a Target Product.
Add a Target Product
-
Select Browse next to Add Software Product in an open Customized Product Template.
-
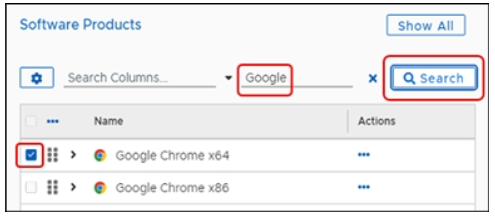
Enter the Name of the product you want to customize in the search field, and then select Search.
-
Select the Software Product you want to customize. You can target only one Software Product in each Customized Product entry.
-
Select Add Software Product to populate the configurable items in the static list of Install Settings. Settings change depending on the Target Product.
-
Select Save in the upper-left of the template to save your changes.
-
Continue with Configure Software Install Settings.
Configure Software Install Settings
-
Select Install in the left column of Install Settings.
-
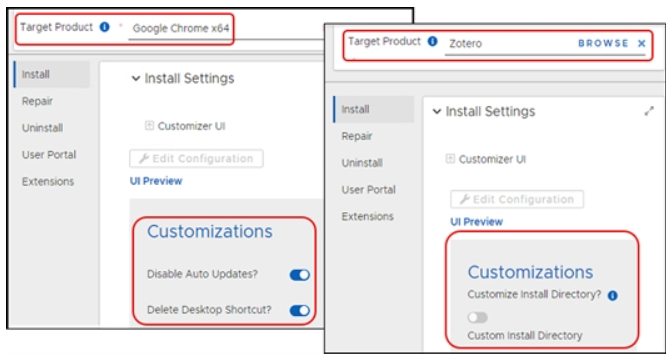
The list of available customizations reflects the settings you can customize in the software product you selected.
-
Settings change depending on the Target Product.
-
Select each of the remaining items in the list of customizations. If the software you have chosen allows changes or input for any of these settings, review and create the necessary responses.
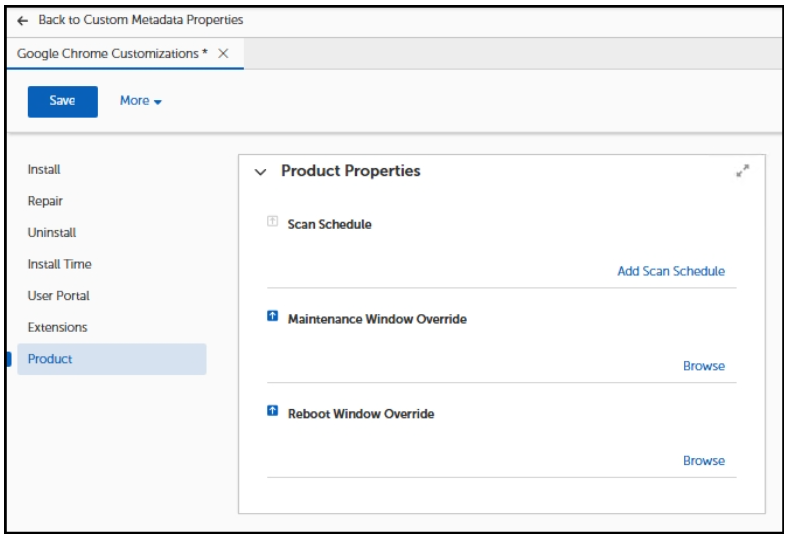
Configure Custom Scan Schedule
By default, Patch clients run a full scan every day at 6 AM for a duration of eight hours and use the inherited maintenance window and reboot schedule. Using a customized product, you can set a custom scan schedule, a maintenance window override, and a reboot window override on a per-product basis. This is useful when some products can be too resource-intensive to scan daily, or need to run during a different maintenance and reboot window than less resource intensive products.
-
Click Product in the left column.
-
Click Add Scan Schedule, select a Schedule (for example, First of the Month (19hrs)) and click OK.
-
Deselect the inheritance arrow for Maintenance Window and/or Reboot Window Override and click Browse to select the desired values.
-
Select Save on the upper-left of the dialog to save your progress.
-
Select <-- Back to Customized Products above General Settings.
The changes you have made take effect the next time the associated Deployment Wave runs.