Tenable Patch Management (TPM) automates even the most complex enterprise patching processes, allowing IT and security teams to precisely mirror their patching strategies and tailor processes for specific device groups.
Access Server logs using the  on the Admin Portal or by navigating to the following location:
Tenable Patch Management/ Tenable Patch Management/Logs.
Note: Tenant logs can only be accessed by navigating to > Logs in the Admin Portal.
The following options are available on the Logs page.
-
Download All Server Logs: Downloads all Server logs, including component and workflow logs.
-
Download Server Error Logs: Downloads TPM Server error logs.
-
Clear Web Logs: Clears all Admin Portal runtime information and errors recorded by the browser session.
-
Download Web Logs: Downloads all Admin Portal runtime information and errors recorded by the browser session.
When you need information beyond what this documentation provides, enter a support ticket and request help from Tenable Support.
TPM uses both the Admin Portal and the Patch dashboard for configuration and management.
Use the Admin Portal to set up your environment, create policies, add administrators, and more. Global settings include groups, security, and administrators.
During TPM installation the administrator creates a SuperAdmin account using either a native TPM login or a Windows Active Directory account (recommended).
Tip: You can create an OIDC-enabled or SAML-enabled account after server activation and component configuration.
-
Enter the Fully Qualified Domain Name (FQDN) for TPM followed by the port (optional) into the browser address bar:
https://<FQDN>:[port]If necessary, confirm the port details with the administrator who defined the port during software installation. If the server is already using port 80, for example, the web site might use port 9678.
-
Press Enter. The Admin Portal login dialog opens.

-
Log in using one of the following methods:
-
Enter a native Login ID (email address) and password, and then click Log in.
-
Select Login with Active Directory (recommended).
-
Select Login with <OIDC Entry>. OIDC-enabled accounts can be configured after server activation and component configuration.
-
Select Login with <SAML Entry>. SAML-enabled accounts can be configured after server activation and component configuration.
Tip: If you are using Mozilla Firefox, refer to the Resolve the Mozilla Firefox Active Directory Login Issue Knowledge Base article.

After successfully logging in, the TPM home page appears.
-
Licensing
TPM requires a license for each active client. The license key contains the licensed company name and client count. TPM periodically counts all active, healthy, reporting clients as licensed clients.
You may enter the license key when installing the server, or enter the license key using the Admin Portal after completing the installation. If you are starting the for the first time or your key has expired, select Manage License to add or replace the license.
Add a License Key
If you entered your license key during installation, you do not need to reenter it.
-
Click Manage Licenses at the upper-right of the Admin Portal dashboard.
-
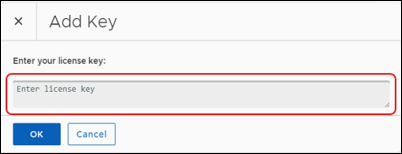
Click Add Key, and enter your license key.
-
Click OK to return to the Product Licensing workspace.
-
Wait for the licensing process to complete. For any user-generated changes, TPM sends a status update when it has enabled the installed solution.
Target Collections for the Licensed Product
After entering a license key, select a Target Collection for the licensed product.
Caution: Use care when selecting Use All Clients. Earlier versions of the installed Tenable Patch Management version do not support this feature and selecting it can corrupt the patch environment.
TPM recommends upgrading to the latest version of the product.
-
Select the Tenable Patch Management product name in the Product Licensing list.
-
Select + Browse under Target Collections.
This opens the Select Group dialog.
-
Select one or more Groups from the All Groups table.
-
Select OK on the lower-left corner to return to the Product Licensing workspace.