Provision Tenable Core Web Application Scanner (BYOL)
Tenable Core Web Application Scanner Bring Your Own License (BYOL) is an instance of a Tenable Vulnerability Management Web Application Scanner installed in Microsoft Azure that allows you to scan internal-facing web applications deployed in Microsoft Azure. The Tenable Core Web Application Scanner (BYOL) is used to perform vulnerability assessments of web applications.
To provision a Tenable Core Web Application Scanner BYOL instance:
-
Log in to the Microsoft Azure portal.
-
In the left-hand menu, click + Create a resource.
The New page appears.
-
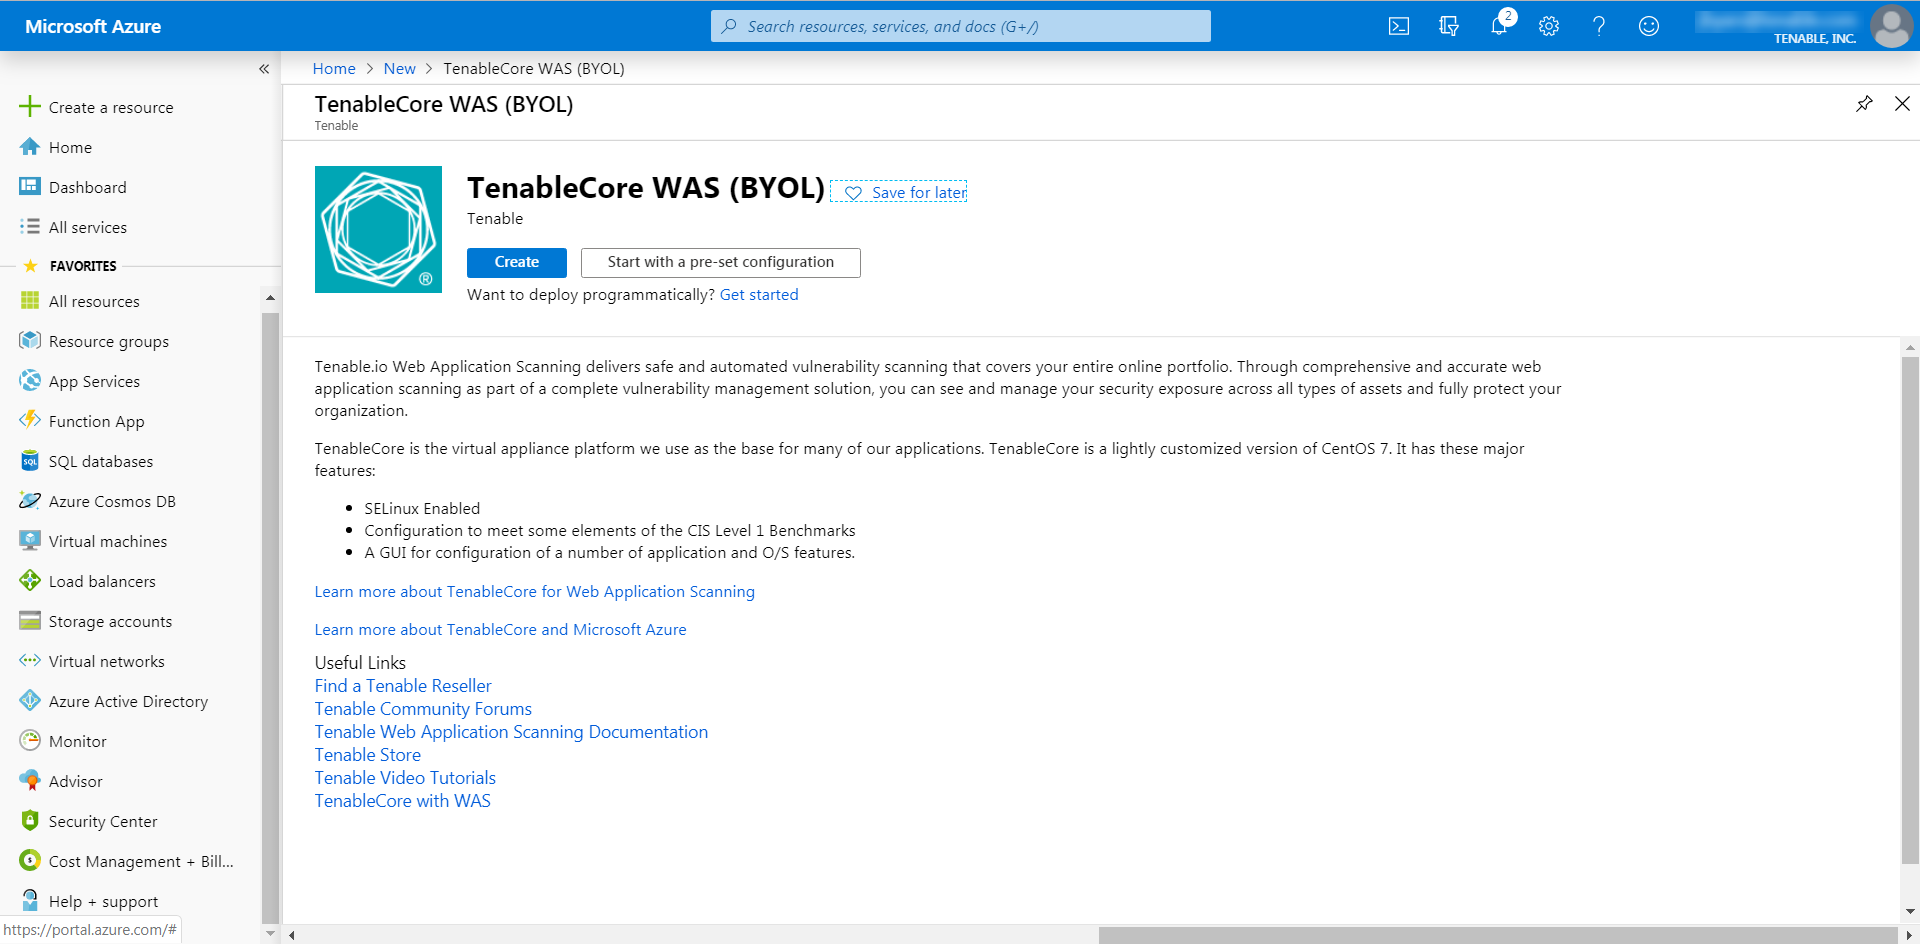
In the search box, type TenableCore WAS (BYOL).
As you type, Tenable options appear.
-
Select the TenableCore WAS (BYOL) option or press enter.
The TenableCore WAS (BYOL) page appears.
-
Click the Create button.
The Create a virtual machine page appears.
-
On the Basics tab, enter the required information for each option in the Project details, Instance details, and Administrator account sections.
Option Description Project Details Subscription The account through which resources are reported and services are billed. Resource Group The collection of resources that share the same lifecycle, permissions, and policies. Instance Details Virtual machine name The name used for both, the virtual machine and host name.
Note: The virtual machine name cannot be changed after the virtual machine is created. You can change the host name when you log into the virtual machine.
Region The regional location most suitable for you and your customers.
Note: Some virtual machine sizes are not available in certain regions.Availability options (Optional) Additional options to help manage availability and resilience of your applications. Provides options to use replicated virtual machines in availability zones or availability settings to protect your applications and data from outages and maintenance events. Image The base operating system or application for the virtual machine. Size The virtual machine size to support the workload you want to run. Administrator Account Authentication Type The type of authentication the administrator uses - SSH or password. Username The administrator username for the virtual machine. SSH Key (Only available when you select SSH for Authentication Type) The single-line RSA public key or multi-line PEM certificate.
For additional information on setting up your SSH account, see Create a Password for the Initial Administrator User Account.
Password (Only available when you select Password for Authentication Type) The administrator password for the virtual machine. Confirm Password (Only available when you select Password for Authentication Type) Verification for the administrator password for the virtual machine.
-
Click the Disks tab.
The Disks page appears.
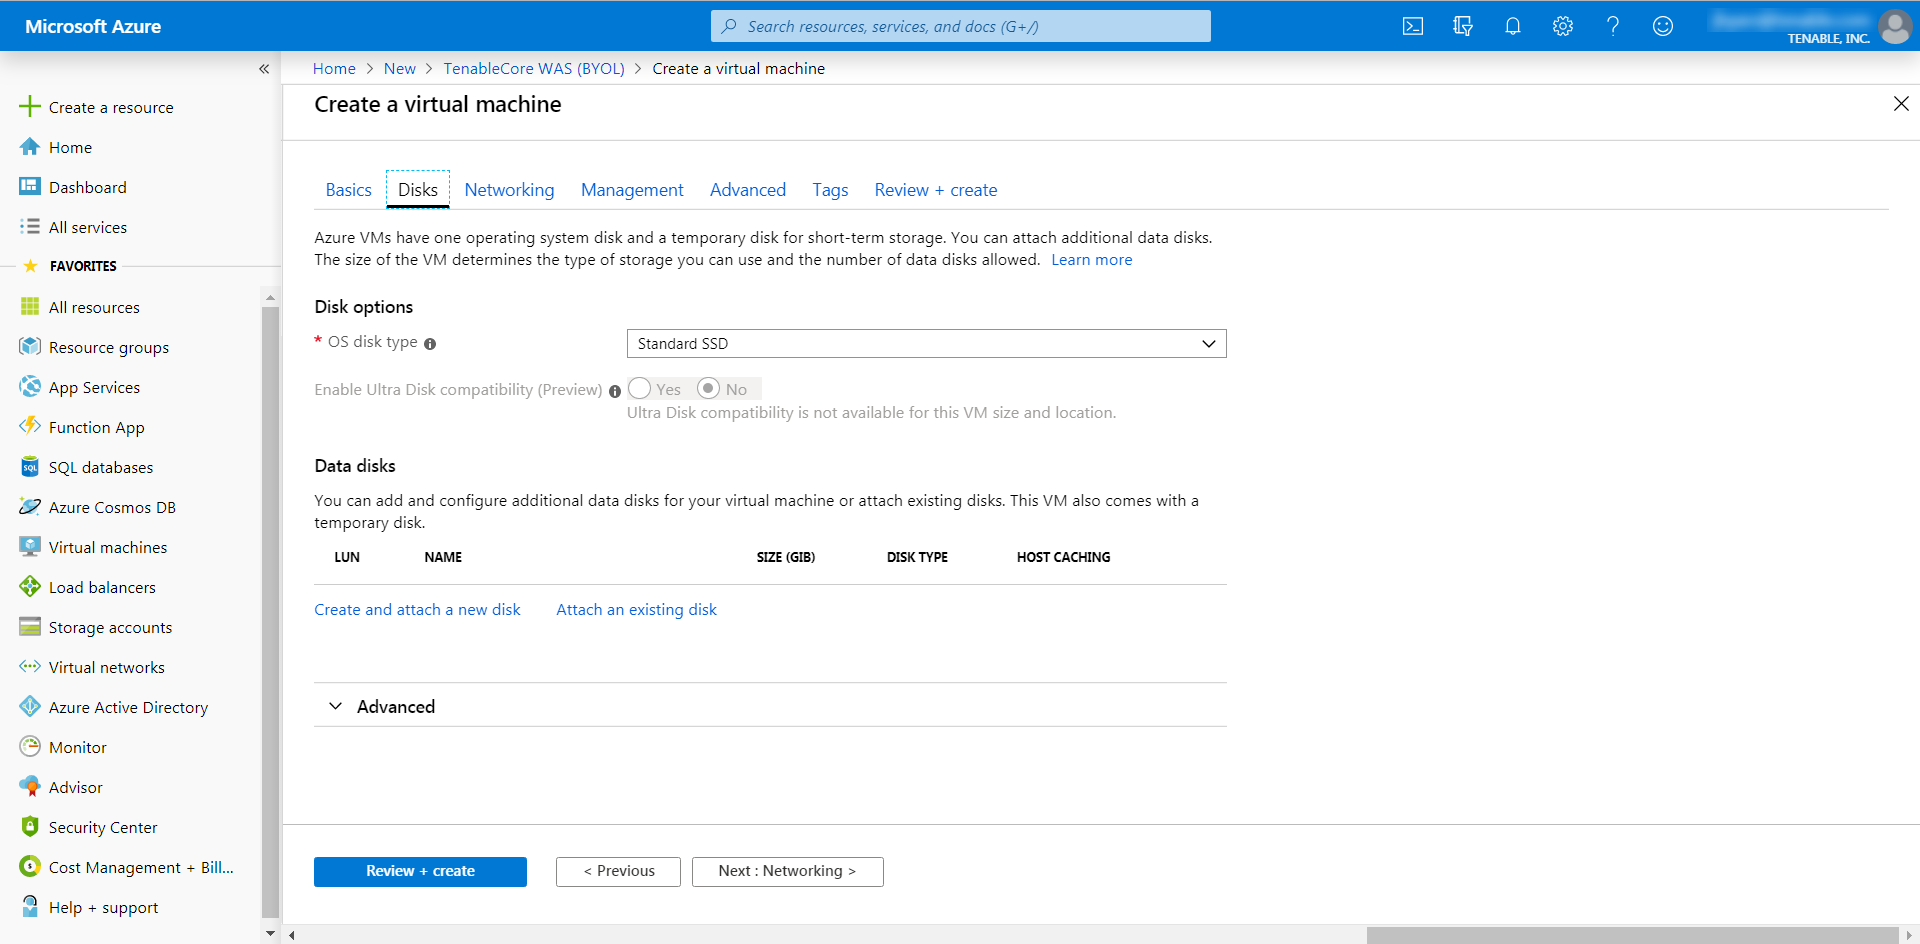
- On the Disks page, in the Disks option section, select an OS disk type from the drop-down.
- (Optional) In the Data disks section, you can add and configure additional data disks or attach existing disks.
-
Click the Networking tab.
The Networking page appears.
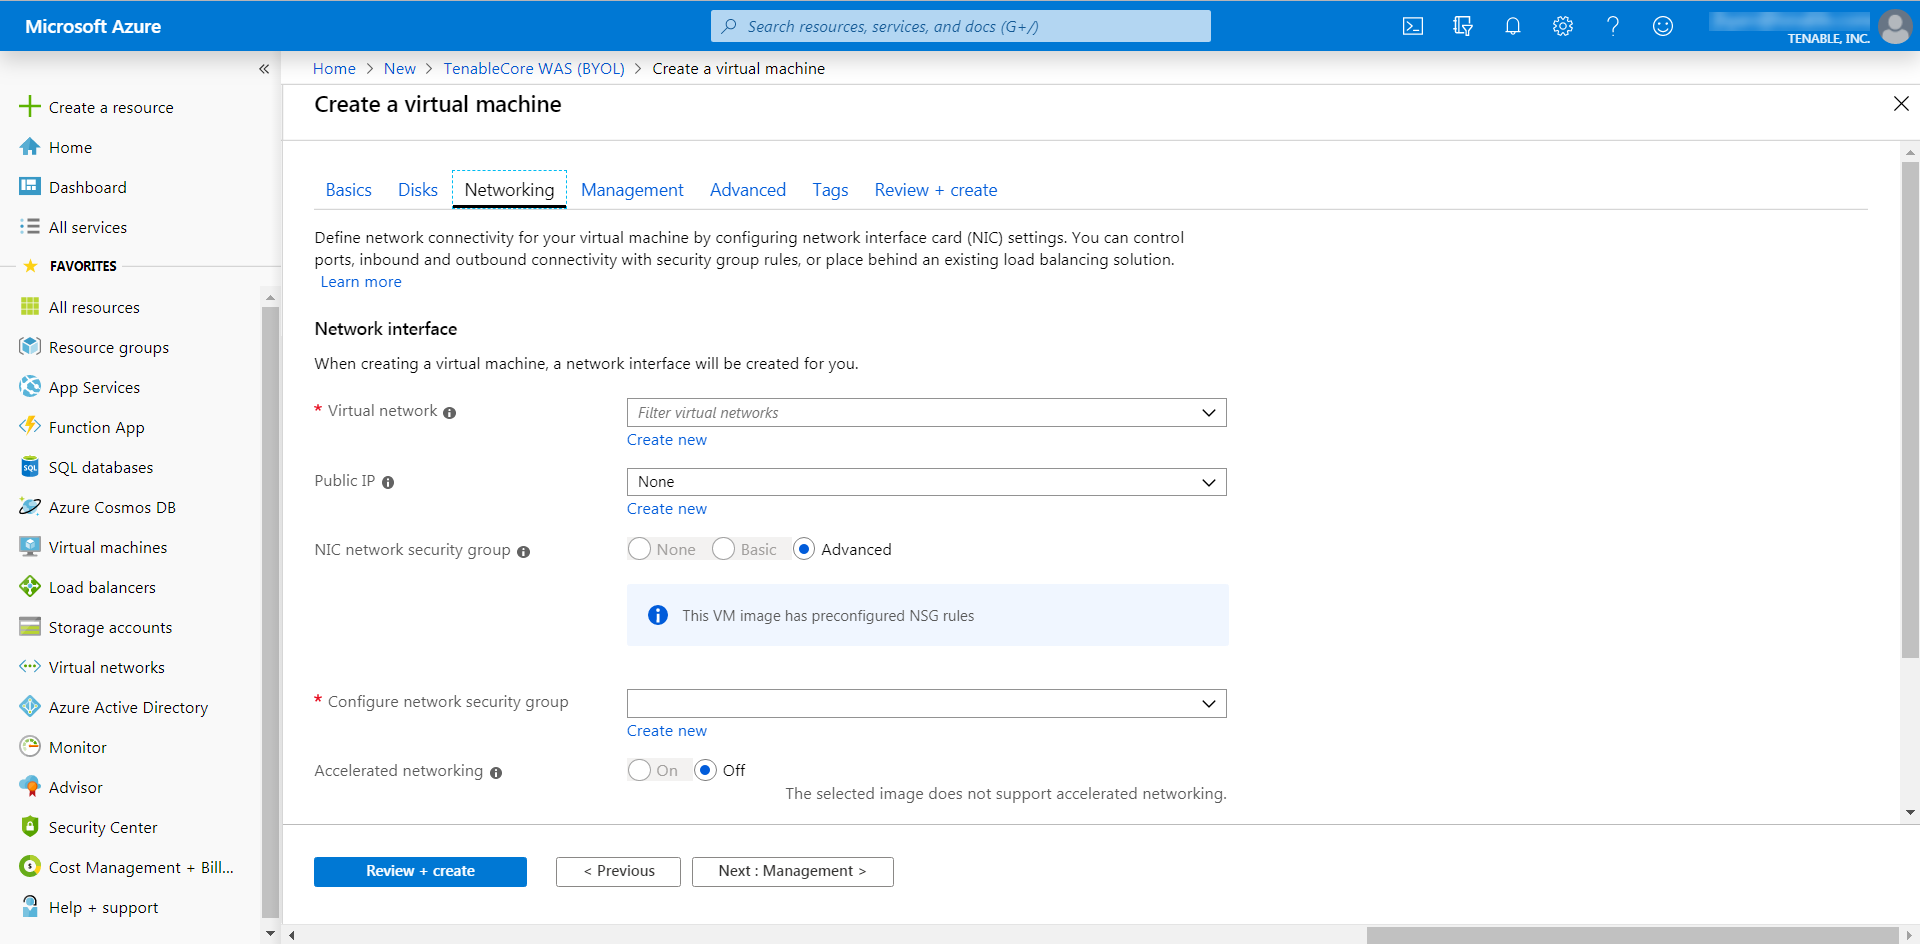
- In the Virtual Network drop-down box, select a network.
- (Optional) Select a Public IP and NIC network security group.
-
In the Configure network group drop-down box, select a resource group.
Note: You can create a new group by clicking the Create new link beneath the drop-down box.
- (Optional) Enable or disable Accelerated networking option.
- (Optional) In the Load balancing option, select to place the virtual machine behind an existing load balancing solution.
-
Click the Management tab.
The Management page appears.
-
Enter your management preferences.
Options Description Monitoring Boot diagnostics (Optional) Enable to capture the serial console output and screenshots of the virtual machine running on a host. OS guest diagnostics (Optional) Enable to receive metrics for your virtual machine. Diagnostic storage account The account used to store your metrics. Identity System assigned managed identity (Optional) Enable to grant permissions using the Azure role-based access control. Microsoft Entra ID Login with AAD credentials (preview) (Optional) Enable to use your corporate Active Directory credentials to log in to the virtual machine, enforce MFA, and enable access via RBAC roles. Auto-shutdown Enable auto-shutdown (Optional) Enable to automatically shutdown your virtual machine daily. -
(Optional) Click the Advanced tab.
The Advanced page appears.
- (Optional) On the Advanced page, enter information for the Extenstions, Cloud init, Host, and VM generation sections.
-
(Optional) Click the Tags tab.
The Tags page appears.
- (Optional) On the Tags page, use the drop-down boxes to create tags to help categorize your resources.
-
Click Review + Create.
The Create a virtual machine page appears, and the system begins a validation process.
After the validation completes, a success message appears at the top of the screen.
-
Click Create.
Azure begins the virtual machine deployment.
After the validation completes, a success message appears.
The TenableCore WAS (BYOL) virtual machine is added to your Resource Groups.
What to do next:
-
To complete the configuration, see Deploy Tenable Core + Tenable Web App Scanning in Microsoft Azure in the Tenable Core for Tenable Web App Scanning user guide.
Note: Microsoft does not require pre-approval to conduct vulnerability scans against Azure resources.