Configure High Availability
You can create a high availability configuration by setting up two-node replication with the ha-manager utility. If you encounter issues during setup, before restarting the configuration process, use --disconnect to disconnect your master and standby nodes without erasing any Log Correlation Engine or PostgreSQL configuration related to high availability.
If you previously configured high availability on your Log Correlation Engine 4.8.4 deployment and want to migrate to Log Correlation Engine 6.0.4 or later, you can upgrade and then re-configure your high availability configuration, as described in Migrate Your High Availability Configuration to Log Correlation Engine 6.0.4 or Later.
For more information about high availability configurations, see High Availability.
Before you begin:
- Confirm the two nodes you intend to use in your high availability configuration have IP addresses in the same broadcast subnet. For example:
- Standby node 192.0.2.10/24, with non-loopback interface bond0
- Master node 192.0.2.11/24 with non-loopback interface eth0
- Consider the following when selecting your virtual IP address:
- If you are converting a single-node Log Correlation Engine deployment to two-node high availability, use the IP address of your current Tenable Log Correlation Engine server as the virtual IP address and assign a new native IP address to your existing server. This enables Tenable Security Center and Tenable Log Correlation Engine clients to continue operations without reconfiguration.
If you are migrating an Log Correlation Engine deployment with high availability configured, use the same virtual IP address you used in your previous configuration.
To configure high availability:
-
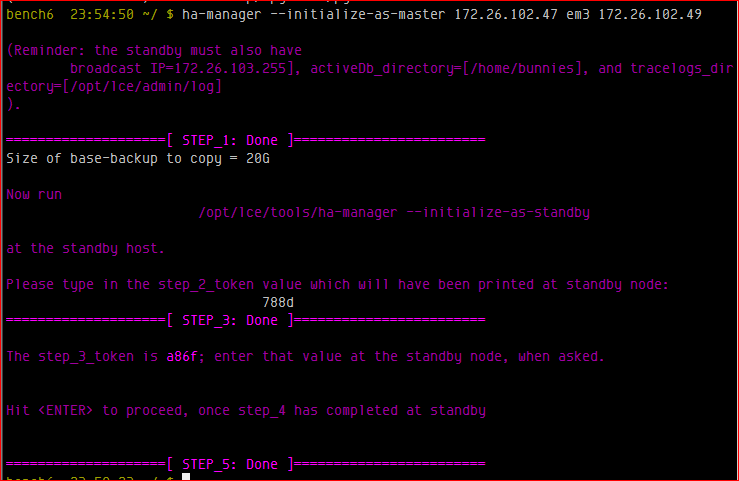
At the master node, run:
ha-manager --initialize-as-master
<standby IP address> eth0 <virtual IP address>
The ha-manager utility initializes setup on the master node.
The ha-manager utility prints the estimated size of the base-backup, a full copy of the master node's activeDb.
-
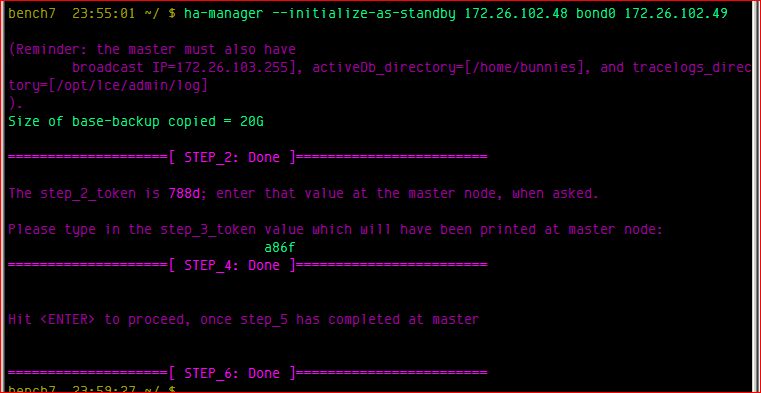
At the standby node, run:
ha-manager --initialize-as-standby
<master IP address> bond0 <virtual IP address>
The ha-manager utility initializes setup on the standby node.
The ha-manager utility sends the base-backup of the master node to the standby node.
The ha-manager utility prints the step_2_token.
The master node prompts you for the step_2_token.
Note: The time to complete this step depends on the size of the base-backup. During the transfer, the ha-manager utility will print and update the total file size transferred so far.
-
At the master node, type the step_2_token and press Enter.
The ha-manager utility runs.
The ha-manager utility prints the step_3_token.
The standby node prompts you for the step_3_token.
-
At the standby node, type the step_3_token and press Enter.
The ha-manager utility runs.
-
When the standby node's ha-manager utility finishes running, at the master node, press Enter.
-
When the master node's ha-manager utility finishes running, at the standby node, press Enter.
-
If only one node has a copy of your SSH keys, run the following command:
/opt/lce/tools/ha-manager --copy-SSH-keys-to-peerLog Correlation Engine copies the SSH keys to the peer node.
Note: To ensure both the master node and standby node can respond to requests from Tenable Security Center, both nodes must have the same SSH keys. If both nodes already have a copy of your SSH keys, skip this step.
What to do next:
- Monitor your high availability status, as described in Monitor Your High Availability Configuration.