Tenable One: Ping Identity IdP
One of the most common IdPs used to configure SAML with Tenable One is Ping Identity. The following steps guide you through the configuration process from start to finish.
Manual configuration requires the following:
-
ACS URL: A custom URL provided by Tenable in the following format:
https://cloud.tenable.com/saml/login/PLACEHOLDERTip: FedRAMP environments use the following custom URL format: https://fedcloud.tenable.com/saml/login/PLACEHOLDER -
Entity ID: A custom ID provided by Tenable during SAML configuration in the following format:
TENABLE_IO_PLACEHOLDER -
A certificate within the SAML metadata object that matches the data originally sent to Tenable.
Note: Tenable does not support the use of multiple certificates and only extracts the first certificate from the metadata object. If the object includes multiple certificates, you must specify which certificate to use if it is not the first one listed. -
A user in Tenable One that also matches a user created within Ping Identity. For more information on creating users, see:
-
Create a User Account in the Tenable Vulnerability Management User Guide
-
Creating Users in the Ping Identity User Guide
-
Ping Identity: Create Temporary Application
To create a temporary application in Ping Identity:
-
In your browser, navigate to the Ping Identity admin portal.
-
In the left navigation menu, navigate to Connections > Applications.
The Applications page appears.
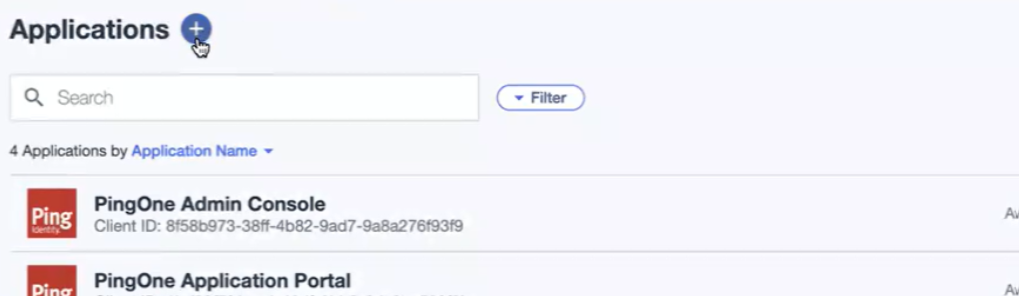
-
At the top of the page, click the
 button.
The Add Application page appears.
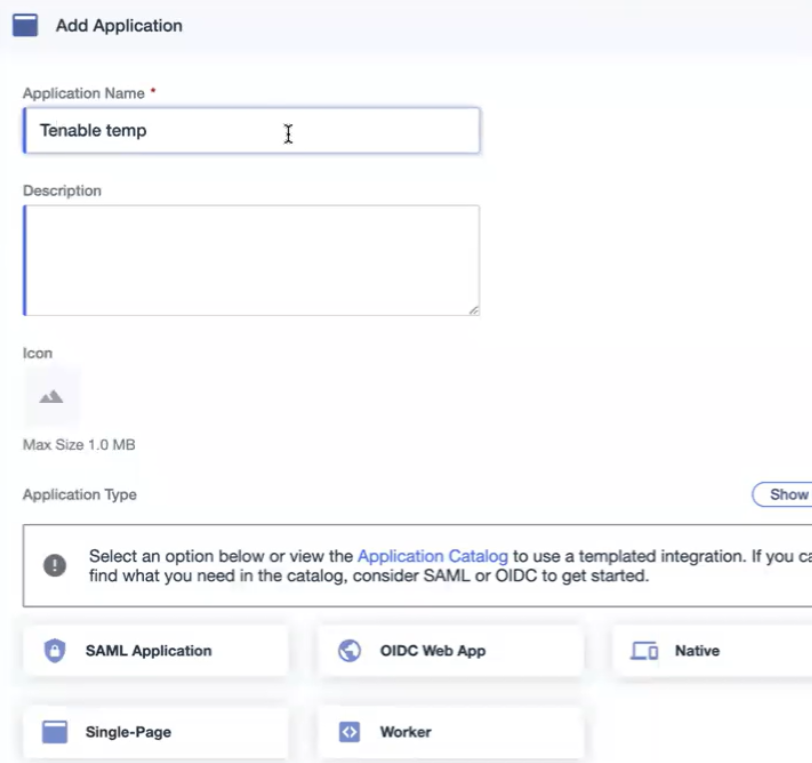
-
In the Application Name box, type a name for your temporary application.
-
Click the SAML Application tile.
-
Click Configure.
The SAML Configuration page appears.
-
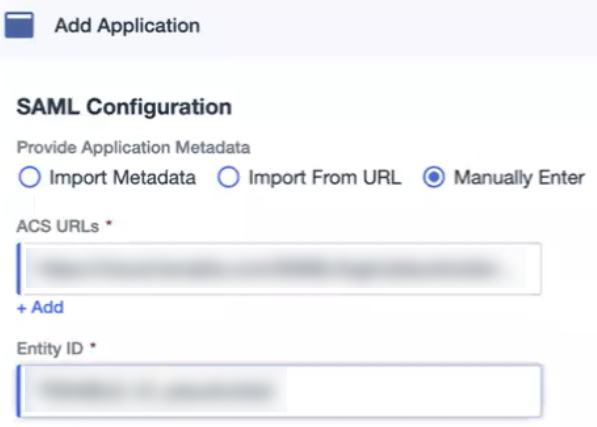
In the Provide Application Metadata section, select the Manually Enter radio button.
-
In the ACS URLs text box, type the following placeholder text:
https://cloud.tenable.com/saml/login/PLACEHOLDERNote: You will later replace PLACEHOLDER with a unique UUID for the SAML configuration. This link is case-sensitive. -
In the Entity ID text box, type the following placeholder text:
TENABLE_IO_PLACEHOLDERNote: You will later replace PLACEHOLDER with a unique UUID for the SAML configuration. -
Click Save.
A success message appears and Ping Identity directs you to an overview page for the application.
-
At the top of the page, click Configuration.
The Connection Details appear.
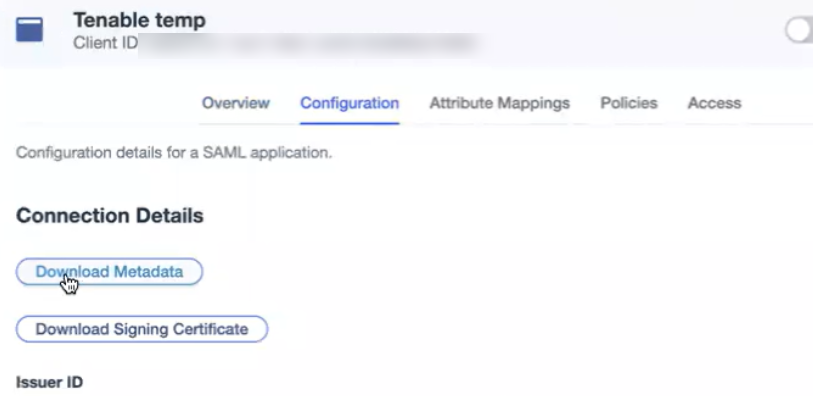
-
Click Download Metadata.
Your browser downloads the metadata.xml file.
Tenable One SAML Configuration
Once you have downloaded your medata.xml file, you can use it to configure SAML in Tenable One. You can configure this directly in the Tenable Vulnerability Management application.
To set up the Tenable One SAML configuration:
- In your browser, navigate to Tenable One.
- On the Workspace page, click Tenable Vulnerability Management.
The Tenable Vulnerability Management user interface appears.
-
In the upper-left corner, click the
 button.
 The left navigation plane appears.
-
In the left navigation plane, click Settings.
The Settings page appears.
-
Click the SAML tile.
The SAML page appears.
-
In the action bar, click
Create.The SAML Settings page appears.
-
Do one of the following:
 To provide configuration details by uploading the metadata.xml file from your IdP:
-
In the first drop-down box, select Import XML.
Note: Import XML is selected by default.
-
The Type drop-down box specifies the type of identity provider you are using. Tenable One supports SAML 2.0 (for example, Okta, OneLogin, etc.).
This option is read-only. -
Under Import, click Add File.
A file manager window appears.
-
Select the metadata.xml file.
The metadata.xml file is uploaded.
To manually create your SAML configuration using data from the metadata.xml file from your IdP:
-
In the first drop-down box, select Manual Entry.
A SAML configuration form appears.
-
Configure the settings described in the following table:
Settings Description Enabled toggle A toggle in the upper-right corner that indicates whether the SAML configuration is enabled or disabled.
By default, the Enable setting is set to Enabled. Click the toggle to disable SAML configuration.
Type Specifies the type of identity provider you are using. Tenable One supports SAML 2.0 (for example, Okta, OneLogin, etc.).
This option is read-only.Description A description for the SAML configuration. IdP Entity ID The unique entity ID that your IdP provides.
Note: If you want to configure multiple IdPs for a user account, create a new configuration for each identity provider with separate identity provider URLs, entity IDs, and signing certificates.
IdP URL The SAML URL for your IdP. Certificate Your IdP security certificate or certificates.
Note: Security certificates are found in a metadata.xml file that your identity provider provides. You can copy the content of the file and paste it in the Certificate box.
Authentication Request Signing Enabled A toggle that indicates whether authentication request signing is enabled.
When this toggle is enabled, if:
-
a user is logged in via SAML and their session expires
-
a user logs out and tries to log back in directly via the Tenable One interface rather than their IdP
Tenable One automatically signs the SAML authentication request that is sent to the IdP to log the user back in.
Note: The authentication request can only be validated if the IdP is also configured to accept this setting. For more information, see the following resources:- Manage Signing Certificates in Okta
- Enforce Signed SAML Authentication Requests in Microsoft Entra ID
- Edit a SAML Application in Ping Identity (Enforce Signed AuthnRequest option)
User Auto Provisioning Enabled A toggle that indicates whether automatic user account creation is enabled or disabled. Automatic account provisioning allows users with an account for the IdP named in the SAML configuration to create a Tenable Vulnerability Management account the first time they log in via the IdP.
Note: This option only appears during intial configuration if the setup is manual. Otherwise, you must edit the configuration after initial setup to enable this option.IdP Assigns User Role at Provisioning To assign a user role during provisioning, enable this toggle. In your SAML identity provider, add an attribute statement with userRoleUuid as the attribute name and the user role UUID as the attribute value. To obtain the UUID for a user role, go to Settings > Access Control > Roles.
Note: This option only appears during intial configuration if the setup is manual. Otherwise, you must edit the configuration after initial setup to enable this option.Note: To access this option, you must first enable the User Autoprovisioning Enabled option.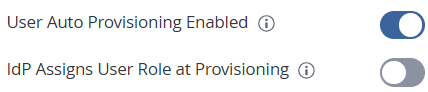
IdP Resets User Role at Each Login To assign a role each time a user logs in, overwriting the current role with the one chosen in your IdP, enable this toggle. In your SAML identity provider, add an attribute statement with userRoleUuid as the attribute name and the user role UUID as the attribute value.
To obtain the UUID for a user role, go to Settings > Access Control > Roles.
Note: This option only appears during intial configuration if the setup is manual. Otherwise, you must edit the configuration after initial setup to enable this option.Group Management Enabled Enable this toggle to allow the Tenable One SAML configuration to manage user groups. You must enable this toggle for the Managed by SAML option to function successfully. -
-
-
Click Save.
Tenable Vulnerability Management saves your SAML configuration and you return to the SAML page.
-
In the row for the SAML configuration you just created, click the
 button.
An actions menu appears.
-
Click Download SAML SP metadata.
Your browser downloads the metadata.xml file. You can now use this file for final configuration in your IdP.
Optional: Configure One or More User Groups to Automatically Add a User upon SAML Login
User groups allow you to manage user permissions for various resources in Tenable One. When you assign users to a group, the users inherit the permissions assigned to the group. When you enable the Managed by SAML option for a user group, Tenable One allows you to automatically add any user that logs in via SAML to that group.
Before you begin:
Ensure you've enabled the Group Management Enabled toggle when configuring the SAML settings within Tenable One.
To enable the Managed by SAML option:
-
In Tenable Vulnerability Management, in the upper-left corner, click the
button. The left navigation plane appears.
-
In the left navigation plane, click Settings.
The Settings page appears.
-
Click the Access Control tile.
The Access Control page appears.
-
Click the Groups tab.
The Groups page appears.
-
In the user groups table, click the user group to which you want to automatically add your SAML users.
The Edit User Group page appears.
-
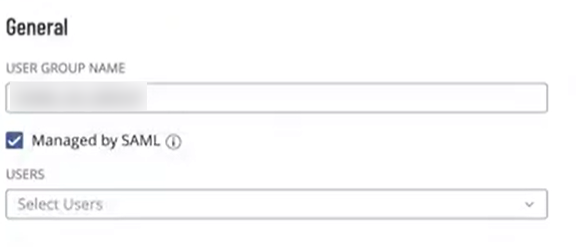
In the General section, select the Managed by SAML check-box.
-
Click Save. Tenable Vulnerability Management saves your changes. Once you configure the related claim within your IdP, any time a user logs in via your SAML configuration, Tenable One automatically adds them to the specified user group.
Ping Identity: Create Permanent Application and Import Metadata
Now that you have downloaded the completed metadata file, you can use that file to create a permanent Tenable application in Ping Identity.
-
In your browser, navigate to the Ping Identity admin portal.
-
In the left navigation menu, navigate to Connections > Applications.
The Applications page appears.
-
Delete the temporary application you previously created.
-
At the top of the page, click the
button.The Add Application page appears.
-
In the Application Name box, type a name for your permanent application.
-
Click the SAML Application tile.
-
Click Configure.
The SAML Configuration page appears.
-
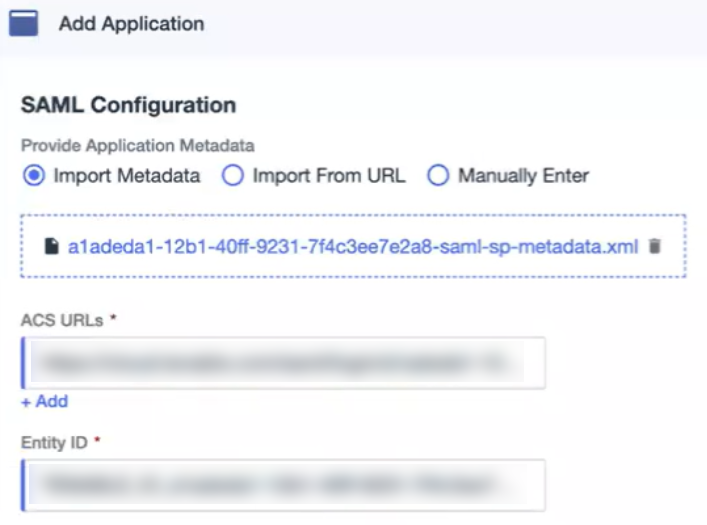
In the Provide Application Metadata section, select the Import Metadata radio button.
-
In your file manager, select the Service Provider metadata.xml file that you downloaded from Tenable Vulnerability Management.
Ping Identity imports the metadata from the file, including the ACS URL and Entity ID specific to the SAML configuration.
-
Click Save.
-
On the Applications page, enable the toggle for the permanent Tenable application you created.

-
Click the name of the application you created.
The overview page for the application appears.
-
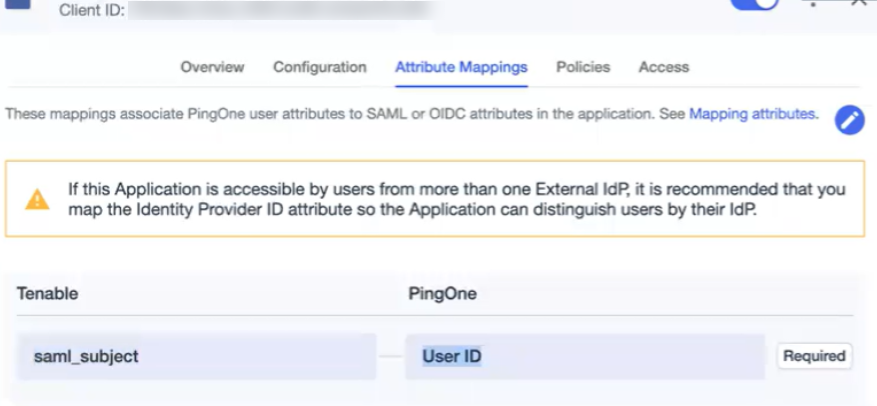
At the top of the page, click the Attribute Mappings tab.
Attribute mapping options appear.
-
In the upper-right corner, click the
 button.
The PingOne Mappings item becomes editable.
-
In the drop-down menu, select Email Address.
-
Click Save.
Ping Identity saves your changes to the permanent application, and your SAML configuration is ready for use.
Optional: Finalize Configuration for Managed by SAML Group Option
If you configured the Managed by SAML option to automatically add any user that logs in via SAML to a user group, then you must configure a related group claim within the Microsoft Entra ID IdP.
To configure the IdP group claim:
-
In Ping Identity, on the overview page for your application, click the Attribute Mappings tab.
Attribute mapping options appear.
-
In the upper-right corner, click the
button. -
Add a new attribute mapping:
-
In the Tenable column, type groups.
-
In the PingOne column, select Group Names.
-
-
Click Save. Any time a user logs in via your SAML configuration, Tenable One automatically adds them to the specified user group in Tenable One.
Additional Resources
For more information on Ping Identity IdP configuration, see the following resources: