Configuring Policies for Syslog Notifications
After you configure a syslog server in OT Security, you can configure specific policies to send notifications to the syslog server. When creating new policies, you can select the syslog server as a destination for the alert notifications. You can also edit existing policies to add the syslog server as a destination for alert notifications. Ensure that you enable the relevant policy to generate alerts.
-
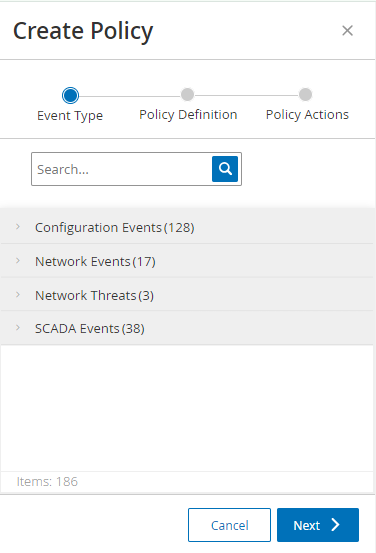
On the Policies page, click Create Policy.
The Create Policy panel appears.
-
Click a Policy Category to show the sub-categories and/or Policy Types.
A list of all sub-categories and/or types included in that category appears.
-
Select a policy type.
-
Click Next.
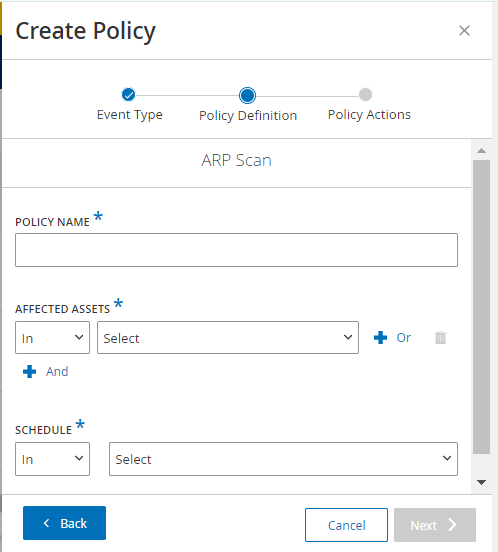
A series of parameters for defining the policy appear. This includes all relevant policy conditions for the selected Policy Type.
-
In the Policy Name box, type a name for this policy.
Note: Choose a name that describes the specific nature of the event type that the policy is configured to detect.
-
In the Affected Assets section:
Important: You cannot edit the Source and Destination asset groups for Intrusion Detection System (IDS) events.-
Select In (default) to allow the selected element or Not in to block the selected element.
-
From the drop-down list, select the relevant elements such as Asset Group, Network Segment, Port Group, Schedule Group, and so on.
-
Select the required element.
Note: If the grouping to which you want to apply the policy does not exist, you can create a new group according to your requirements, see Groups. -
(Optional) For Asset parameters (Source, Destination, and Affected Assets): To add an additional Asset Group or Network Segment with an Or condition, click the blue + Or button next to the box, and select another Asset Group or Network Segment.
-
(Optional) For Asset parameters (Source, Destination, and Affected Assets): To add an additional Asset Group or Network Segment with an And condition, click the blue + And button next to the box, and select another Asset Group or Network Segment.
-
-
Click Next.
A series of Policy Action parameters appears. These are the actions that OT Security takes when it encounters a policy hit.

-
In the Severity section, click the required severity level for this policy.
-
To send event logs to one or several syslog servers: In the Syslog section, select the checkbox next to each server to receive the event logs.
Note: To add a Syslog server, see Syslog Servers in the OT Security User Guide.
-
To send email notifications for events: In the Email drop-down box, select the email group to notify.
Note: To add an SMTP server, see SMTP Servers in the OT Security User Guide.
-
In the Additional Actions section, the relevant specified action:
-
To disable the policy after the first policy hit occurs, select the Disable policy after first hit checkbox. This action is relevant for some types of Network Event Policies and some types of SCADA Event policies.
-
To initiate an automatic snapshot of the affected asset whenever a policy hit is detected, then select the Take snapshot after policy hit checkbox. This action is relevant for some types of Configuration Events policies.
-
-
Click Create.
OT Security creates and activates the new policy. The new policy appears on the Policies page. Once activated, this policy starts generating policy-hit alerts.
-
On the Policies page, select the required policy.
-
From the Actions menu, select Edit.
The Edit Policy panel appears with the current configuration.
-
Click Next.
A series of Policy Action parameters appears. These are the actions that OT Security takes when it encounters a policy hit.
-
To send the event logs to one or several syslog servers: In the Syslog section, select the checkbox next to each server to receive the event logs.
-
Click Save.
OT Security saves the policy with the new configuration.