Create a New Repository + Scan Zone
The creation of a new repository and scan zone ensures that existing data won’t be affected. To create a new repository and scan zone:
-
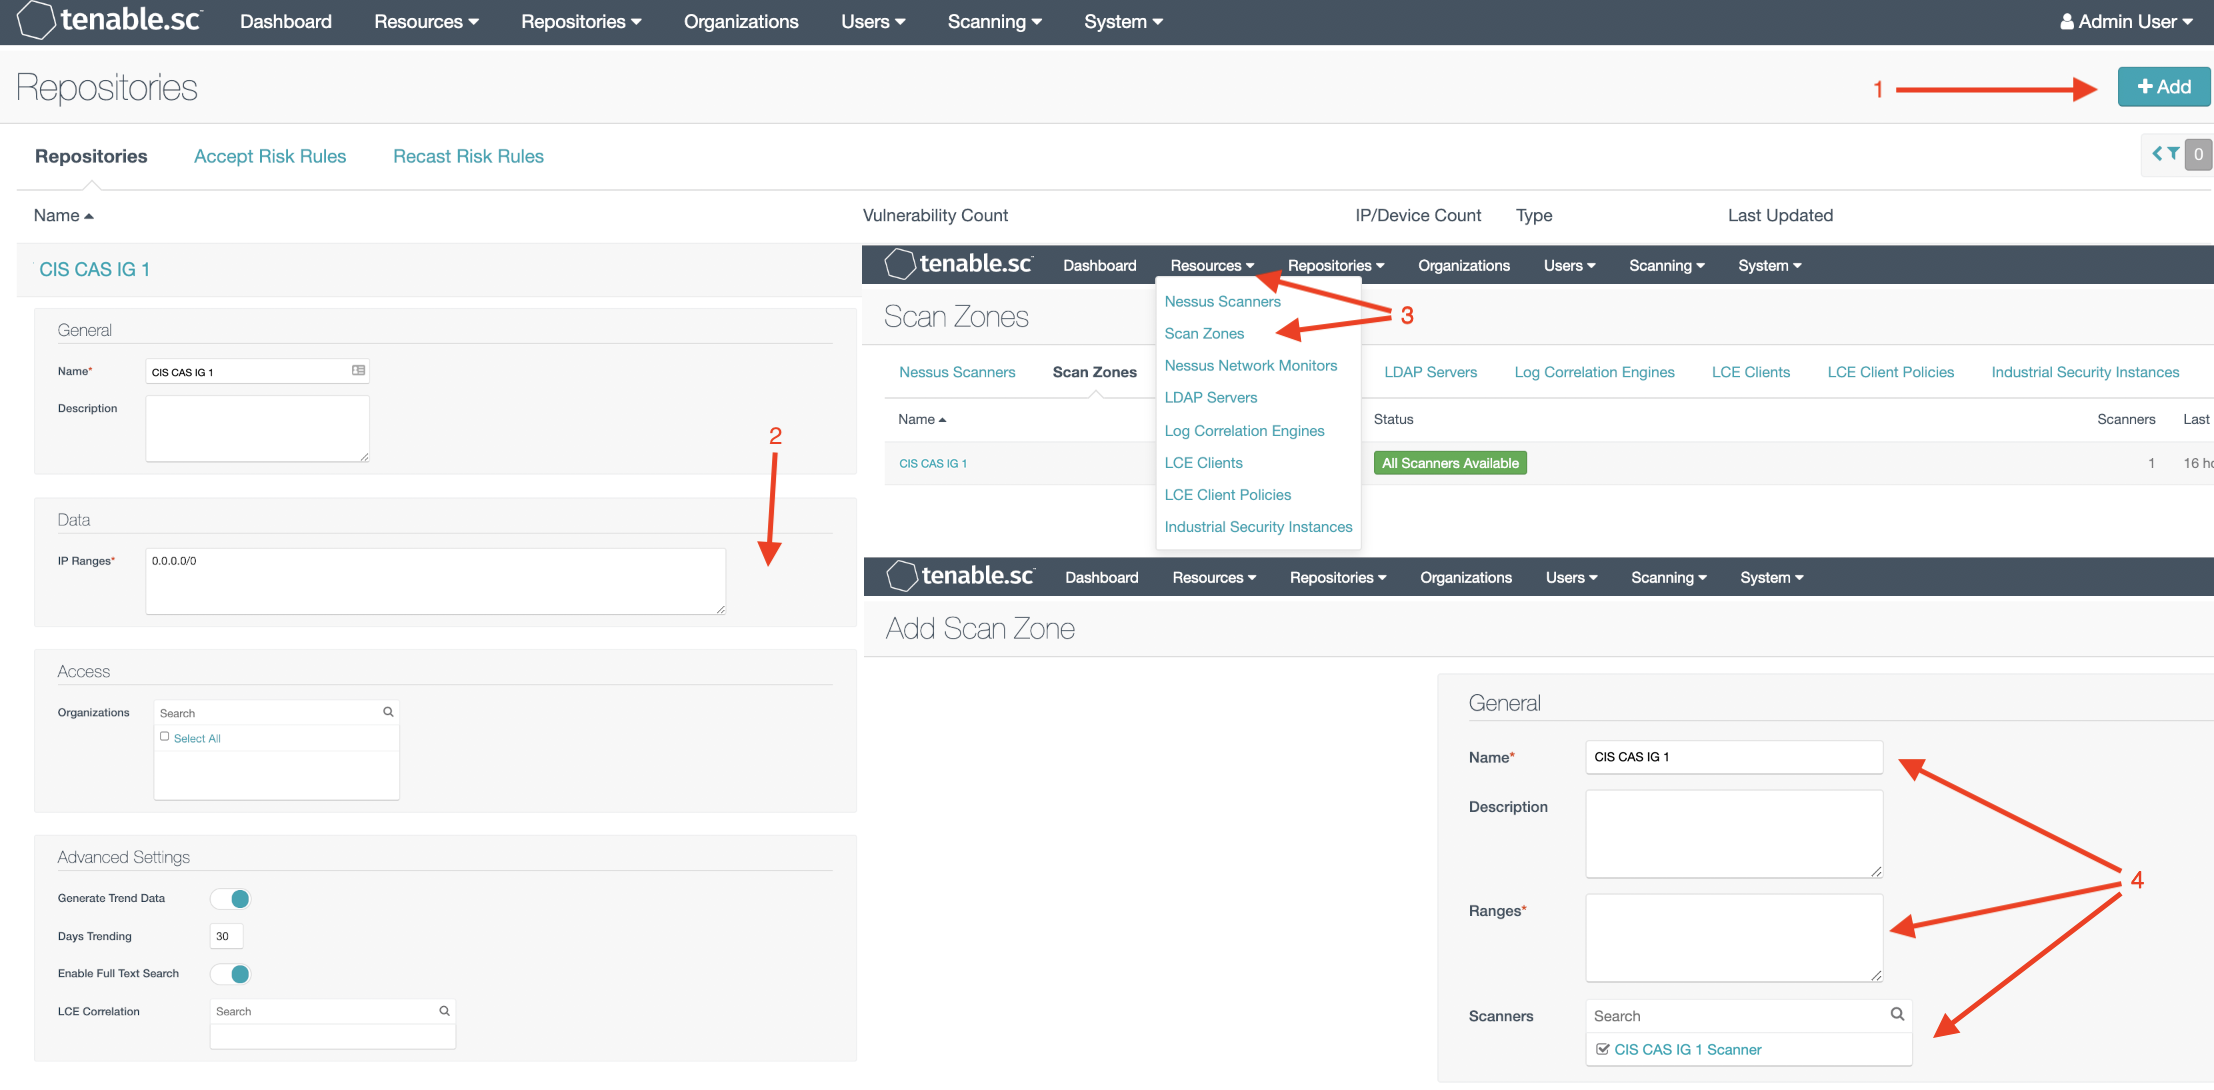
While logged in as an admin user, navigate to Repositories and click Add button. You should then select IPv4 repository.
-
Enter a name in the Name field and an IP range in the IP Ranges field. The IP range should be just the system that will be scanned to ensure that no other targets are scanned. Additionally, ensure that an organization is selected to allow a security manager to access the repository.
-
Under the Resources menu in the top bar, click Scan Zones.
-
Enter the required fields, Name and Ranges. The IP range should be just the system that will be scanned to ensure that no other targets are scanned. Ensure a scanner is selected.
After creating the repository and scan zone, the next step is to prepare the requirements for the scan (Audit file, Credentials, and Policy). The credentials for the target should be known, therefore they will be re-used. Next the audit file must be imported before creating the policy. The questions for the audit file are listed in CAS Implementation Group 1 Audit Questions along with the possible values. Please refer to the questions before uploading the audit file.
The scan will use a Policy Compliance Auditing policy since the scan will be run on a known target, but if the scan will be done on a new target it may be helpful instead create a custom policy with only the “General”, “Policy Compliance”, and “Settings” plugin families enabled. Having the custom policy for the scan will allow the user to troubleshoot the scan easily if something fails (ex. credentials).