Manage Proxy Server Usage
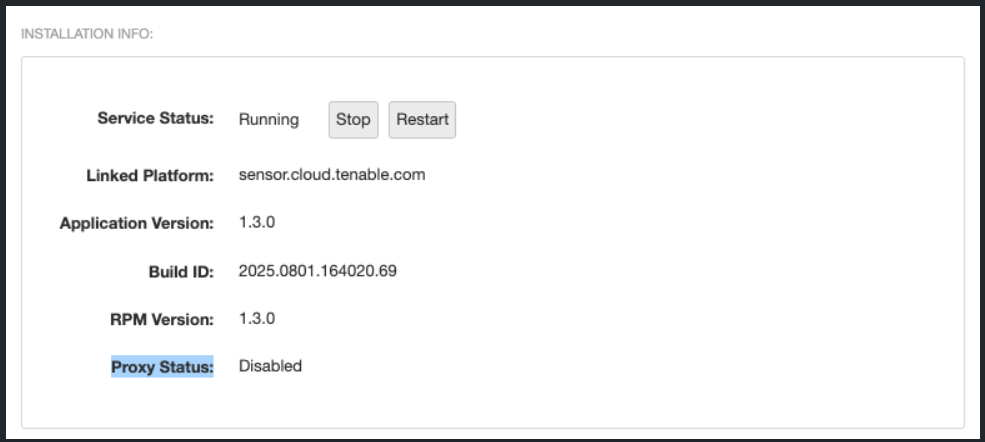
Tenable Core + Sensor Proxy displays Installation Info and Proxy Configuration on the Sensor Proxy page. The Installation Info section displays the proxy status as Disabled (if no proxy is configured) or displays the proxy host information (if a proxy is configured). In the Proxy Configuration section, you can enable and configure the proxy or disable the proxy and use your own manual setup.
Note: The Manage Proxy Server Usage features are supported for Sensor Proxy versions 1.3.0 and later.
-
Log in to Tenable Core via the user interface.
The Tenable Core web user interface page appears.
-
In the left navigation bar, click Sensor Proxy.
The Sensor Proxy page appears.
-
In the Installation Info section, in the Proxy Status field, view the current status
Note: The Proxy Status can be the proxy's current URL or Disabled.
-
Log in to Tenable Core via the user interface.
The Tenable Core web user interface page appears.
-
In the left navigation bar, click Sensor Proxy.
The Sensor Proxy page appears.
-
In the Proxy Configuration section of the page, select one of the three choices:
Proxy Method Description No Proxy Disables the proxy.
System Proxy Enables the use of the System Proxy settings configured via Tenable Core in the Updates > Proxy Configuration page. For more information on proxy server configuration, refer to Configure a Proxy Server. Tip: You can also check or edit your current settings in the Proxy Configuration page by selecting the
 icon.
icon.Manually Configured Proxy Displayed only if you have a manually configured proxy. For more information on manual proxy server configuration, refer to Configure Sensor Proxy to Use a Third-Party HTTP Proxy in the Sensor Proxy User Guide. Note: If you switch from a Manually Configured Proxy to either No Proxy or a System Proxy, a confirmation pop-up appears to proceed with removing or replacing your proxy environment file.
-
Click Apply Proxy Settings.
A confirmation message appears, and Tenable Core applies your configuration changes.
