Configure a Simple Matrix Dashboard Component
Required User Role: Organizational user with appropriate permissions. For more information, see User Roles.
For more information, see Dashboards and Matrix Component Options.
Before you begin:
-
Begin adding a custom matrix dashboard component, as described in Add a Custom Dashboard Component.
To construct a simple matrix dashboard component:
-
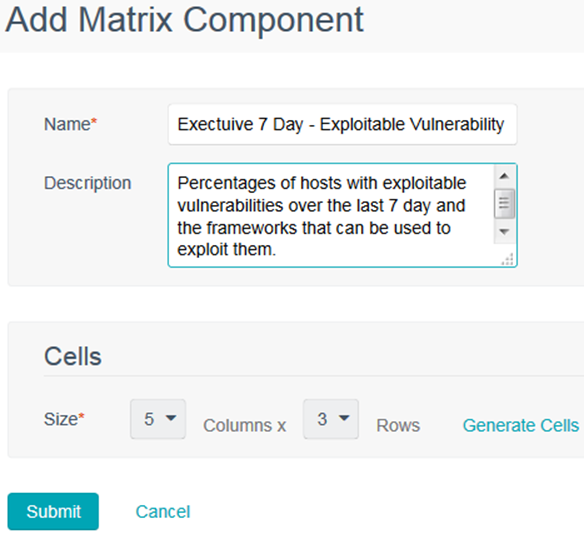
On the Add Matrix Component page, in the Name box, type a name for the dashboard component.
-
Type a Description for the dashboard component.
-
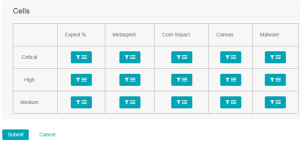
In the Cells section, select the number of Columns and Rows for the matrix.

For example, 5 columns and 3 rows.
-
Click Generate Cells.
The matrix editor appears.
-
Next to the header label, click the

The actions menu appears.
-
Click Edit Header.
-
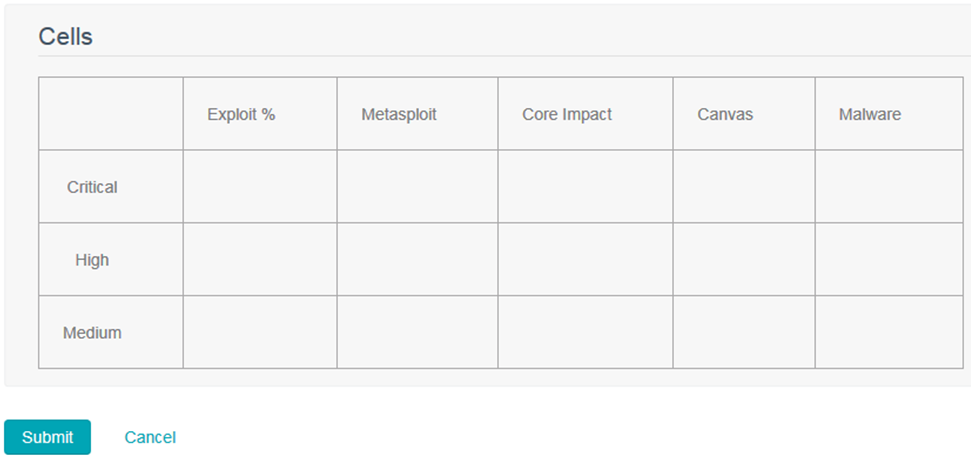
Type a Label for the column or row header.
-
Click Submit.
The matrix editor appears, with the new header label displayed.
-
Repeat the header label steps for the other header cells.
-
Hover over the body cells and click the edit icon.
The Add Matrix Component page appears.
-
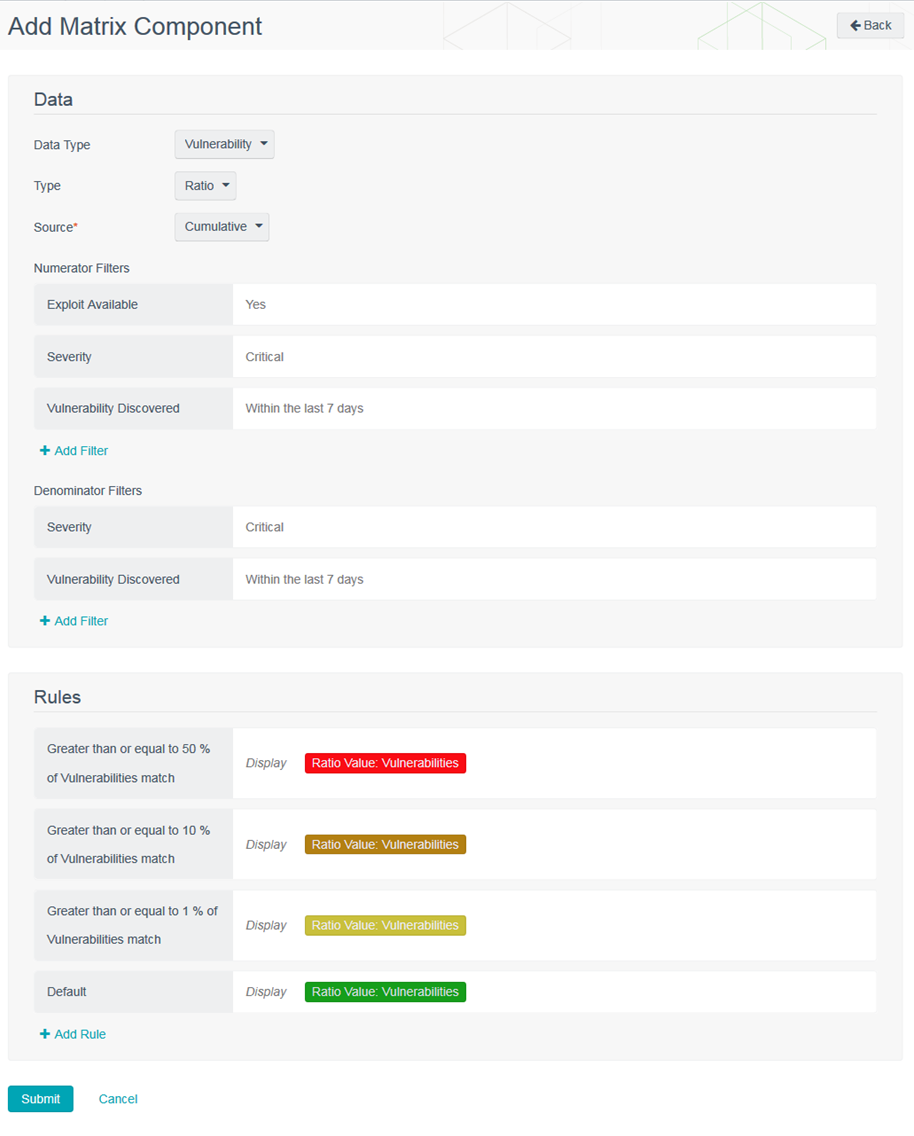
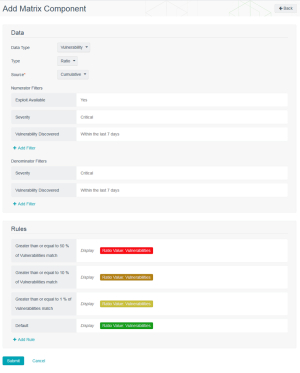
Customize the matrix component options.
For example, this matrix component displays Vulnerability data by a ratio from the Cumulative database. The numerator filters are looking for vulnerabilities that have an exploit available with a Critical severity discovered within the last 7 days. The Denominator filters are for vulnerabilities that have a Critical severity discovered within the last 7 days. The rules are looking for percentages of the vulnerabilities that match and designate the ratio value with the corresponding color based on the percentages found.
-
Repeat the body cell steps for the other body cells.
In the example above, the other cells are similar with many of the same rules. The differences are adding a Numerator filter to include the Exploit Framework we are looking for and a Denominator filter for the Exploit Available option.
-
Click Submit.
The matrix element appears.