Create a User Group
Required User Role: Administrator
To create a user group:
-
In the upper-left corner, click the
 button.
 The left navigation plane appears.
-
In the left navigation plane, click Settings.
The Settings page appears.
-
In the left navigation, click
 Settings.
The Settings page appears.
-
Click the Access Control tile.
The Access Control page appears. On this page, you can control user and group access to resources in your Tenable Web App Scanning account.
-
At the top of the user group table, click the
 Create User Group button.
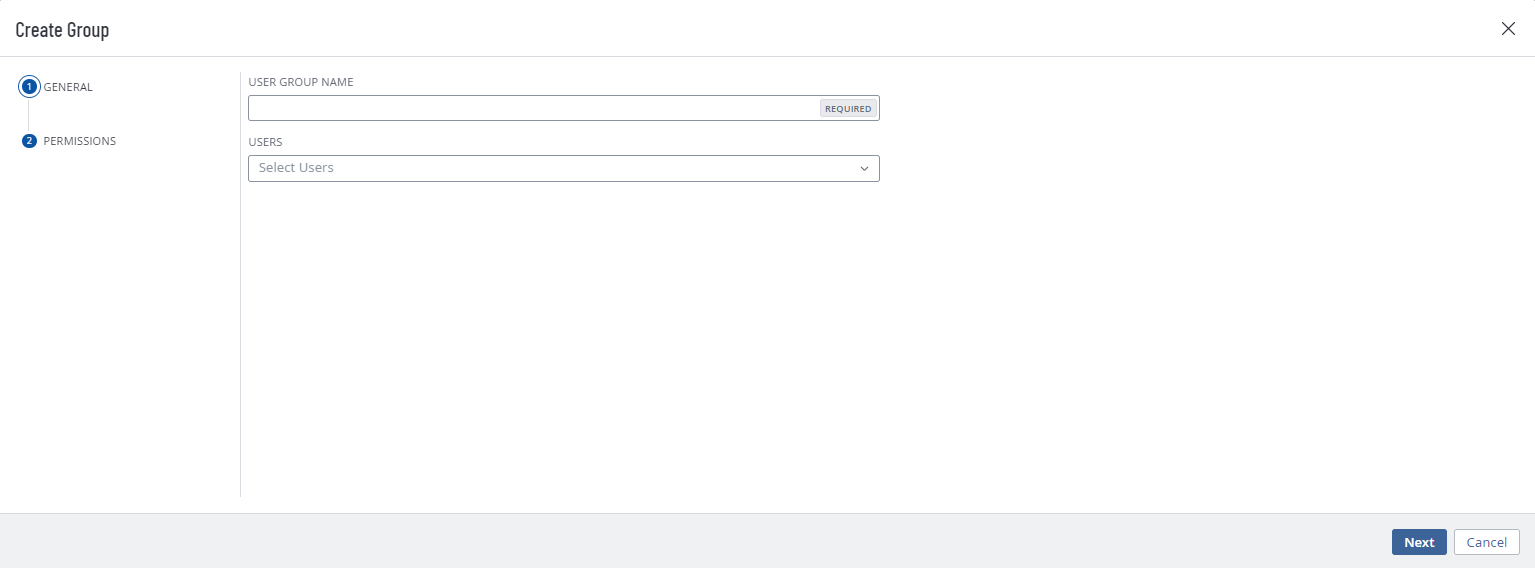
The Create Group page appears.
- In the User Group Name box, type a name for the new group.
-
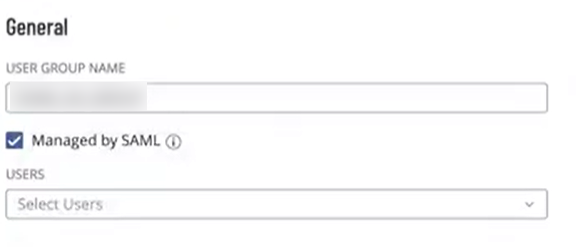
 (Optional) If you want to enable Tenable Vulnerability Management to automatically add users who log in using your SAML configuration to this user group, in the General section, select the Managed by SAML checkbox.
Important: For this feature to function successfully, you must also enable the Group Management Enabled toggle when creating/editing your SAML configuration. For more information on SAML configuration steps, see the SAML Quick Reference Guide.
(Optional) If you want to enable Tenable Vulnerability Management to automatically add users who log in using your SAML configuration to this user group, in the General section, select the Managed by SAML checkbox.
Important: For this feature to function successfully, you must also enable the Group Management Enabled toggle when creating/editing your SAML configuration. For more information on SAML configuration steps, see the SAML Quick Reference Guide.Once you configure the related claim within your IdP, anytime a user logs in via your SAML configuration, Tenable Vulnerability Management automatically adds them to the specified user group.
-
Add users to the group:
-
For each user you want to add, click the Users drop-down box and begin typing a username.
As you type, Tenable Web App Scanning filters the list of users in the drop-down box to match your search.
-
Select a user from the drop-down box.
Tenable Web App Scanning adds the user to the list of users to be added to the user group.
Tip: To remove a user from the list of users to be added, roll over the user and click the
 button.
-
-
Click Save.
Tenable Web App Scanning creates the user group and adds the listed users as members.
The Groups page appears, where you can view the new group listed in the user groups table.

