Monitored Networks
The Monitored Network configuration contains a set of IP ranges (CIDRs / subnets) that define the monitoring boundaries for OT Security. OT Security ignores assets outside of the configured ranges.
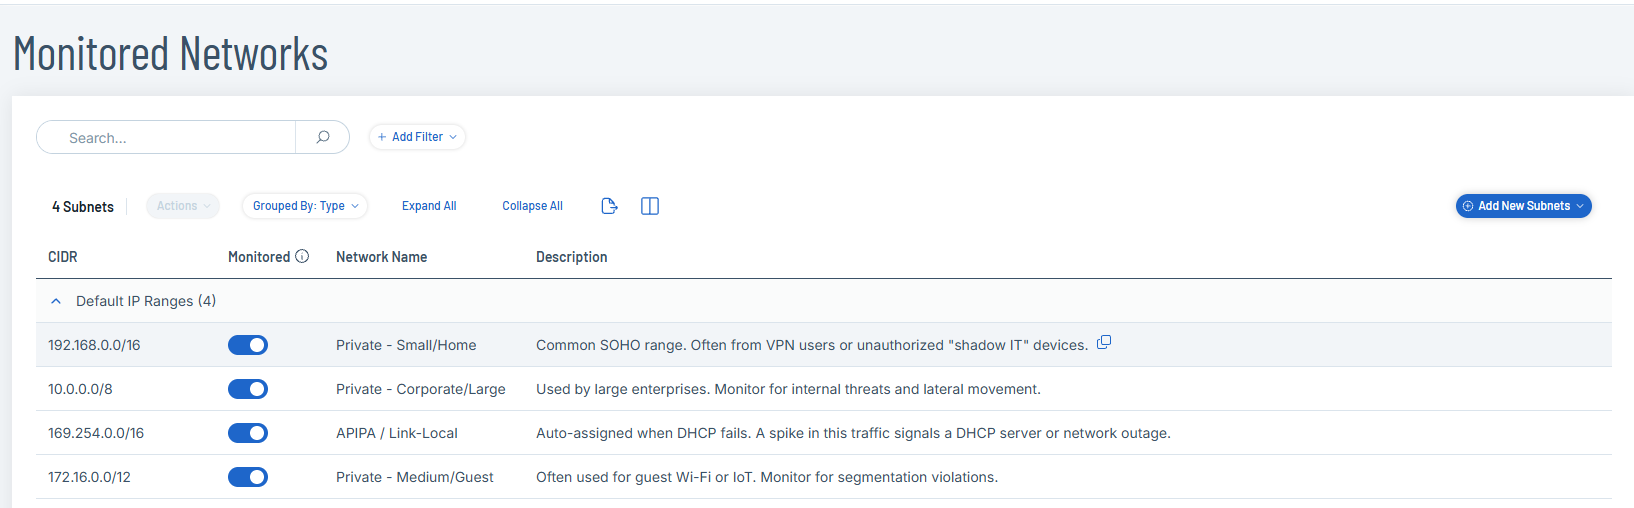
By default, OT Security configures three default public ranges: 10.0.0.0/8, 172.16.0.0/12, and 192.168.0.0/16, as well as the link-local range of 169.254.0.0/16 (APIPA).
For Nessus Network Monitor (NNM) components, OT Security processes only the first 128 entries.
To disable any of the default ranges or add ranges appropriate for your network:
-
Go to Settings > Environment Settings > Monitored Networks.
The Monitored Networks page appears.
-
Customize tables as required. See Customize Tables.
-
The Monitored Networks table includes the following details:
Column Description Default IP Ranges and Custom IP Ranges The Default IP Ranges section displays the default IP ranges configured in OT Security.
The Custom IP Ranges section displays any IP range that you create.
CIDR The CIDR column displays the IP addresses to monitor. Monitored Click to enable or disable the monitoring of the configured IP addresses. Network Name The name of the network. Description The description about the IP ranges. 
Hover over a value to display the Copy button. You can use this to copy the parameter value.
Add Subnets
You can add a subnet or a list of subnets for monitoring.
To add a new subnet:
-
In the left navigation menu, click Settings > Environment Settings > Monitored Networks.
The Monitored Networks page appears.
-
In the upper-right corner, click Add New Subnets.
A menu appears.
-
Select one of the following:
-
Add One Subnet — Select this option to add a single subnet.
-
Add Subnets List — Select this option to add a list of subnets.
The Add Subnet panel appears.
-
-
If you selected Add One Subnet:
-
In the CIDR box, type the IP address range. For example, 192.168.1.0/24.
-
Click the Monitored toggle to enable OT Security to capture traffic and execute active queries within the IP range.
Note: The Monitored toggle is enabled by default. To turn off monitoring, click to disable the Monitored toggle. -
(Optional) In the Network Name box, type a name for the network.
-
(Optional) In the Description box, type a description for subnets.
-
Click Save.
-
-
If you selected Add Subnets List, in the Add Subnets panel, do the following:
-
In the CIDR box, provide the list of CIDRs, one CIDR per line.
-
Click the Monitored (All Added Subnets) toggle to allow OT Security to capture traffic and execute active queries for all the listed subnets.
Note: The Monitored toggle is enabled by default. To turn off monitoring, click to disable the Monitored (All Added Subnets) toggle. -
Click Save.
OT Security saves the subnets and they appear on the Monitored Networks page.
-
Edit a Subnet
You can edit a subnet to make changes to it.
-
To edit a subnet, do one of the following:
-
In the Monitored Networks table, hover over the IP range row you want to edit.
OT Security enables the Actions menu.
-
In the Monitored Networks table, right-click the row of the IP range you want to edit.
A menu appears.
-
-
Select Edit Subnet.
The Edit Subnet panel appears.
-
Make the changes needed.
-
Click Save.
OT Security saves the changes to the subnets.