Customize Tables
OT Security pages display data in a table format with a list for each item. These tables have standardized customization features, enabling you to access the relevant information.
Customize the Column Display (3.19 and earlier)
You can customize which columns are displayed and how they are organized.
To specify which columns are displayed:
-
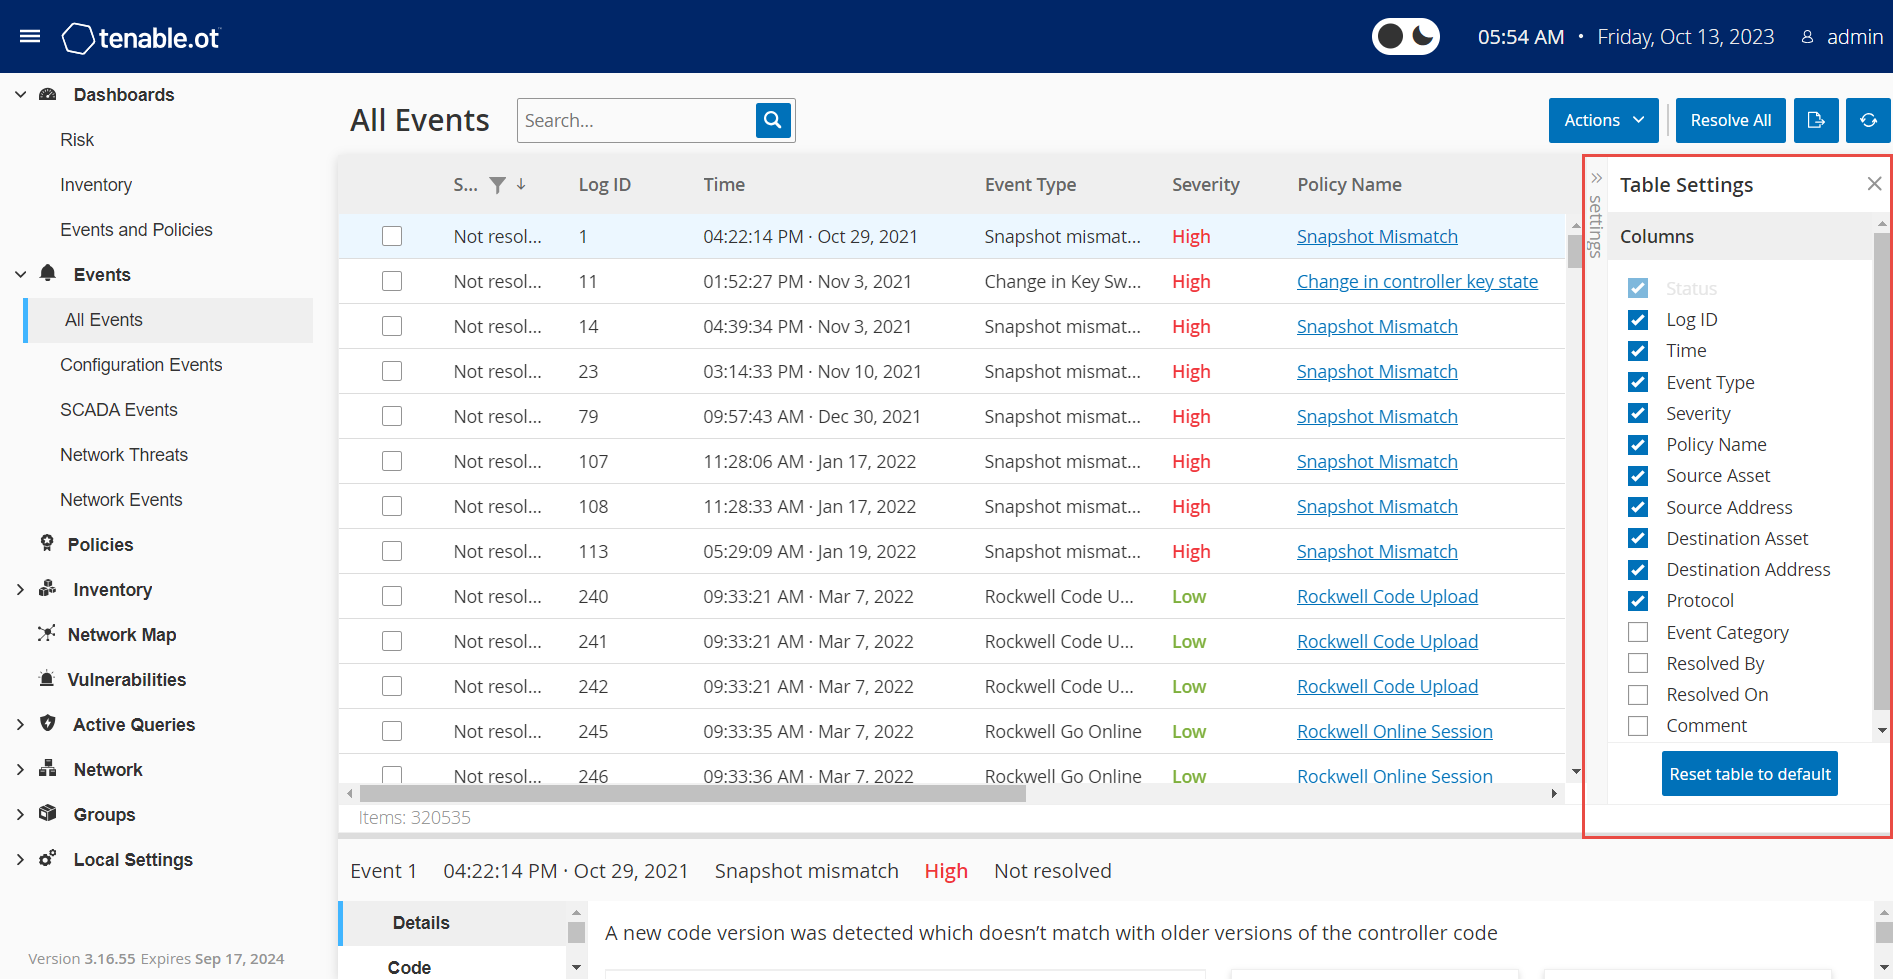
On the right of the table, click Settings.
The Table Settings panel appears with the Columns section.
-
In the Columns section, select the checkbox next to the columns you want to show.
-
Clear the checkbox next to the columns you want to hide.
OT Security displays only the selected columns.
-
To close the Table Settings window, click x or the Settings tab.
To adjust the order of display of the columns:
-
Click a column header and drag it to the desired position.
Customize the Column Display (4.0 and later)
-
In the header bar, click the
 button.
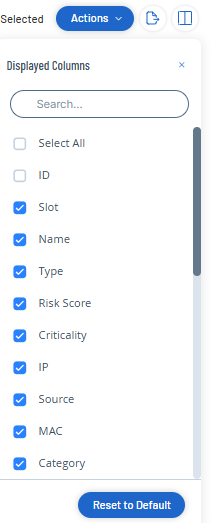
The Displayed Columns panel appears.
-
Select the checkboxes next to columns you want to show.
Note: Clear the checkboxes next to columns you want to hide.Tip: Use the Search box to search for specific columns. -
Click the
 button to close the Displayed Columns panel.
OT Security displays only the selected columns.
Group Lists by Categories (3.19 and earlier)
For the Inventory pages, you can group the lists by various parameters that are relevant to that particular screen.
To group the lists:
-
Click the Settings tab along the right edge of the table.
The Table Settings pane appears on the right with the Columns and Grouping sections.
-
Scroll down to the Grouping section.

-
Select the parameter by which you want to group the lists. For example, Type.
OT Security displays the grouped categories.
-
To close the Table Settings window, click x or the Settings tab.
-
Click on the arrow next to a category to show all instances for that category.

Group Lists By Categories (4.0 and later)
-
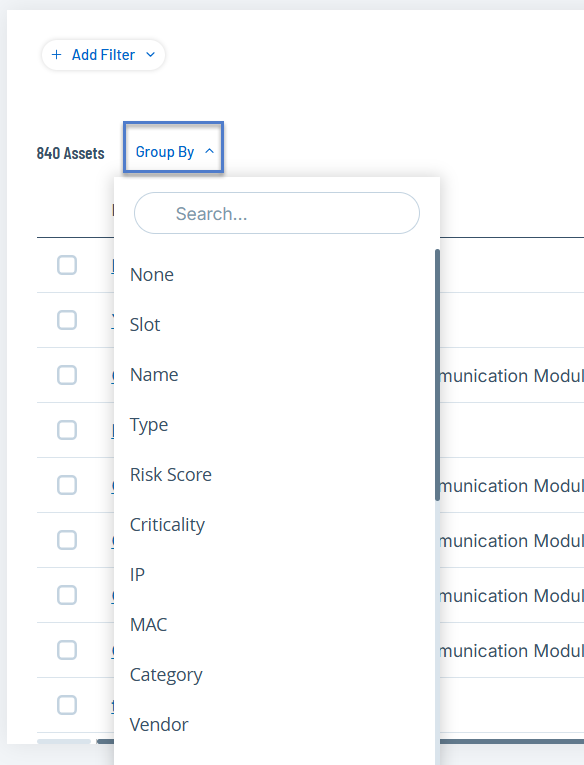
In the table header, click the Group By drop-down list.
-
Select the parameter to use to group the list. For example: Name.
Tip: Use the Search box to search for a specific parameter.OT Security groups the list by the selected parameter.
Note: Use the Expand All or Collapse All buttons to expand or collapse the list respectively.
Sort Columns
To sort the lists:
-
Click a column heading to sort the assets by that parameter. For example, click the Name heading to display the assets in alphabetical order by Name.
-
Click the column heading again to reverse the display order (that is, A→Z, Z→A).
Filter Columns (3.19 and earlier)
You can set filters for one or more column headings. The filters are cumulative so that only lists that fit all the filter criteria are displayed. The filter options are specific to each column heading. Each page offers a selection of relevant filters. For example, in the Controllers Inventory window, you can filter by Name, Addresses, Type, Backplane, and Vendor.
To filter the lists:
-
Hover over a column heading to show the filter icon
 .
. -
Click the filter icon
 .
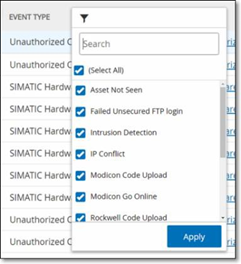
. A list of filter options appears. The options are specific to each parameter.
-
Select the elements to display and clear the checkboxes for those to hide.
Note: You can start by clearing the Select All checkbox and then selecting the ones you want to show. -
You can search the list for filters and select or clear them.
-
Click Apply.
OT Security filters the lists as specified.
To remove the filters:
-
Click filter
 button.
 -
Click Select All checkbox to clear all selections.
-
Click again on the Select All checkbox to select all elements.
-
Click Apply.
Filter Columns (4.0 and later)
-
In the table header, click the
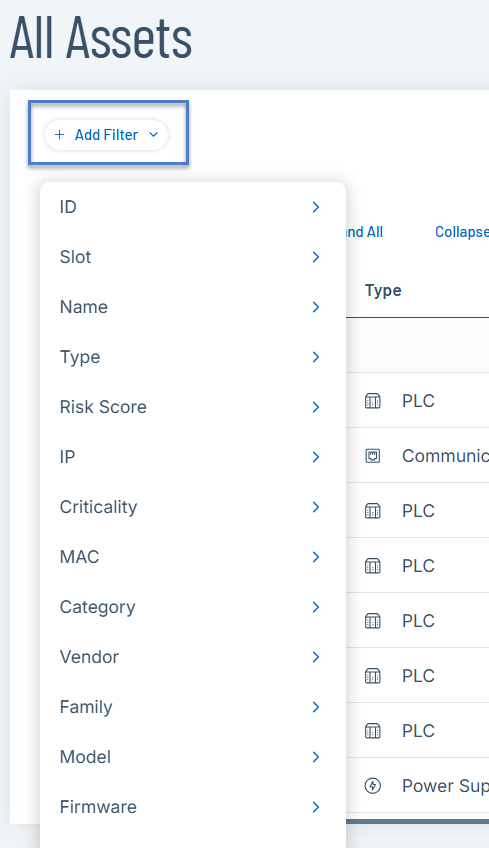
 Add Filter drop-down list.
A drop-down menu appears with available filter elements.
-
Select the element you want to filter by.
A list of filter options appears.
-
Select the checkboxes next to the options you want to filter.
Tip: Use the Search box to search for specific filter options.
Save a Filter
You can save the filters that you use frequently and access them from Saved Filters as needed. This allows you to save and quickly return to your specific filtered views.
Note: The Save Filter functionality is available on the Inventory, Findings > Vulnerabilities, and Findings > Policy Violations pages.
To save a frequently used filter:
-
In the table header, click the
 Add Filter drop-down list.
A drop-down menu appears with available filter elements.
-
Select the required filter elements.
-
Click Apply Filter.
OT Security displays the filtered results.
-
To save the filter, click Save Filter.
The Save Filter panel appears.
-
In the Name box, type a name for the filter.
-
Click Save.
OT Security saves the filter.
-
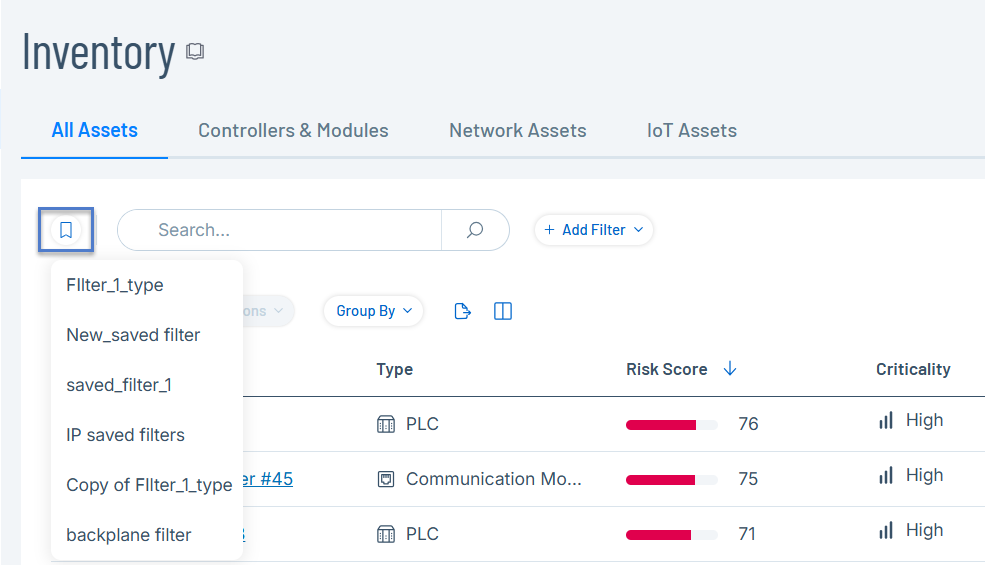
To access the saved filters, click the
 button.
The list of saved filters appears.
-
Click the required filter and view the filtered results.
Modify Saved Filters
You can make changes to existing saved filters.
To make changes to an existing saved filter:
-
In the table header, click the click the
 button.
The list of saved filters appears.
-
Click an existing saved filter you want to modify.
-
Add or remove filter elements as required.
-
Click Save Filter and select Save Changes.
OT Security saves the changes to the filter.
Create a Copy of the Saved Filter
You can create a duplicate of the saved filter and save it as a new filter.
To duplicate a saved filter and save it under a new name:
-
In the table header, click the click the
 button.
The list of saved filters appears.
-
Click an existing saved filter you want to copy.
-
Click Save Filter and select Save as Copy.
The Save Filter panel appears.
-
In the Name box, change the filter name.
-
Click Save.
OT Security saves the filter.
Remove All Filters
To clear all applied filters and return the table to its original, unfiltered state:
-
In the table header, click Remove All Filters.
Search (3.19 and earlier)
On each page, you can search for specific records.
To search the lists:
-
In the Search box, type the search text.
-
Click the
 button.
 -
To clear the search text, click the x button.
Search (4.0 and later)
On each page, you can search for specific records.
To search the lists:
-
In the Search box, type the search text.
-
Click the
 button.
 -
To clear the search text, click the
 button.
