Integrate with Tenable Vulnerability Management
You can integrate Tenable Attack Surface Management with Tenable Vulnerability Management to provide continuous external attack surface monitoring and deliver real-time data for ingestion into the platform. This integration enhances the Tenable Vulnerability Management Host data with external attack surface context. You can perform deep vulnerability scans against this data, which helps identify the security risk present in exposed vulnerabilities and provides you with a workflow for managing vulnerability findings.
You have complete control of enabling and tailoring the data scope flowing from Tenable Attack Surface Management to Tenable Vulnerability Management. There are several customization options, including complex filters, that you can apply globally or per inventory to ensure assets considered for Tenable Vulnerability Management Host creation fit your team’s view of the external world.
Before you begin
-
Make sure that your Tenable Vulnerability Management container has a valid Tenable Attack Surface Management license.
To modify filters that control the data that Tenable Attack Surface Management sends to Tenable Vulnerability Management:
-
In the left navigation bar, click the
 button.
The All Integrations page appears.
-
In the left navigation pane, click Tenable.
The Tenable integrations page appears with a table that lists the integration name and type.
-
Do one of the following:
-
In the Global Settings section, do the following:
Note: Global Settings affect all inventories.-
In the Custom Network UUID drop-down box, select the UUID of your network. The networks created in Tenable Vulnerability Management appear in this list.
-
To identify assets based on the hostname or the IP address, select one of the following from the Asset Identification drop-down box:
- Identify assets by Hostname
-
Identify assets by IP address
For more information, see Asset Identification Characteristics.
-
In the Ingestion Filters box, provide filters and click Set. For more information about adding filters, see Asset Filters.
-
-
(Optional) In the Inventory Settings section, click the Enable Inventory Settings toggle to enable settings for the current inventory.
Note: Inventory Settings affect only the current inventory.Tenable Attack Surface Management enables the inventory setting parameter fields.
Tip: The * next to the inventory settings indicate that the default values for these parameters are the global configuration settings. Click Clear Overrides to reset to the default global setting values. -
-
In the Custom Network UUID drop-down box, select the UUID of your network. The networks created in Tenable Vulnerability Management appear in this list.
-
To identify assets based on the hostname or the IP address, select one of the following from the Asset Identification drop-down box:
-
Identify assets by Hostname
-
Identify assets by IP address
-
-
In the Ingestion Filters box, provide filters and click Set. For more information about adding filters, see Asset Filters.
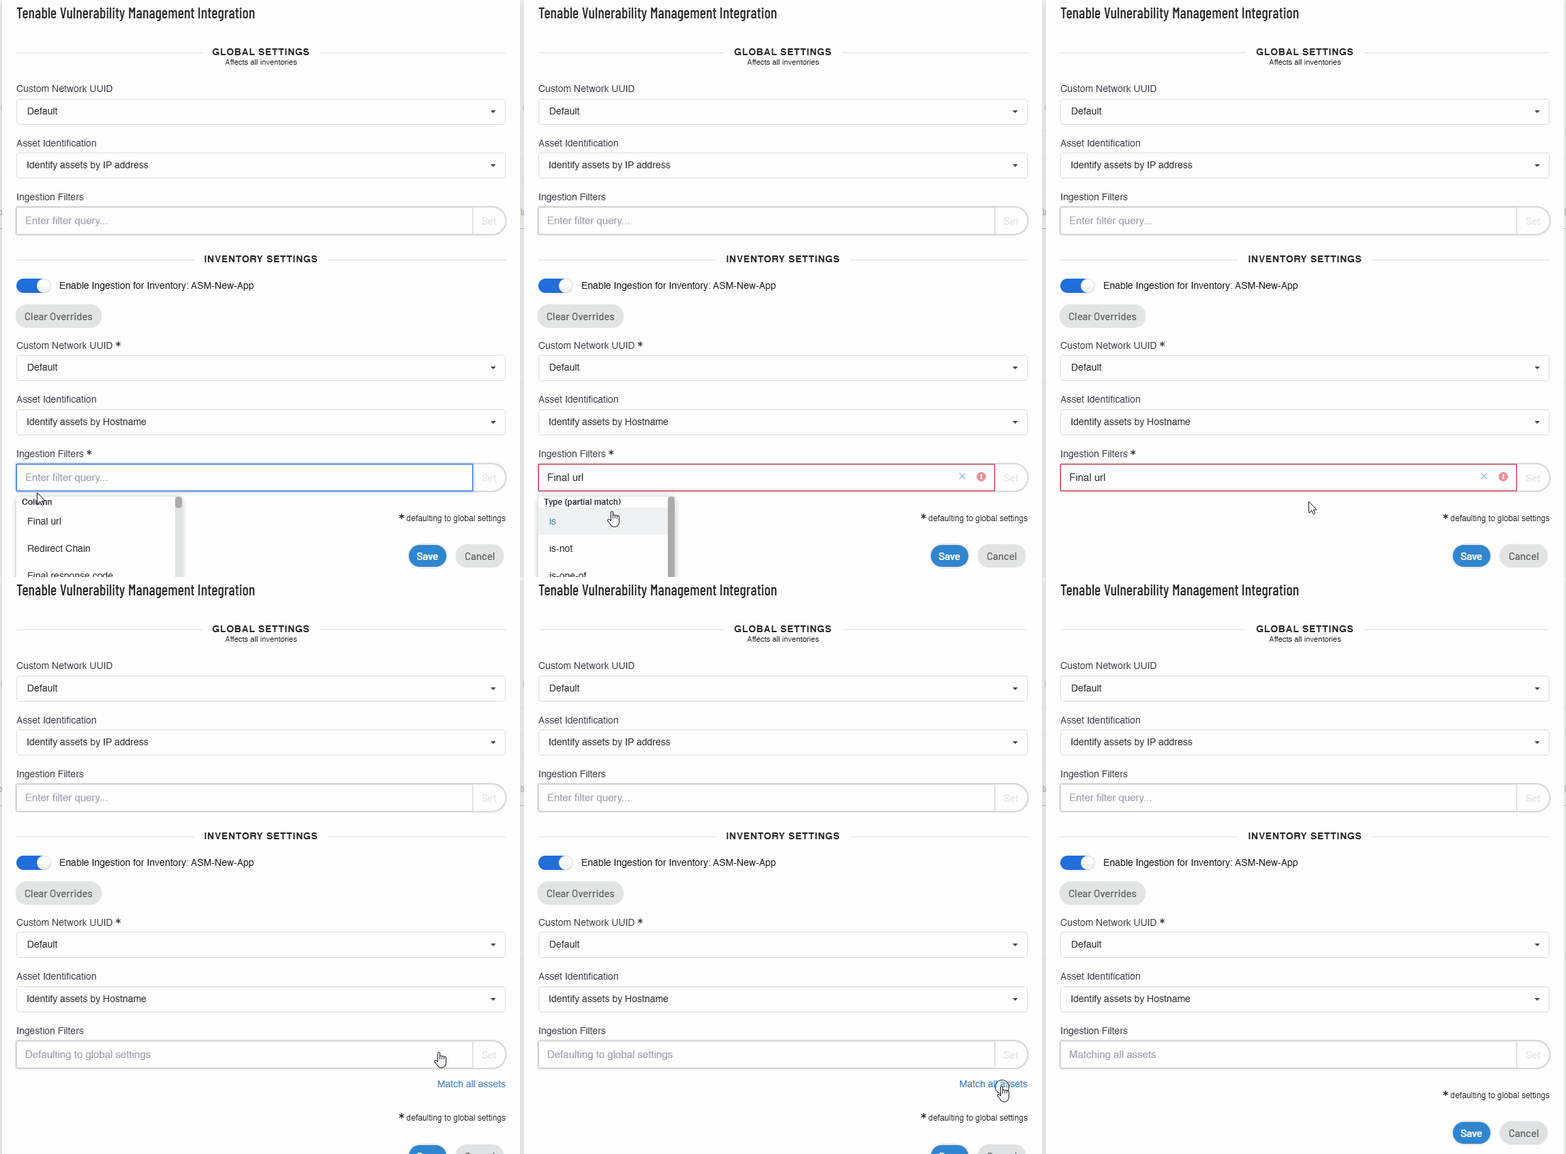
Note: When you click the x button in the Ingestion Filters box, Tenable Attack Surface Management does the following:
- Clears overrides and sets the filters to the default global filter settings.
- Displays a Match all assets link. When you click on the link, Tenable Attack Surface Management updates the Ingestion Filters option to Matching all assets

-
-
Click Save.
-
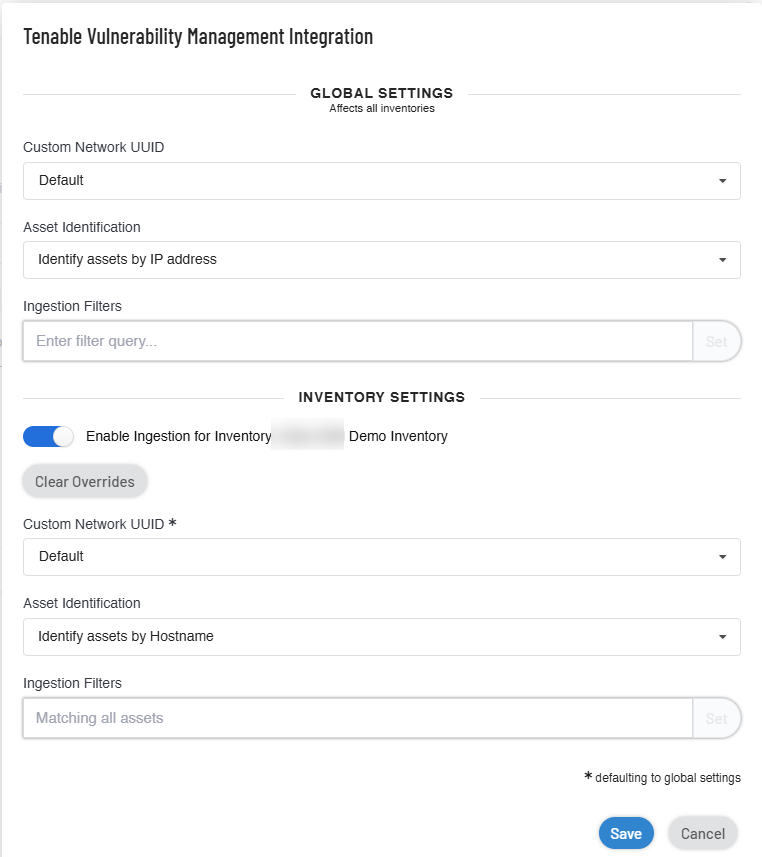
Global settings are configured to ingest any asset with any open ports identified by their IP addresses.
-
Inventory settings are configured to use an inventory with assets that use elastic IPs identified by their hostnames.
Tenable Attack Surface Management saves the integration. Tenable Vulnerability Management now ingests data based on the modified filters and displays the assets that match the filters.
The example given in the procedure shows that you can divide your assets into different inventories to apply different types of configuration based on your requirements, for instance, in the image:
