Remediation Tracking
Unpatched assets expose organisations to vulnerabilities that are actively being exploited. End of life assets may pose the greatest risk since they are unsupported and no longer receiving security updates or support from the vendor. Tenable provides the Outstanding Remediation Tracking dashboard for Tenable Vulnerability Management and Outstanding Remediations Tracking. In addition to the Articles previously listed, the following DORA Articles are related to remediation tracking efforts:
-
Article 9.4(f), have appropriate and comprehensive documented policies for patches and updates
In this section the following Tenable products will be highlighted:
-
Tenable Security Center
-
Tenable Vulnerability Management
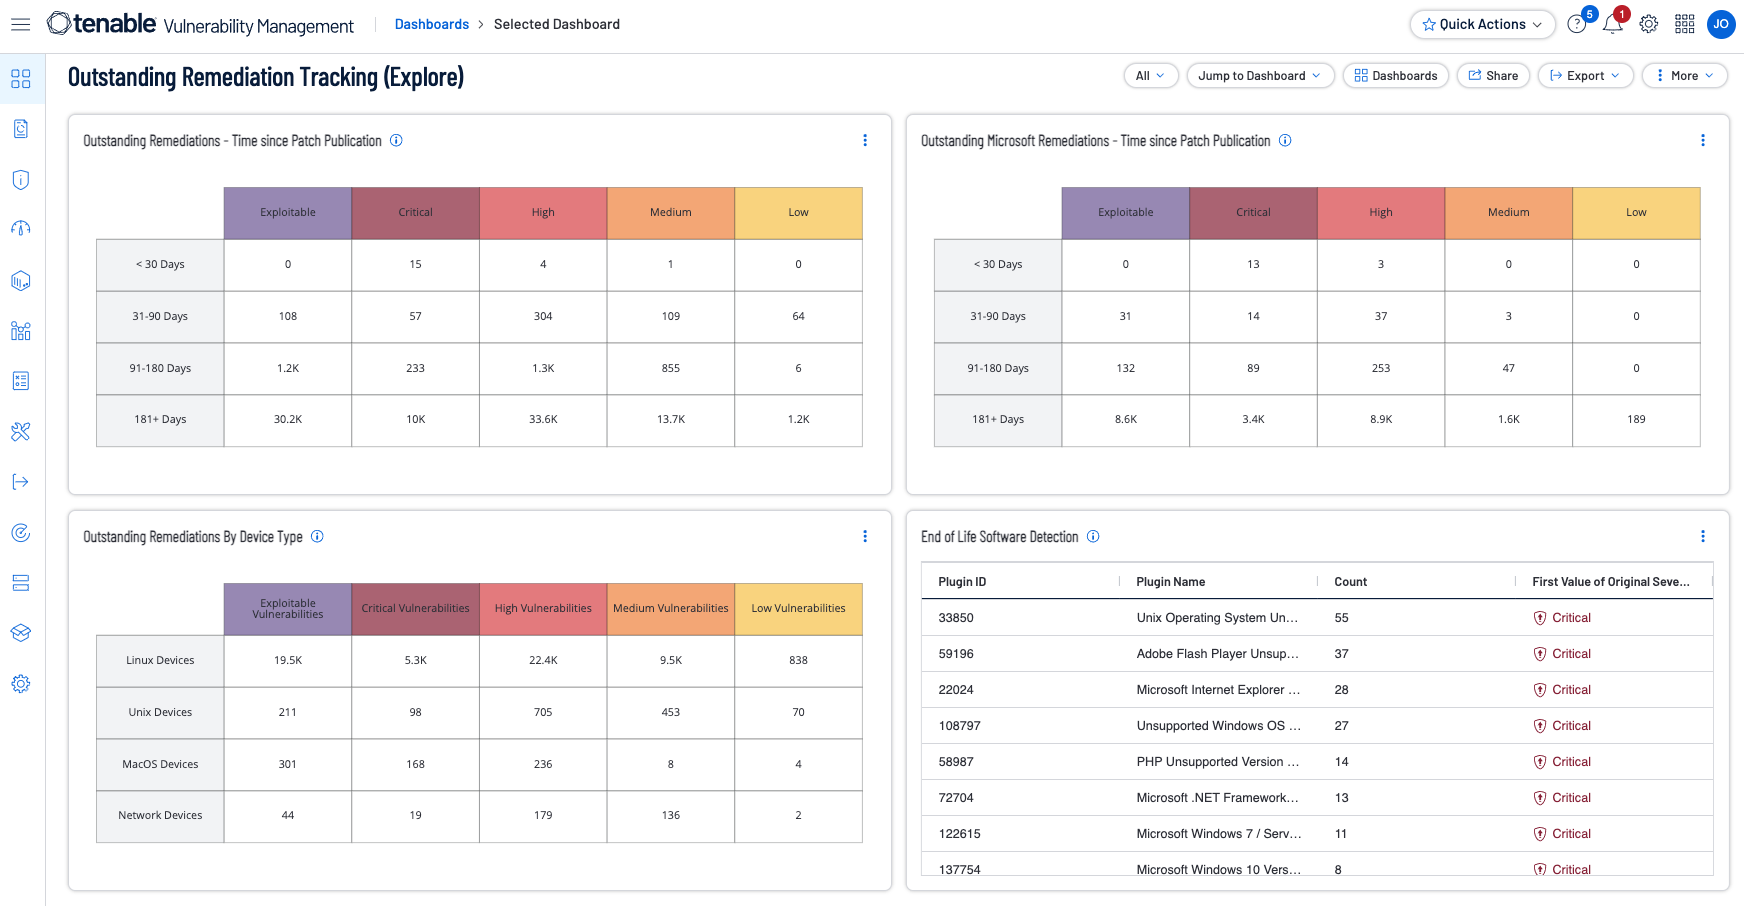
![]()
The Outstanding Remediations Tracking dashboard provides risk guidance using the “Remediation Summary” tool. This tool works by employing a concept called “top patch”. Tenable.sc uses proprietary technology to identify a chain of patches. The first patch in the chain is called the “top patch.” If the “top patch” is applied, all subsequent vulnerabilities will also be remediated at the same time. Using both the Remediation Summary tool and “Patch Report” plugin, the organisation can better plan remediation efforts. Within Tenable Vulnerability Management several filters are used including those for unsupported products, patch publication date ranges.
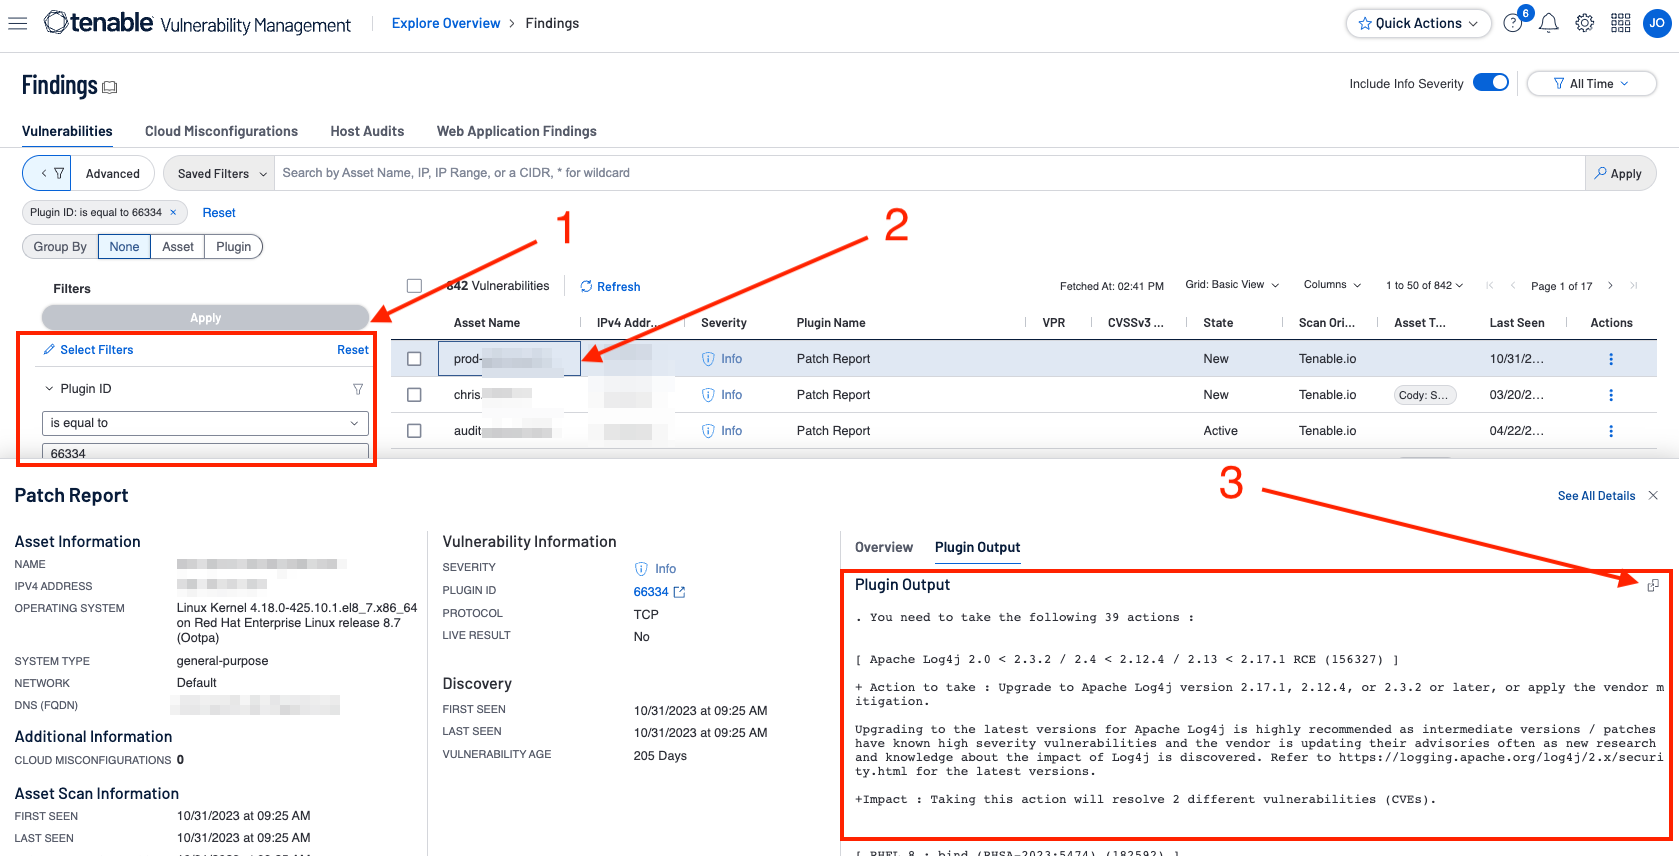
The Nessus "Patch Report" plugin (66334) summarises all of the missing patches and general remediation actions required to remediate the discovered vulnerabilities on a given host. Instead of counting the number of vulnerabilities, the plugin lists applications that need to be upgraded. The approach is not only much easier for IT administrators to consume, but the count of applications provides a measure of how much "work" is required to secure a system.
Within Tenable Vulnerability Management, analysts can create a filter for plugin 66334 within the filters component on the Findings page as shown following (1). Once results have appeared, selecting an asset (2) by clicking on the asset name opens the details window at the bottom of the page. Selecting Plugin Output reveals the detailed Actions to undertake, including the Impact those actions have. The information can easily be exported to the clipboard by clicking the copy (3) icon. An additional filter can be added to change the State filter to “Fixed” to review patches that have previously been resolved.
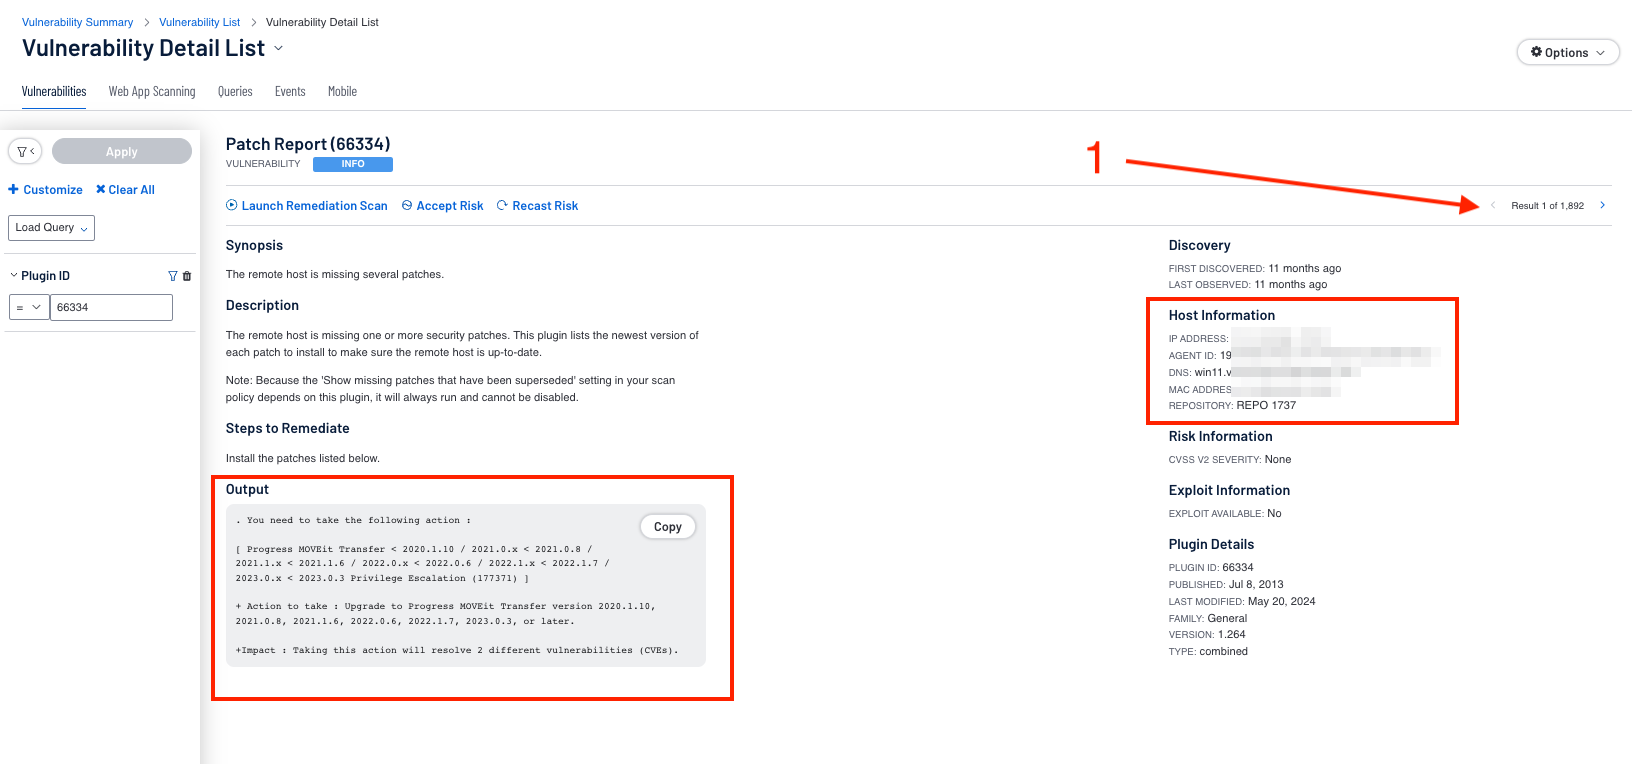
The steps are similar if using Tenable Security Center, however they vary slightly. From the Analysis tab, choose Vulnerabilities. Create a filter for plugin 66334. After the results are displayed choose to go to Vulnerability Detail.

The Vulnerability Detail is shown with the detailed Actions to undertake, including the Impact those actions have. The information can easily be exported to the clipboard by clicking the copy icon. To select the next detail click next (1). An additional filter can be added to change the state to “Mitigated” and “Previously Mitigated” to review patches that have previously been resolved.
For more information related to Remediation Tracking refer to the NIS 2 Cyber Exposure Study section on IT Security Maintenance located here.