Bring Penetration Testing Data into Tenable Exposure Management
The Challenge
Static Findings in a Dynamic Environment
Penetration testing simulates real-world attacks to identify logical flaws and complex exploit chains. Automated scanners often miss these vulnerabilities. However, findings in static PDF reports or spreadsheets lose urgency and context. These point-in-time snapshots do not drive continuous security.
The Solution
Continuous Context via the Open Connector
To address these challenges, Tenable Exposure Management provides the Tenable One Open Connector. The Tenable One Open Connector ingests penetration testing data directly into Tenable Exposure Management. This connector transforms static findings into trackable exposure data.
Core Benefits
This integrations allows you to:
-
Eliminate Data Silos: Move beyond disconnected PDFs and spreadsheets that create dangerous visibility gaps between your testing results and your daily security operations. Centralize pen-testing findings with exposure data to create a single source of truth and a complete, unified view of risk across your entire attack surface.
-
Contextualize Prioritization: Stop viewing findings in a vacuum. A "High" severity finding in a static PDF lacks the vital context needed to prioritize it against thousands of other exposures. By layering pen-testing results with insights from across your attack surface, Tenable Exposure Management pinpoints exactly which weaknesses pose the greatest risk to your specific business operations.
-
Streamline Remediation:Tenable Exposure Management replaces manual follow-up emails with automated tracking to eliminate spreadsheets. This prevents vulnerabilities from persisting unnoticed. By integrating these results, you close the visibility gap and make remediation seamless. Using Tenable Exposure Management, you can track and validate every weakness to ensure you address all security issues.
What You Can Achieve with Integrated Data
Centralized Visibility
Eliminate pen-testing blind spots by consolidating data into a single view.
-
Unified dashboard: View pen-testing findings alongside your CVEs, identity, and cloud exposures in a single dashboard.
-
Single source of truth: Consolidate findings from across your tech stack to gain a comprehensive view of your entire attack surface.
-
Enriched asset records: Enrich asset records with pen-testing findings to understand which specific assets are vulnerable to logical exploits or lateral movement.
Contextual Risk Prioritization
Pinpoint the weaknesses that matter most to your organization.
-
Critical asset context: Blend pen-testing findings with context from your broader attack surface to identify which "High" severity weaknesses actually threaten your most critical business assets.
-
Identify toxic combinations: Use pen-testing data to identify toxic risk combinations, such as a simple misconfiguration that acts as a gateway to sensitive data.
-
Break attack paths: Target specific choke points uncovered during pen-testing to break your highest-risk attack paths.
Operationalized Remediation
Turn pen-testing reports into streamlined, trackable action.
-
Unified lifecycle management: Track the lifecycle of pen-testing findings (Open vs. Fixed) using the same platform and workflows you use for exposure management.
-
Real-time ownership: Assign pen-testing findings directly to asset owners and monitor remediation progress in real-time, eliminating the need for manual follow-up emails.
-
Accelerated validation: Accelerate the validation of fixes by integrating pen-testing findings into your continuous exposure management cycle.
Holistic Exposure Analytics
Communicate pen-testing findings in a holistic, business-aligned view.
-
Comprehensive risk reporting: Incorporate pen-testing findings into your overall risk reporting to provide a more accurate, comprehensive view of organizational risk.
-
Benchmarking: Monitor how your pen-testing results improve over time and benchmark your security posture against industry peers.
-
Board-level communication: Communicate the value of your pen-testing program to the board with clear, measurable reports that tie pen-testing findings to organizational resilience.
Best Practice for Data Integration
To ensure a seamless import of your penetration testing findings via the Tenable One Open Connector, follow the step-by-step workflow below, adhering to the required formatting and normalization standards.
Step 1: Prepare and Standardize Data
Ensure you format your penetration testing correctly before ingestion.
-
Supported file formats: Make sure to structure your findings in CSV or Excel (.xlsx) format. You may also upload a ZIP file containing a single CSV or Excel file.
Tip: Ask your penetration testing provider to deliver raw data in one of these formats alongside their traditional PDF report.
-
Severity normalization: Tenable Exposure Management categorizes findings into a standard four-tier scale: Critical, High, Medium, and Low.
- Standardize risk levels: If your report uses a custom numeric scale (e.g., CVSS 1.0–10.0 or Risk 1–5), map these to the standard tiers before upload.
- Automated mapping: If you upload raw CVSS scores (0–10) without manual categorization, the platform automatically maps those values to the appropriate severity levels in Tenable Exposure Management and calculates the Exposure Score accordingly.
Step 2: Map Data Fields
The Tenable One Open Connector requires specific data points to link findings to assets. Ensure your import file includes the following critical columns.
Mandatory and Suggested Fields
| Field Category | Mandatory Fields | Suggested and Optional Fields |
|---|---|---|
| Asset Identifier | Asset Name or NetBIOS Name | Asset IP, Tags, Asset State, OS |
| Vulnerability Details | Finding Name or Title, Severity | Finding State, Description, Solution |
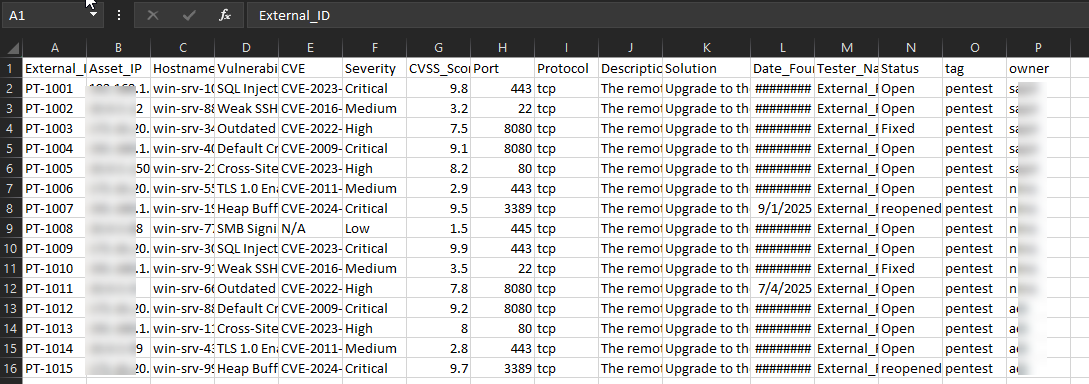
Field Mapping Example
Map your source columns to the Tenable Exposure Management target fields as follows to ensure findings are searchable and actionable.
| Report Column Header (Example) | Tenable Target Field | Why it Matters |
|---|---|---|
| Asset_IP | IPv4 Address | Critical identifier for linking the finding to a specific device in Tenable Exposure Management. |
| Hostname | FQDN or NetBIOS | Secondary identifier to ensure accurate asset matching if IPs change. |
| Vulnerability_Title | Name | The "headline" that appears in dashboards (e.g., SQL Injection). |
| Severity | Severity |
Determines the risk calculation. Note: Ensure values are Critical, High, Medium, or Low.
|
| Description | Description | Provides full context and details of the vulnerability for the analyst. |
| Solution | Solution | The remediation advice for your IT teams. |
| CVE | CVE | Helps correlate manual findings with known vulnerabilities if applicable. |
| Port | Port | (Optional) Specifies the service port affected (e.g., 443). |
| Protocol | Protocol | (Optional) Specifies the protocol (e.g., TCP or UDP). |
Step 3: Ingest Data via the Open Connector
The Tenable One Open Connector acts as the bridge for your external data.
To add the connector:
-
In the left navigation menu, click Connectors.
The Connectors page appears.

-
In the upper-right corner, click
 Add new connector.
The Connector Library page appears.
-
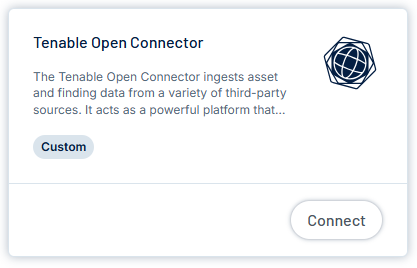
In the search box, type the name of the connector (i.e.,Open Connector). Alternatively, locate the connector in the Custom section.

-
On the Tenable One Open Connector tile, click Connect.
The connector configuration options appear.
- Create Instance:
- In the Name box, use a descriptive naming convention (e.g., Q3-2025-External-PenTest).
- In the Schedule section, execute a one-time import for episodic assessments or schedule a recurring sync for a continuous data feed.
- Upload & Map:
- Upload: Upload your CSV, Excel, or ZIP file.
- Map Columns: Verify that your file columns are correctly mapped to the Tenable Exposure Management Asset Attributes. Mismatched assets result in "unlinked" findings that float without an associated device.
- Configure Aggregation:
- Tenable's suggested best practices or customize as needed).
- Assign the appropriate Exposure Category based on the specific asset types included in your report.
Step 4: Analyze and Organize Findings
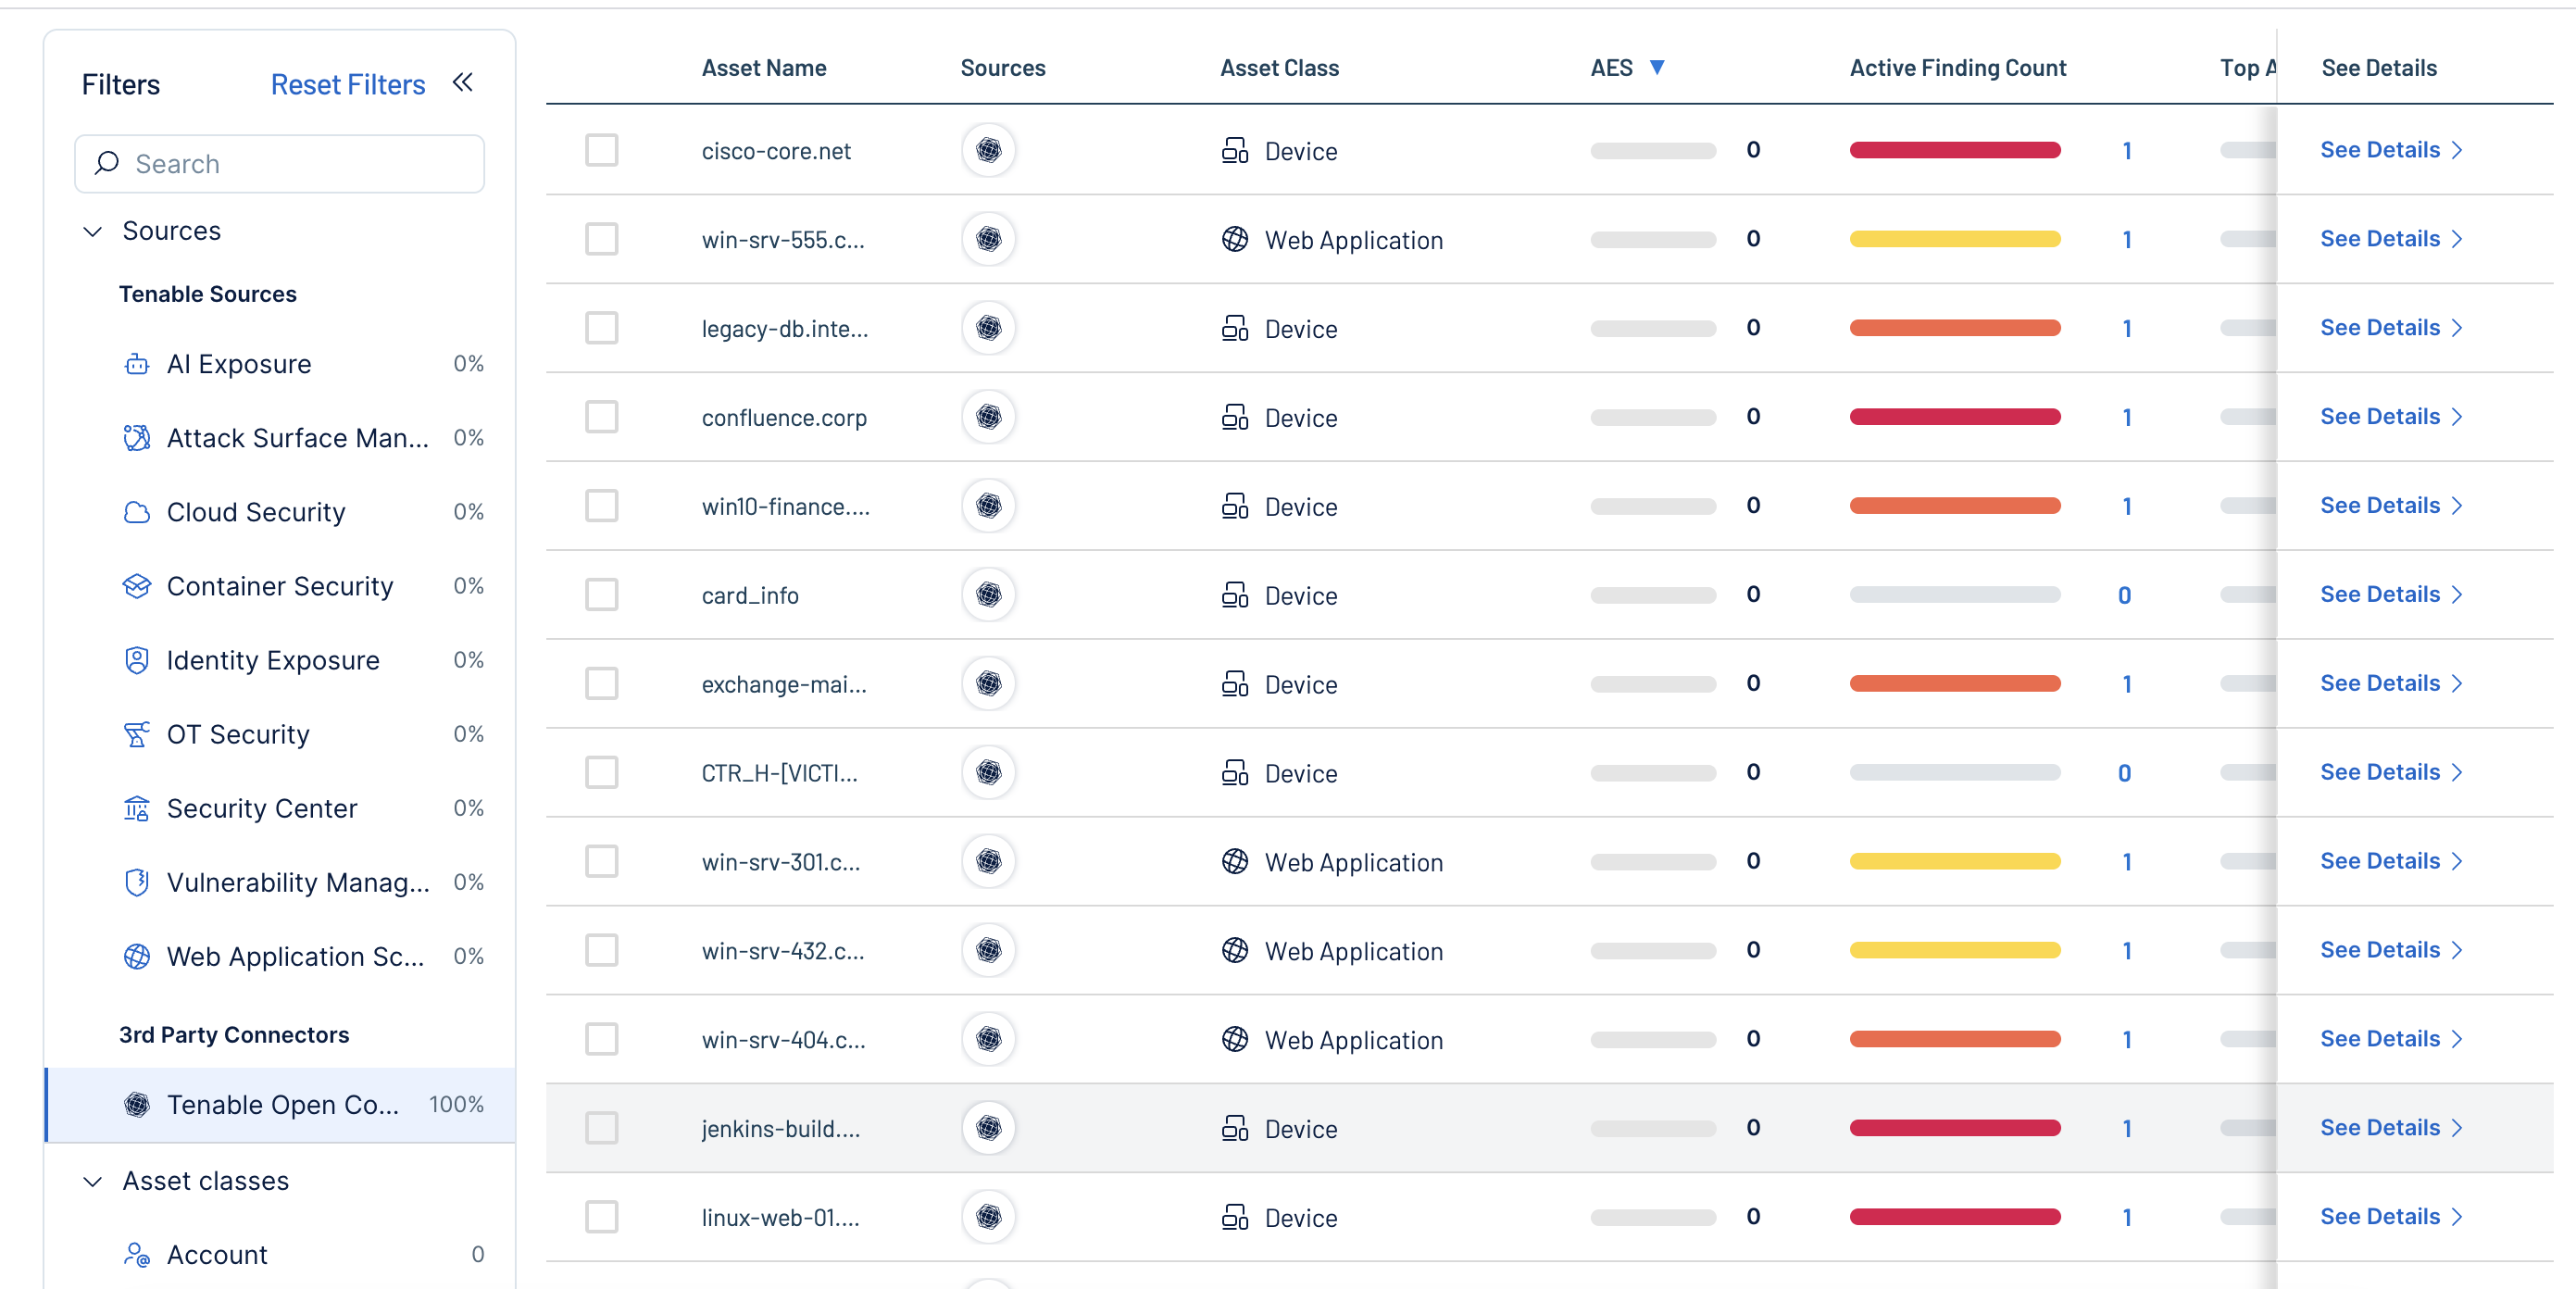
Once ingested, your pen-testing findings become live assets within the platform.
- Validate the import: Filter your Assets view by Source > Custom > Tenable Open Connector to ensure findings appear on the correct assets.
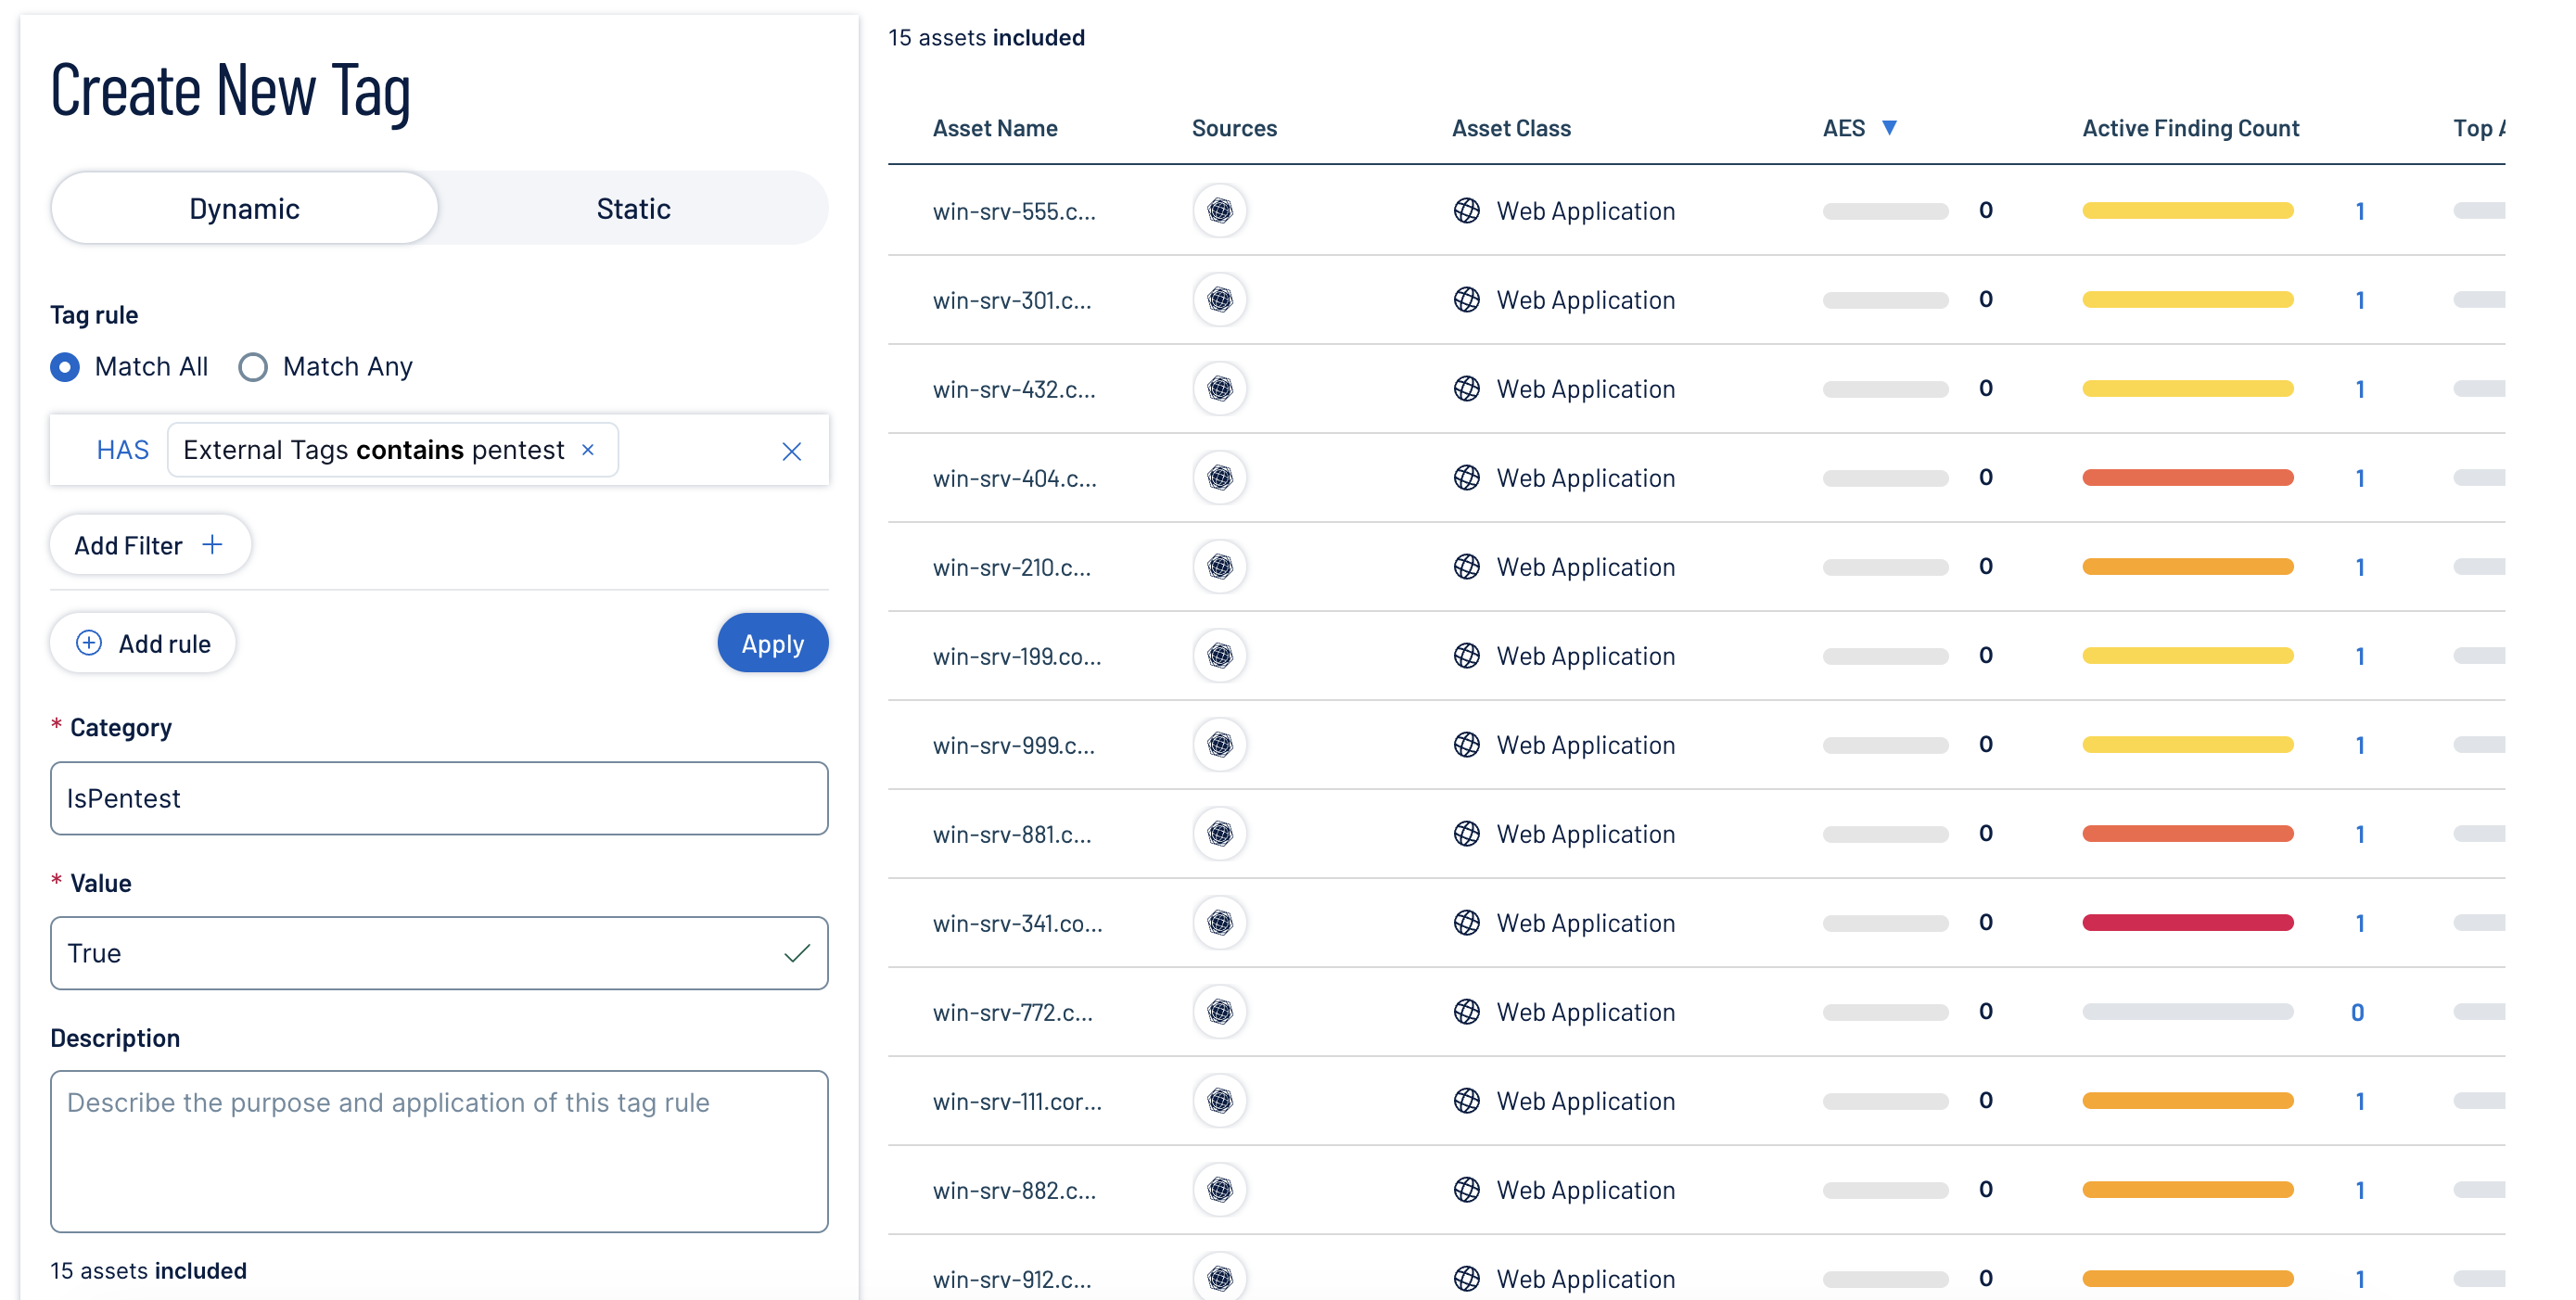
- Organize with tags: Edit "External Tags" from your import into "Tenable Tags" (e.g., Owner:Database_Team, Source:Manual_PenTest) to align with your organizational structure.
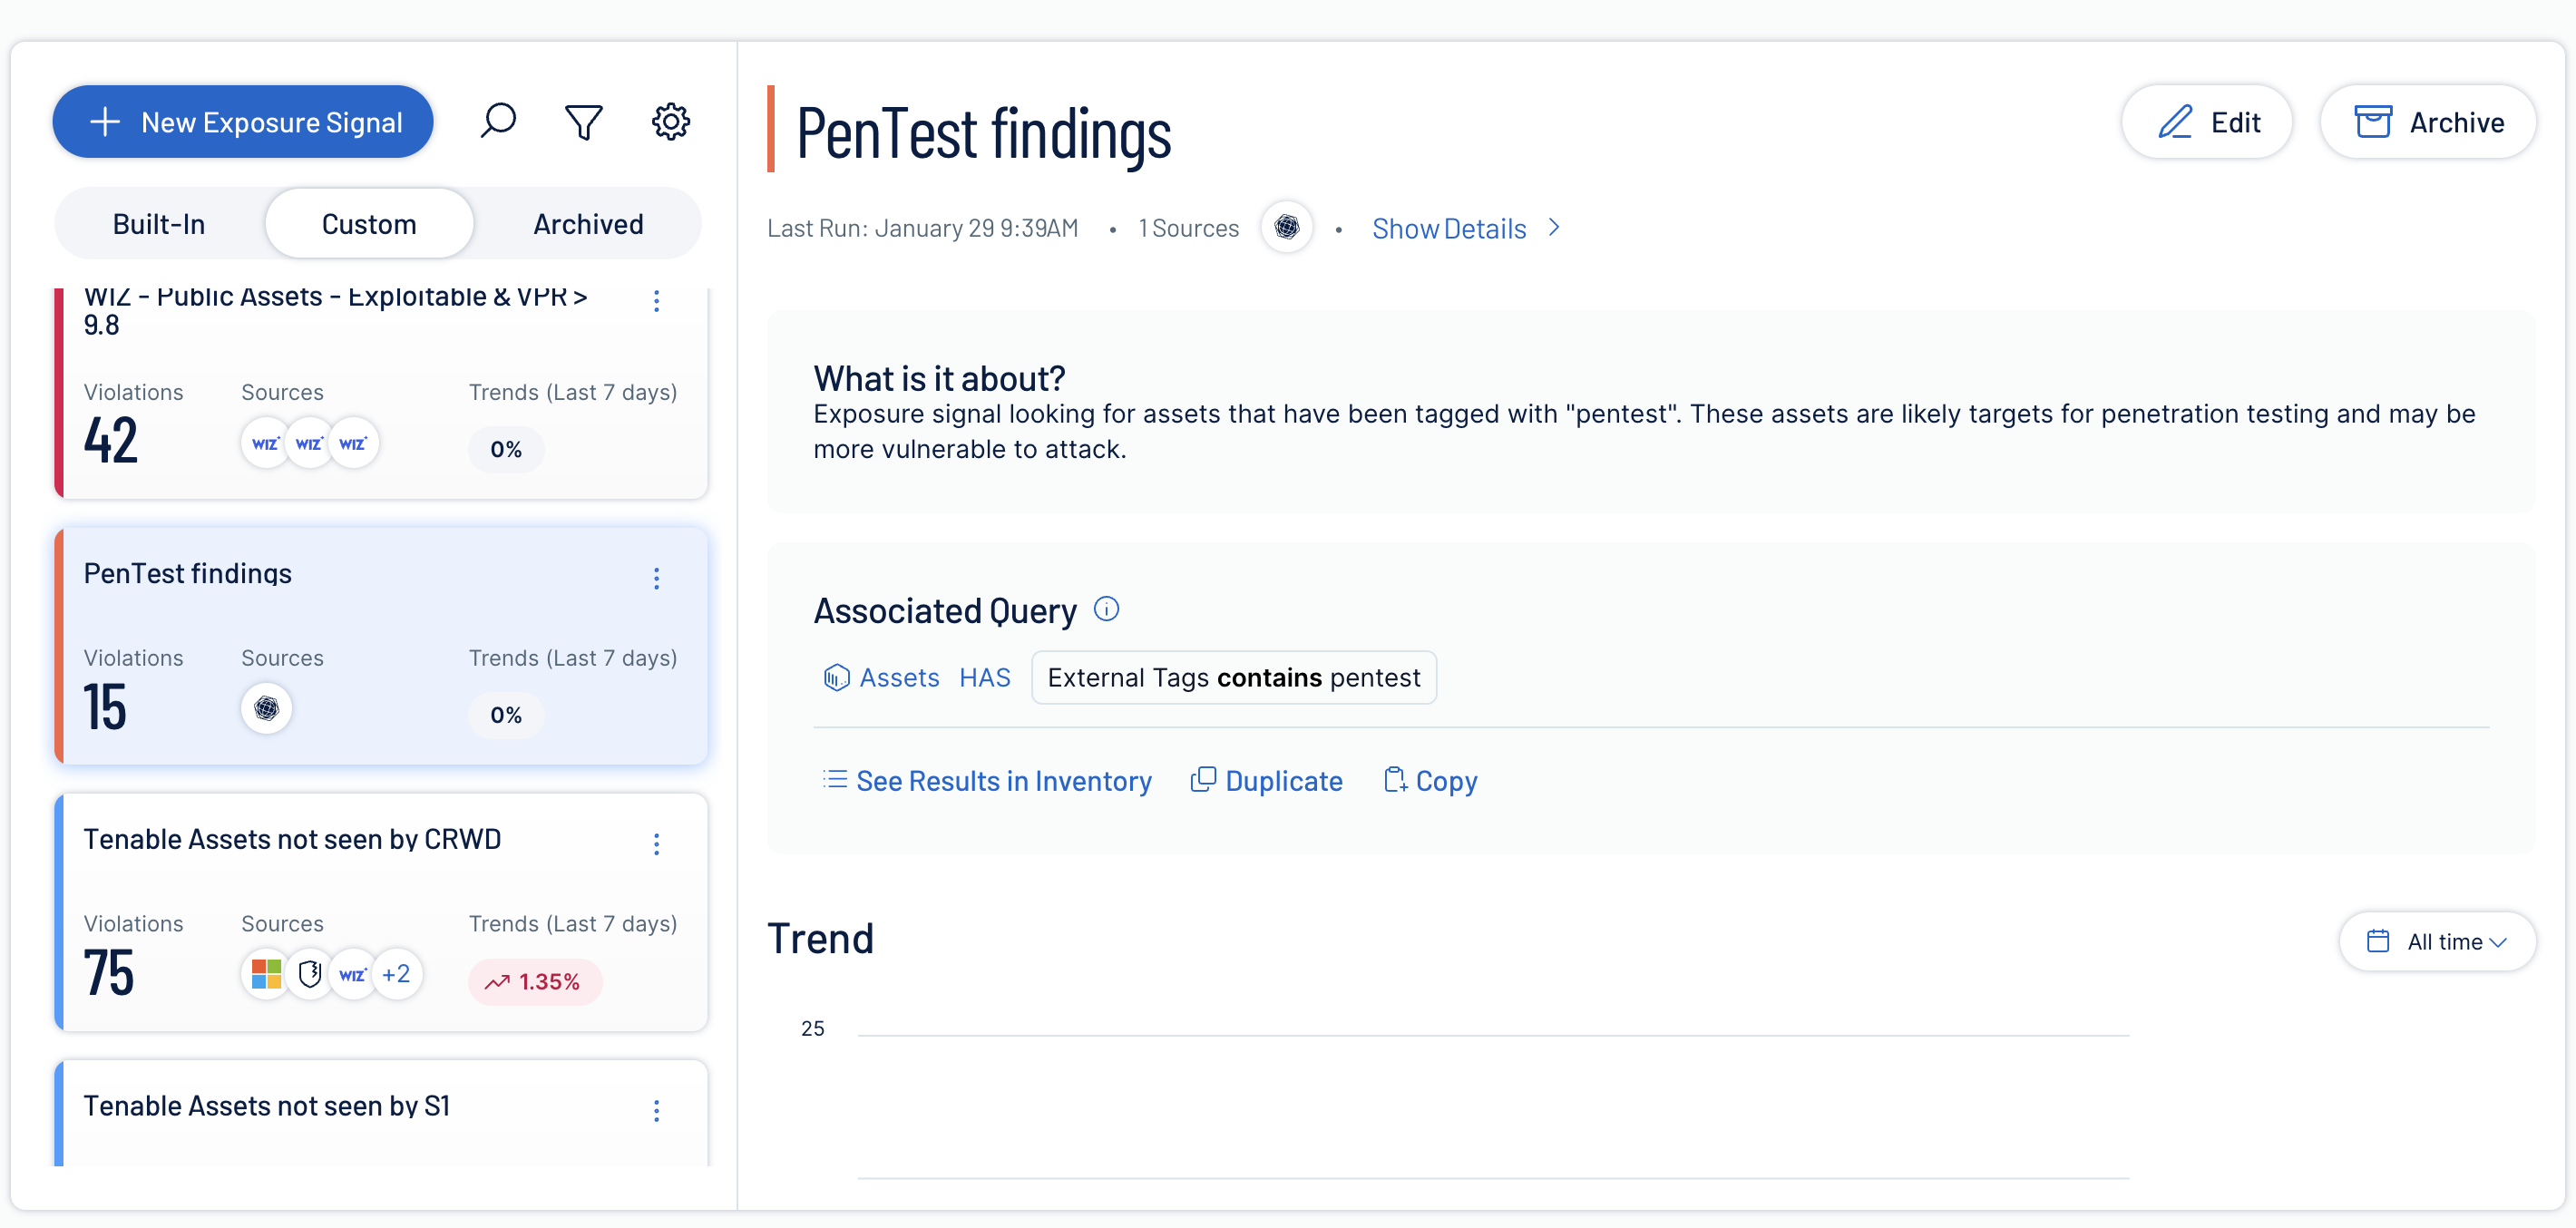
- Create Exposure Signals: Create a custom signal to track assets tagged with "pentest" (Query: External Tags contains pentest). This helps you target specific choke points uncovered during testing.
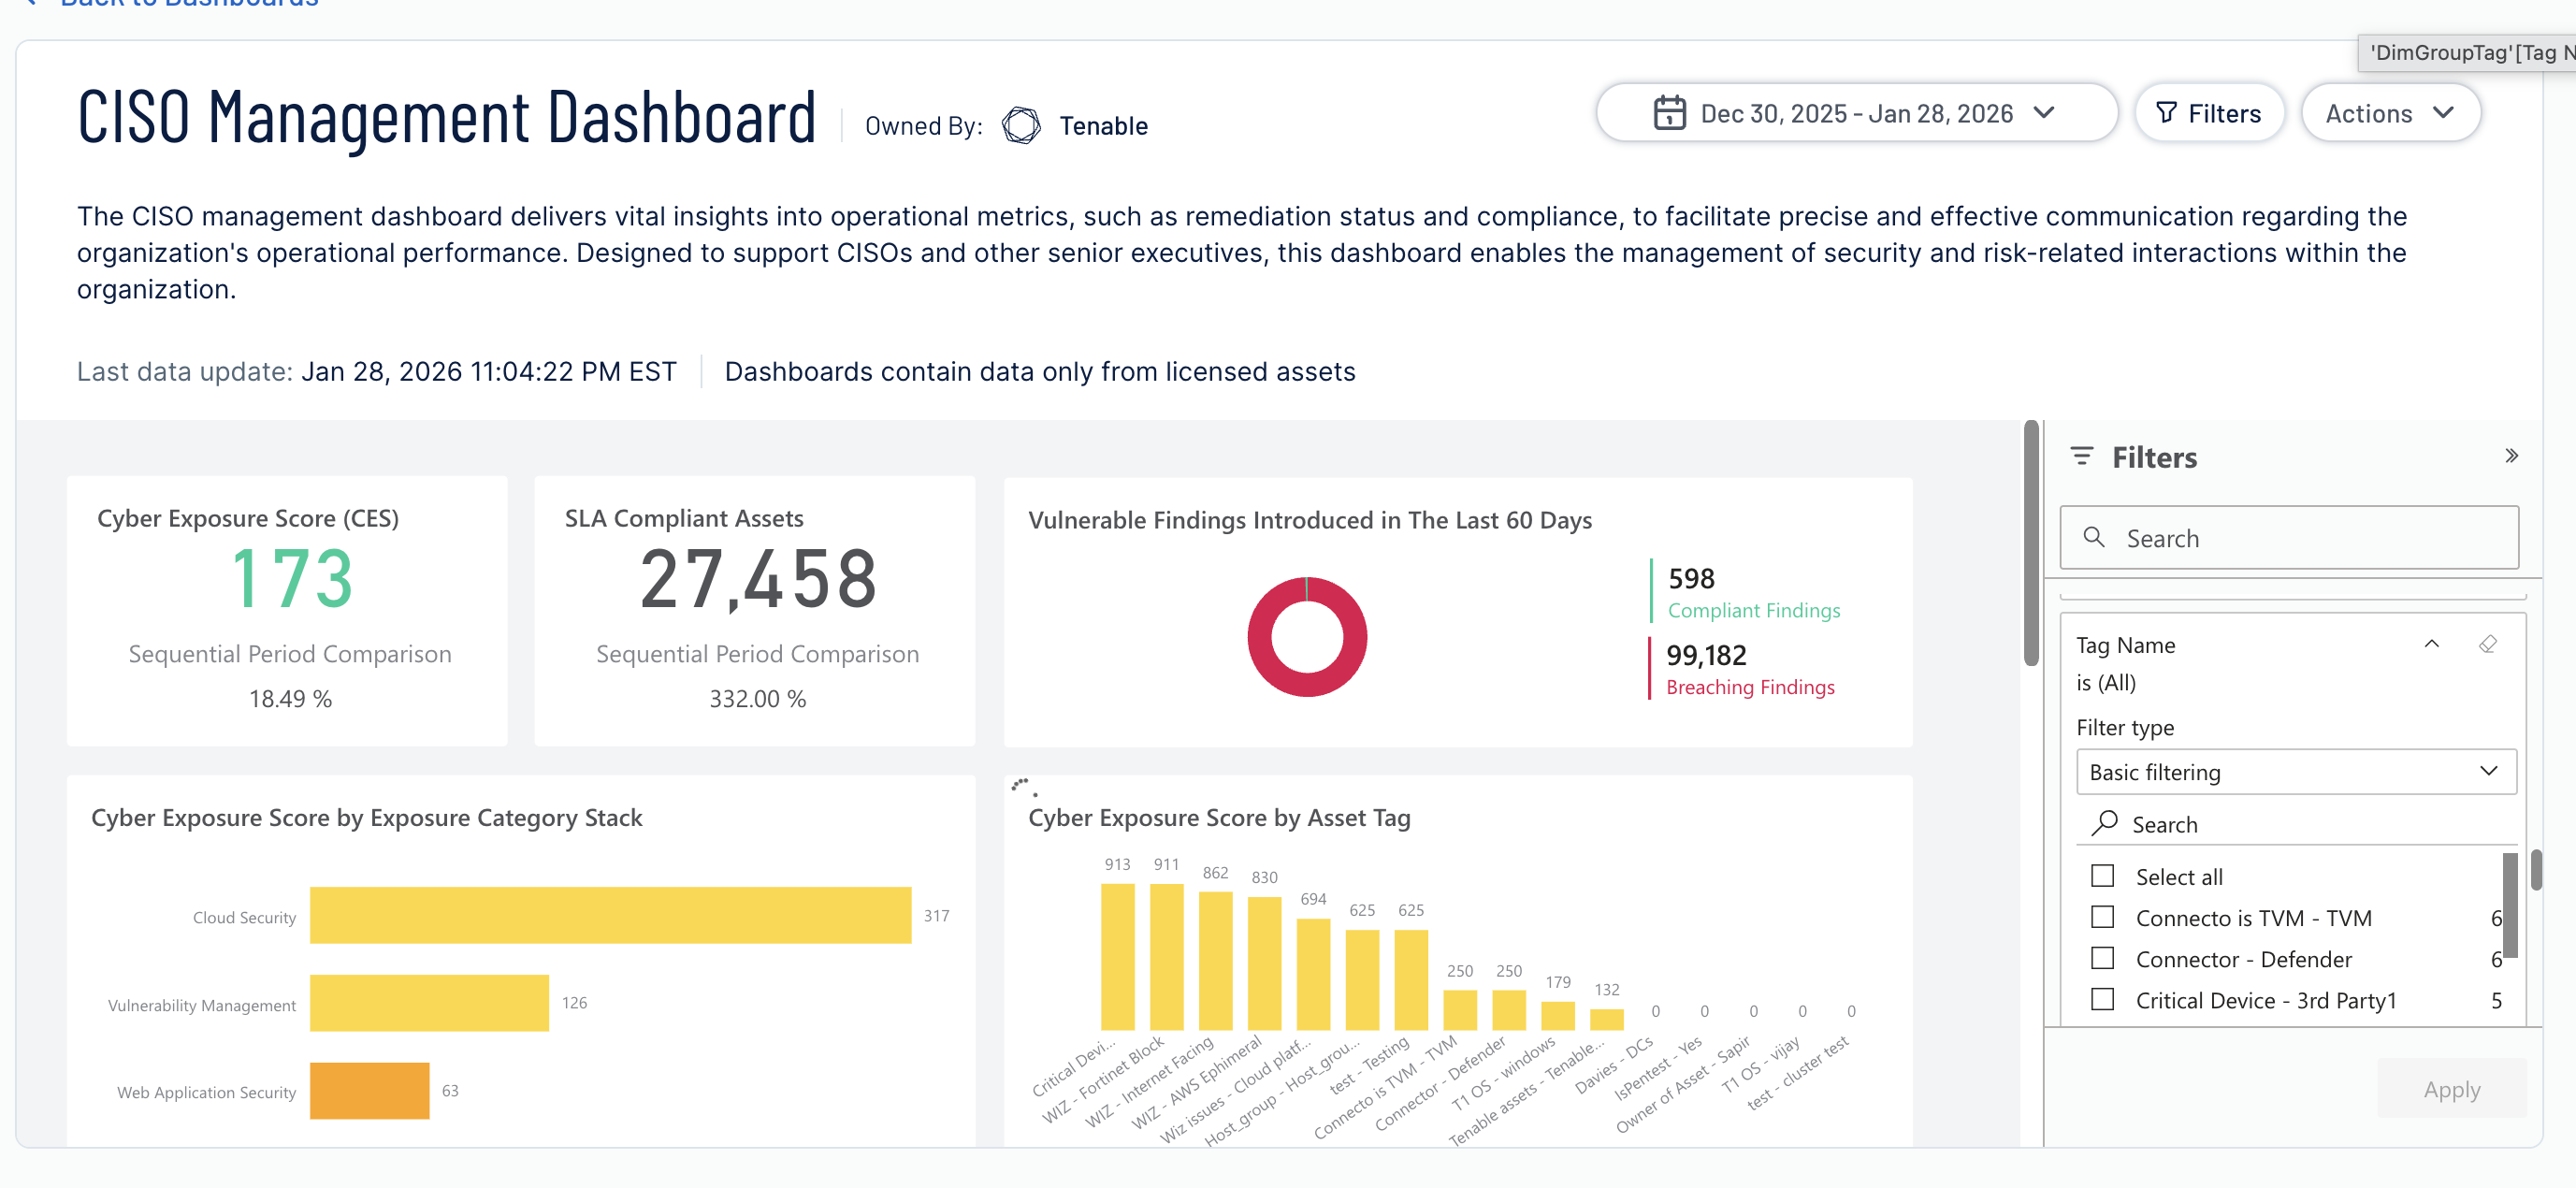
- Visualize data: Use your tags to filter data in Exposure View and Dashboards for targeted analysis.
Step 5: Operationalize the Remediation Lifecycle
Manage the lifecycle of findings using asset ownership and the "Close the Loop" process.
- Assign owners: Filter Findings by Asset Owner Tags to generate targeted reports for specific teams (e.g., "Show me all Open Pen Test findings for the Payments Team").
- Prioritize: Use the Exposure Score to determine which findings to fix first, focusing on those that reduce the most inventory risk.
- Close the loop (fix & verify):
- Maintain records: Treat your import file as a living document. After you remediate a vulnerability, delete that specific row from your file.
- Sync to resolve: Re-upload the updated file. The system automatically compares the new data against the previous version. Tenable Exposure Management moves missing findings to Fixed.
- Recalculate: This sync triggers an immediate recalculation of your Exposure Score.
Summary Checklist
| Stage | Action |
|---|---|
| Prepare | Format data (CSV, Excel, or ZIP) and normalize Severity (Critical, High, Medium, or Low). |
| Ingest | Upload via Tenable One Open Connector and validate asset mapping. |
| Analyze |
Tag by asset owner and check impact on Exposure View and Dashboards. |
| Remediate |
Filter by owner to assign fixes and prioritize based on business risk. |
| Close | Remove fixed findings from the file and re-upload to resolve them in Tenable Exposure Management. |