VR Configuration and Schedule Import
This section describes how to configure OT Security for VR.
Note: The OT Security for VR application supports only OT Security.
The VR integration configuration allows ServiceNow to poll and retrieve vulnerability data from Tenable.
Before you begin:
- In ServiceNow, you must have an account that has the x_tsirm_tio_vr.admin role to complete the setup.
-
Configure the Tenable Connector
Note: Completely configure and tune Service Graph Connector for Tenable for Assets to match Tenable Assets with ServiceNow CIs. If you do not do this first, issues may occur with VR.
- Log in to ServiceNow.
- In the left-hand menu, click Tenable Connector.
-
In the sub-menu, click Connectors.
The Tenable Connectors page appears.
-
Click the Tenable connector you want to use: Tenable.ot.
The Tenable Connector page appears.
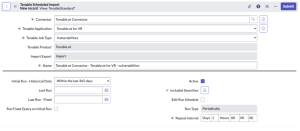
- In the Scheduled Jobs section, click New.
The Tenable Scheduled Import page appears. By default, the Tenable Product and Connector fields populate with the Tenable application/connector you selected in step 4.
-
From the Tenable Application drop-down box, select Tenable.ot for Vulnerability Response.
-
From the Tenable Job Type drop-down box, select the Vulnerabilities job type.
Note: If you are in a domain-separated environment, the Domain is set to the same value that is on the Connector record. If this is not correct, create a new Connector record in the correct Domain.
-
If you are in a domain-separated environment, in the Domain box, type the domain into which to bring connector data.
- (For Tenable Vulnerability Management) From the Import Export drop-down box, select Import. Import is selected by default.
- In the Name text box, type a name for the VR.
-
Configure the options for your import.
Option Description Initial Run Historical Data Specifies how far back (in days) to import when run for the first time. For example, if you select the Within 30 days option, observed vulnerabilities within 15 or 25 days ago are imported into ServiceNow. After the first import, Tenable only requests as many days as needed to catch up with Tenable.
Last Run -Opened/Reopened The date and time that the Open/Reopened import was last run. Last run - Fixed The date and time that the fixed import was last run. Run Fixed Query on Initial Run Pulls fixed vulnerabilities from the past on the first import. This allows for more complete reporting in ServiceNow for prior fixed vulnerabilities. By default, this setting is not selected.
Active If selected, the scheduled job runs on the configured schedule. If Run Type = Periodically and Active = true, then an asset sync is automatically executed when you submit the import or export. By default, this setting is selected. Included Severities Specify the severities you want to be imported. By default, this is set to High, Critical Schedule Edit Run Schedule
Select this box if you want to edit the Run Type and Repeat Interval / Time.
Run Type The frequency that you want the import to run. Repeat Interval / Time The set time (hh/mm/ss) to run the import. - Click Update.
By default, connector starts syncing vulnerabilities from Tenable to ServiceNow.
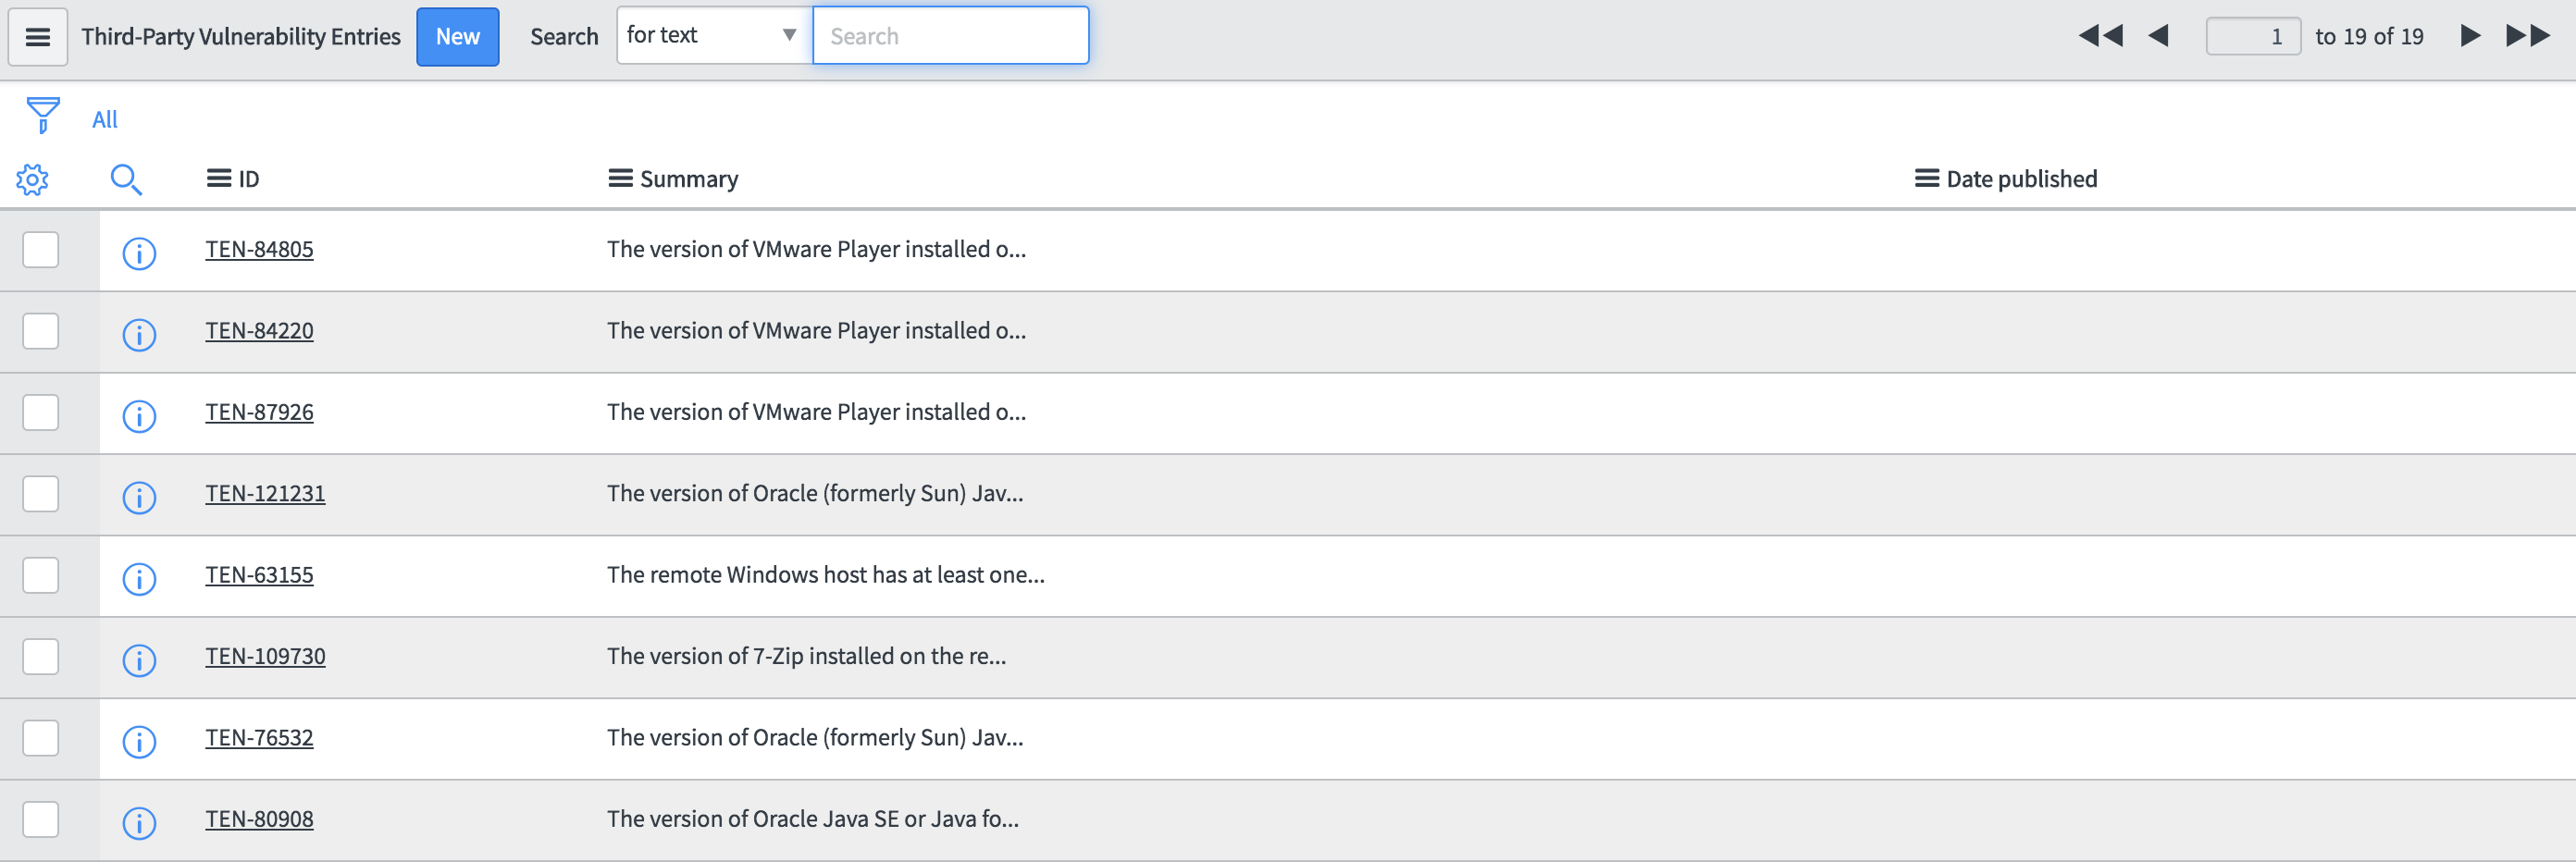
Third-Party Vulnerabilities
To view third-party vulnerabilities:
- Navigate to Vulnerability Response > Libraries > Third-Party.
Vulnerabilities that include TEN- were imported from OT Security. Click a vulnerability to view the details.
Note: The bottom of the page includes vulnerability items and lists of CVE information linked during the import.
Vulnerable Items (Linked Vulnerability and Configuration Items)
To view vulnerable items:
-
Navigate to Vulnerability Response > Vulnerable Items.
Vulnerabilities that include TEN- were imported from OT Security. Click a vulnerability to view the details.
Note: Text boxes are disabled for closed vulnerable items. In the Notes section, you can view information about why the item is closed.