Deployment Waves allow deployment of patches progressively to devices contained in different Business Units. Because Waves execute in top-to-bottom order, less Critical Business Units appear higher in the priority. This prioritizes deployment to non-mission critical business units or smaller groups of endpoints first, followed by more critical or larger groupings of endpoints.
Entries for Deployment Wave settings exist in the object templates for Business Units, Deployment Channels, and Customized Products templates. All methods use the same process.
-
Select Deployment Waves in the left navigation menu of the Patch Management Dashboard.
-
Select the Name of a template to open it, and then save the template with a new title:
-
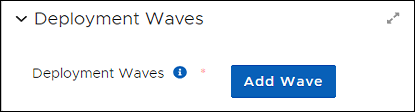
Scroll down to Deployment Waves in an open Deployment Wave template.
-
Select Add Wave. This creates a new table to hold another Wave in the template.
-
Select + Create Wave Entry to open the Wave Entry dialog.

-
Select Browse next to Add Business Unit:
-
Navigate to and select the Business Unit to which the Wave Entry applies.
-
Expand the Include Child Business Units menu to include one or more child Business Units of the selected parent.
-
Select the item that best describes how you want this wave to manage this deployment to child Business Units.
-
-
Select Create Wave Entry to return to the Deployment Wave template.
-
Select Save at the upper left to save your progress:
-
Scroll down to Deployment Waves in an open Deployment Wave template:

-
Select Add Wave, and the select + Create Wave Entry. This opens the Create Wave Entry dialog.

-
Select Browse next to Add Business Unit:
-
Navigate to and select the Business Unit to which the Wave Entry applies.
-
Select Add Business Unit on the bottom left.
-
-
Expand the Include Child Business Units menu to include one or more child Business Units of the selected parent.
-
Select Create Wave Entry to return to the Deployment Wave template.
-
Select Save at the upper left to save your progress:
-
Select Deployment Waves in the left navigation menu of the Tenable Patch Management dashboard, and then click Show All on the upper right.
-
Open the Deployment Wave template you want to change.
-
Scroll down to the Deployment Waves table that shows the Wave Entry you want to edit or remove.
-
Select the ellipsis (…) in the Actions column, and then choose an option:
-
To remove the Wave, select Remove Wave Entry.
-
To Edit the Wave, select Edit the Remote Wave Entry, and then make any necessary changes.
-
-
Select Save at the upper left to save your progress: