View, create, or modify Administrators and Roles, enable OIDC or SAML providers, and assign permissions to Roles. Changes made here affect all licensed TPM products.
-
Select
 on the upper right of the Admin Portal dashboard.
 -
Select Settings > Security > Administrator to manage accounts, roles, OIDC Providers, SAML Providers, and Class Permissions.

-
Select an Administrators tab of Security Settings, and then select + NEW to open the new administrator template.

-
Enter the Administrator Details:
-
Select the Admin Type login from the list. You can choose from the following login options:
-
Native login: Enter a username and password in the format of an email address. The email address does not need to be valid or able to receive mail. However, Tenable recommends entering a valid email when using TPM, or if you need to reset forgotten passwords.
Note: Strong passwords are enforced for Tenable accounts. The password must be at least 10 characters long and contain at least one digit, an uppercase letter, and a lowercase letter.
-
Windows Active Directory account: Enter the email address of the domain account.
-
OIDC-enabled account: Enter the NETBIOS domain name and account name of the user. For more information on OIDC, review the Enable OIDC on a Tenable Patch Management Server Knowledge Base article.
-
SAML-enabled account: Enter the NETBIOS domain name and account name of the user. For more information on SAML, review the Enable SAML on a Tenable Patch Management Server Knowledge Base article.
-
-
-
Enter the User Details:
-
Enter the First Name and Last Name for the new administrator.
-
Complete the additional contact information fields as required.
Note: A red asterisk next to a field indicates a required field.

-
-
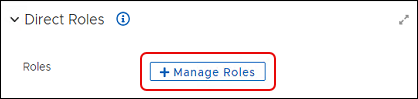
Assign Direct Roles:
-
Select + Manage Roles.
-
Select one or more roles for the new administrator:
-
High level roles include Read-only Admin Role and Super Admin Role.
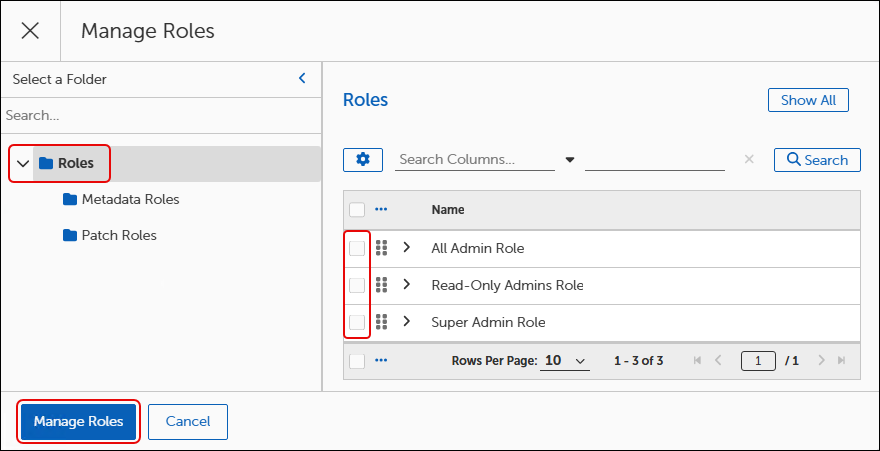
-
-
Select Manage Roles on the bottom-left corner of the dialog to return to the administrator details workspace.
-
-
Select Save at the top left to save the new administrator.
Note: The steps to manage Administrators and Roles may differ for those using Tenable Patch Management Self-hosted. For more information, refer to the Tenable Patch Management - SaaS Deployment vs Tenable Patch Management Self-hosted Customer FAQ.

-
Select the Roles tab of Security Settings, and then select + NEW to open a new Role template.

-
Enter a Role Name and a detailed Role Description in the Role Properties workspace.

-
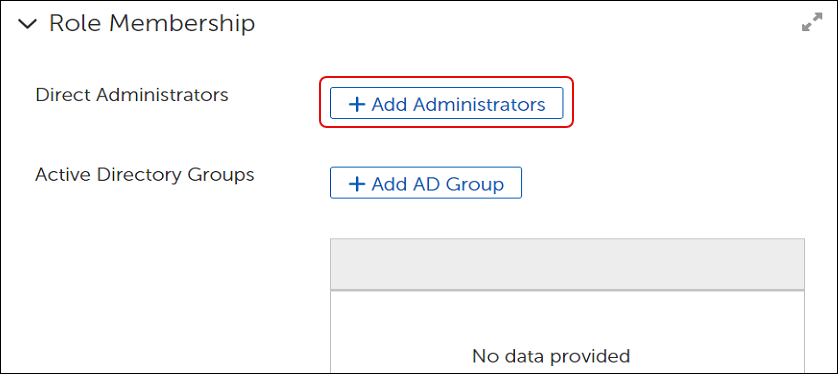
Add one or more Direct Administrators or Group Administrators in the Role Membership section:
-
Add an existing Direct Administrator.
-
Select Add Administrators to open the Add Administrators dialog.
-
Select one or more administrators from the table for the new role.

-
Select Add Administrators to return to the Role template.
-
-
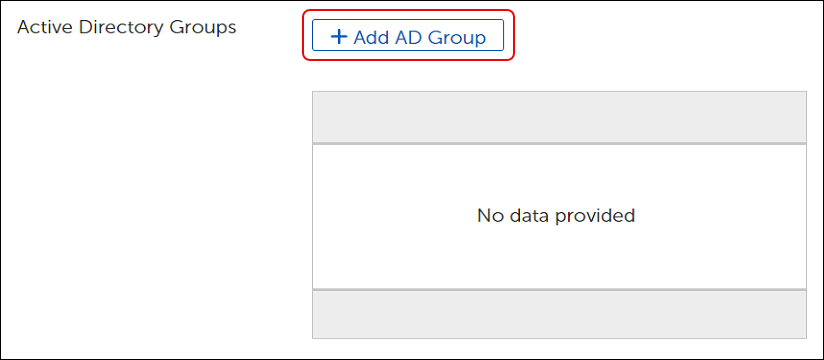
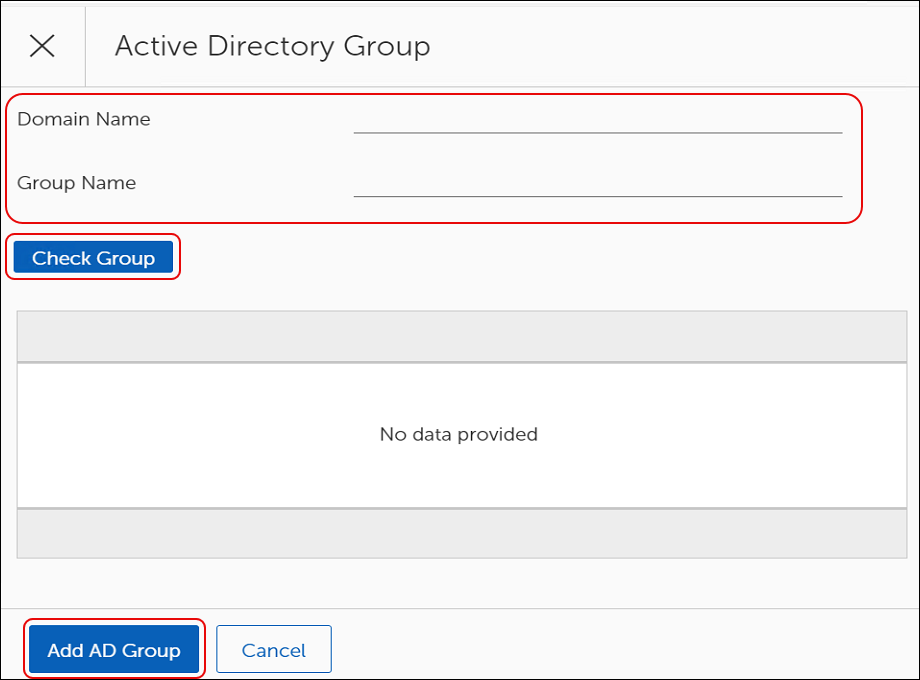
Add an existing AD Group (Active Directory):
-
Select Add AD Group to open the Active Directory Group dialog.
-
Enter the Domain Name and Group Name, and then select Check Group to return the members of the group.
All members are added to the role.
-
Select Add AD Group to return to the Role template.
-
-
Select Save at the top-left to save the new role.