Manage Consoles
The Consoles tab on the Product Details page is available for any Tenable product that allows the use of individual consoles:
-
Tenable One
-
Tenable Vulnerability Management
-
Tenable Security Center
-
Tenable Security Center+
-
Tenable Enclave Security
Here, you can manage your consoles in the following ways:
Create a Console
To create a new console:
-
In the upper-right corner of the Consoles tab, click Manage Consoles.
A menu appears.
-
Click
 Create Console.
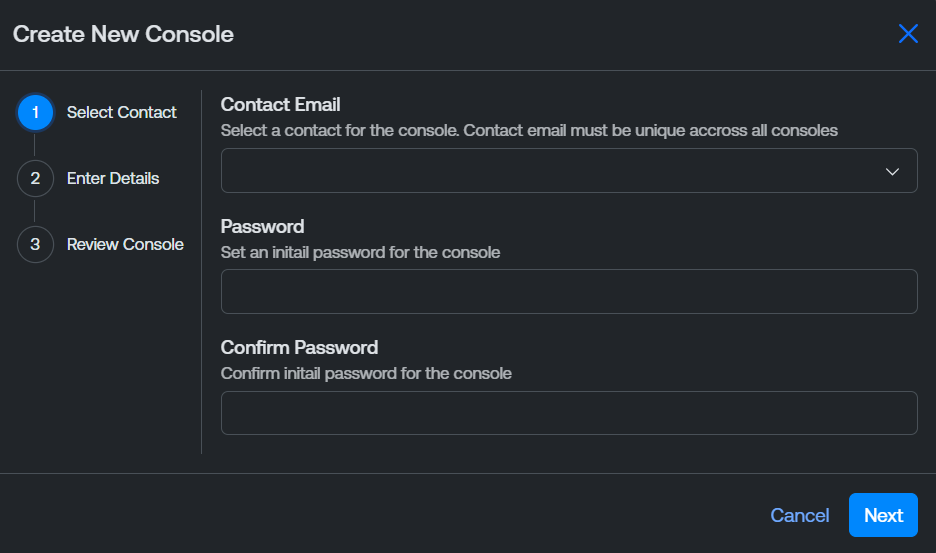
The Create New Console window appears.
-
For Tenable One Foundation/ Tenable One Advanced consoles, configuring the following options:
Note: These options only apply to customers using Tenable One Foundation/ Tenable One Advanced licensing. For more information, see Tenable One Foundation/ Tenable One Advanced Licensing in the Tenable Licensing Quick Reference Guide.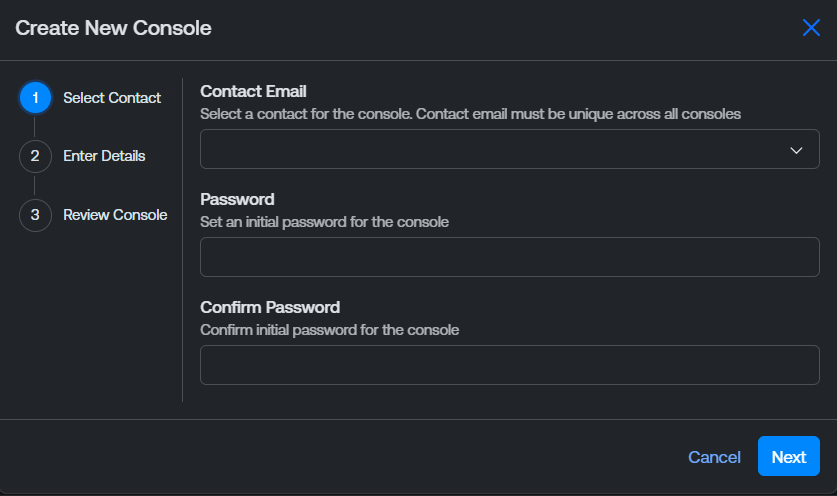
-
From the Contact Email drop-down, select the contact you want to assign to the console.
-
In the Password text box, type the initial password to use to log in to the console.
-
In the Confirm Password text box, re-type the password.
-
Click Next.
-
(Optional) In the Label text box, type a label for the console. This label appears in the Label column across the Tenable Account Management portal.
-
From the Region drop-down, select the cloud region in which you want the console to reside.
Tip: For more information on cloud regions, see Cloud Sensors in the Tenable Vulnerability Management User Guide. -
In the Console Size text box, type the number of IP addresses you want to allocate to the console.
Tip: Alternatively, drag the slider left or right to adjust the number. -
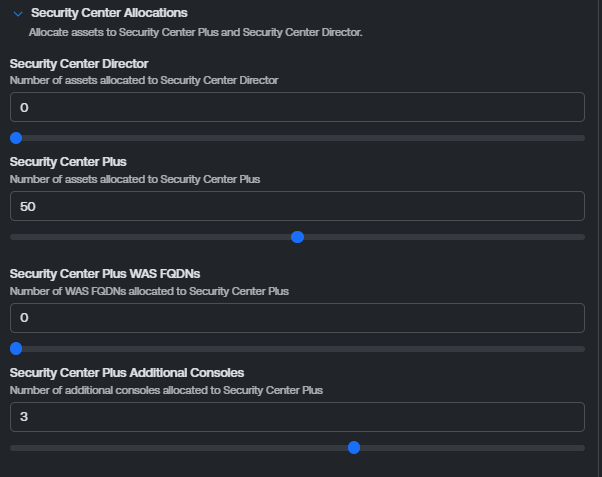
(Optional) To allocate assets to your Tenable Security Center applications, expand the Security Center Allocations section.
 Note: The allocation options available depend on the Tenable One add-on components to which you have access. For more information, see Tenable One Foundation / Tenable One Advanced Licensing in the Tenable Licensing Quick-Reference Guide.
-
In the Security Center Director text box, type the number of assets you want to allocate.
-
In the Security Center Plus text box, type the number of assets you want to allocate.
-
In the Security Center Plus WAS FQDNs text box, type the number of WAS FQDNs you want to allocate.
-
In the Security Center Plus Additional Consoles text box, type the number of additional consoles you want to allocate.
Tip: Alternatively, drag the slider left or right to adjust the number. -
-
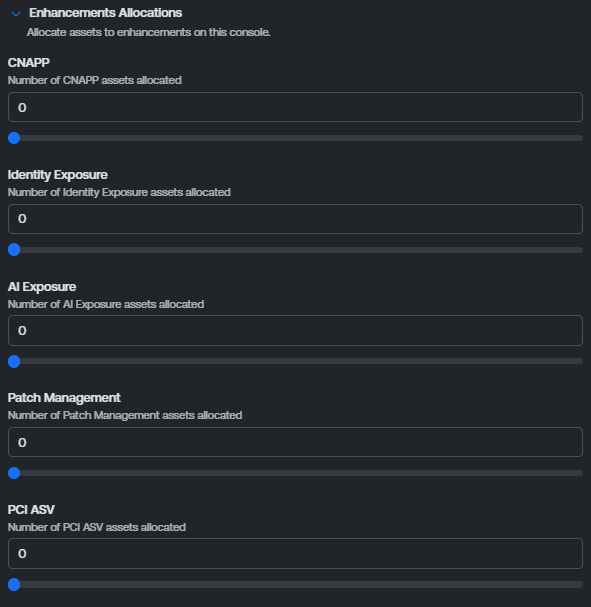
(Optional) To allocate assets to your Tenable One add on enhancements, expand the Enhancements Allocations section.
 Note: The allocation options available depend on the Tenable One add-on components to which you have access. For more information, see Tenable One Foundation / Tenable One Advanced Licensing in the Tenable Licensing Quick-Reference Guide.
-
In the CNAPP text box, type the number of assets you want to allocate.
-
In the Identity Exposure text box, type the number of assets you want to allocate.
-
In the AI Exposure text box, type the number of assets you want to allocate.
-
In the Patch Management text box, type the number of assets you want to allocate.
-
In the PCI ASV text box, type the number of assets you want to allocate.
Tip: Alternatively, drag the slider left or right to adjust the number. -
-
-
For Tenable One Ratio-Based consoles, configuring the following options:
Note: These options only apply to customers using Tenable One Ratio-Based licensing. For more information, see Tenable One Ratio-Based Licensing in the Tenable Licensing Quick Reference Guide.
-
From the Contact Email drop-down, select the contact you want to assign to the console.
-
In the Password text box, type the initial password to use to log in to the console.
-
In the Confirm Password text box, re-type the password.
-
Click Next.
-
(Optional) In the Label text box, type a label for the console. This label appears in the Label column across the Tenable Account Management portal.
-
From the Region drop-down, select the cloud region in which you want the console to reside.
Tip: For more information on cloud regions, see Cloud Sensors in the Tenable Vulnerability Management User Guide. -
In the Console Size text box, type the number of IP addresses you want to allocate to the console.
Tip: Alternatively, drag the slider left or right to adjust the number.
-
-
For Tenable Security Center consoles, configuring the following options:

-
(Optional) In the Label text box, type a label for the console. This label appears in the Label column across the Tenable Account Management portal.
-
In the Console Size text box, type the number of IP addresses you want to allocate to the console.
Tip: Alternatively, drag the slider left or right to adjust the number. -
From the License By drop-down, select the license ID type:
-
Hostname — License the console by the hostname of the Tenable Security Center server.
-
Install UUID — License the console by the install UUID generated during installation. Use this option when the console's hostname is not stable, for example in containerized or cloud-hosted deployments.
Tip: For more information, see the Tenable Security Center licensing documentation. -
-
In the License ID text box, type the hostname or install UUID value that matches your License By selection. This appears in the License ID column for the console across the Tenable Account Management portal.
Note: You can leave License By and License ID blank during creation and set them later from the Consoles list. Both fields must be populated before you can generate a license key.
-
-
For Tenable Vulnerability Management consoles, configuring the following options:
-
From the Contact Email drop-down, select the email address of the primary contact for the console.
-
In the Password text box, type a password for the contact.
-
In the Confirm Password text box, re-type the password for the contact.
-
Click Next.
-
(Optional) In the Label text box, type a label for the console. This label appears in the Label column across the Tenable Account Management portal.
-
From the Region drop-down, select the cloud region in which you want the console to reside.
Tip: For more information on cloud regions, see Cloud Sensors in the Tenable Vulnerability Management User Guide. -
In the Console Size text box, type the number of IP addresses you want to allocate to the console.
Tip: Alternatively, drag the slider left or right to adjust the number.
-
-
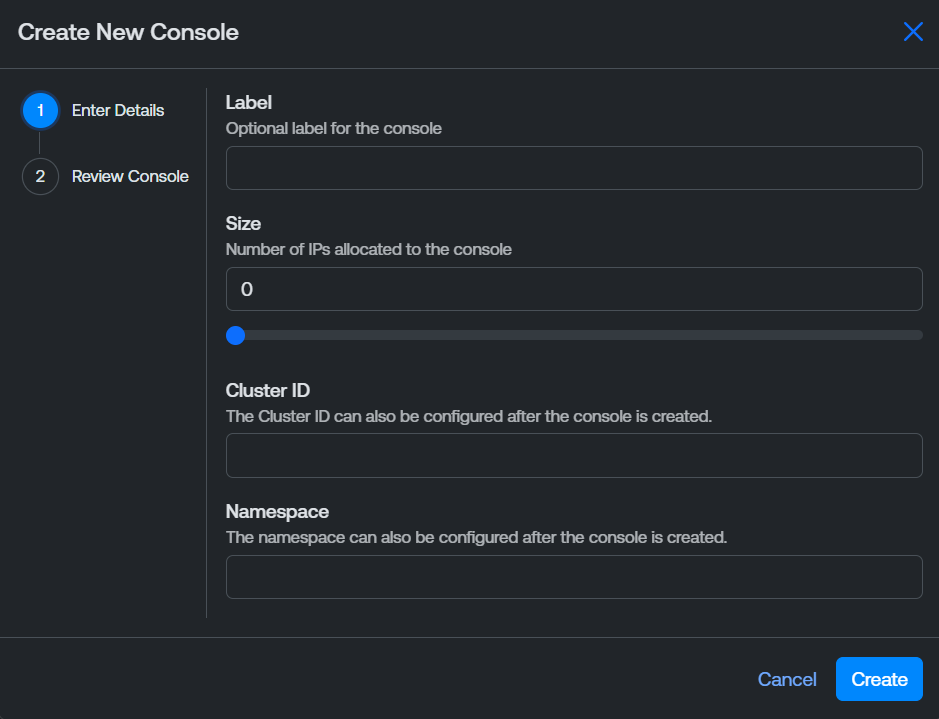
For Tenable Enclave Security consoles, configuring the following options:
-
(Optional) In the Label text box, type a label for the console. This label appears in the Label column across the Tenable Account Management portal.
-
In the Size text box, type the number of IP addresses you want to allocate to the console.
Tip: Alternatively, drag the slider left or right to adjust the number. -
In the Cluster ID text box, type cluster ID label for the console. This appears in the Cluster ID column for the console across the Tenable Account Management portal.
-
In the Namespace text box, type a namespace for the console. This appears in the Namespace column for the console across the Tenable Account Management portal.
Tip: For more information, see Prepare Kubernetes Clusters in the Tenable Enclave Security User Guide. -
-
-
Click Create.
The Review Console page appears.
-
Click Submit.
The Tenable Account Management portal creates the console and adds it to the Consoles list.
Edit Console Size
You can edit the size of any console within the Consoles list.
To edit the size of a console:
-
In the Consoles list, in the row for the console whose size you want to edit, click the
 button.
A menu appears.
-
Click
 Edit Console Size.
The Edit Console Size window appears.

-
In the Size text box, type the number of IP addresses you want to allocate to the console.
Tip: Alternatively, drag the slider left or right to adjust the number. -
In the WAS FQDN text box, type the number of WAS FQDNs you want to allocate to the console.
Tip: Alternatively, drag the slider left or right to adjust the number. -
Click Update.
The Tenable Account Management portal updates the size of the selected console.
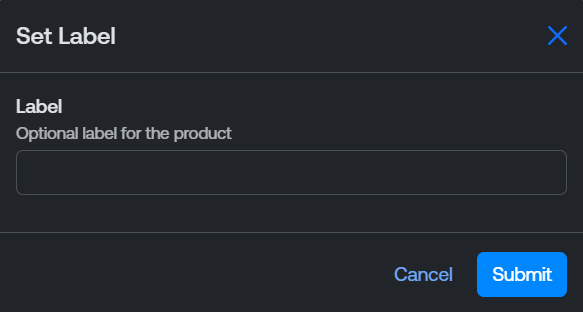
Set a Console Label
You can set an optional label on any console, which appears in the Label column across the Tenable Account Management portal.
To set a label on a console:
-
In the Consoles list, in the row for the console whose size you want to edit, click the
button.A menu appears.
-
Click
 Set Label.
The Set Label window appears.
-
In the Label text box, type a label for the console.
-
Click Submit.
The Tenable Account Management portal saves your changes and displays the label in the Consoles list.
Download a Console License Key (Tenable Enclave Security/Tenable Security Center Consoles Only)
You can download Tenable Enclave Security, Tenable Security Center, and Tenable Security Center Director product license keys from within the Consoles list.
To download a product console license key:
-
In the Consoles list, in the row for the product console for which you want to download a license key, click the
button.A menu appears.
-
Click
 Download License Key.
A confirmation message appears.
Note: If the product has already been activated, then downloading a new license key will automatically reset the product activation. -
Click Download.
The Tenable Account Management portal downloads the key to your local downloads folder.
Delete Console
To delete a console:
-
In the Consoles list, in the row for the console you want to delete, click the
button.A menu appears.
-
Click
 Delete Console.
A confirmation message appears.
-
Click Delete.
The Tenable Account Management portal deletes the selected console.