Product Details
The Product Details page within the Tenable Account Management portal allows you to view important details about your products, as well as manage your product and its assigned contacts, request renewal quotes, and more!
To access the Product Details page:
-
Access the Products page.
-
In the Products list, in the Code column, click the code for the product for which you want to view details.
The product details page appears.

The product details page includes the following sections:
Product Overview
The product overview section includes important information about the product, including, but not limited to:
-
Activation Code — The activation code for the product.
-
Customer ID — The customer ID of the product owner assigned to the product.
-
Consoles Licensed — Where applicable, the number of individual consoles licensed to the product.
-
Container UUID — Where applicable, the UUID assigned to the product container.
-
Size — Where applicable, the size of the license associated with the product.
In this section, you can manage your product the same way as on the Products page. For more information, see Manage Purchased Products.
Depending on the product for which you are viewing details, you can view the following additional product information:
Billing and Subscription
The Billing and Subscription tab on the product details page allows you to view purchase, billing, subscription, and expiration information about your product.
This section includes the following information:
-
Purchase Date — The date on which the product was purchased.
-
Expiration Date — The date on which the product license expires.
In this section, you can manage your product billing and subscriptions in the following ways:
Request Renewal Quote
You can request a renewal quote for any product you have listed within the Tenable Account Management portal.
To request a renewal quote:
-
In the lower-right corner, click
 Request Renewal Quote.
The Request Renewal Quote window appears.

-
Fill out the form with the appropriate information for the renewal quote request.
-
Click Submit.
The Tenable Account Management portal submits your request for a renewal quote.
Renew or Quote Online
For some Tenable products, you can renew or get a quote for the product online.
To renew or quote online:
-
In the lower-right corner, click
Renew or Quote Online.The Renew or Quote Products Online window appears.

-
Select the check box next to each Tenable product available for online renewal or quote.
-
Click Proceed to Cart.
The Tenable Account Management navigates you directly to your Tenable shopping cart to complete your online product purchase.
Consoles (Tenable One, Tenable Vulnerability Management, Tenable Security Center, Tenable Security Center+, Tenable Enclave Security Only)
The Consoles tab on the product details page is available for any Tenable product that allows the use of individual consoles:
-
Tenable One
-
Tenable Vulnerability Management
-
Tenable Security Center
-
Tenable Security Center+
-
Tenable Enclave Security
Here, you can view and manage those consoles.

The Consoles list includes the following information:
-
Status — The status of the console, for example Active or Unactivated.
-
Code — The product code associated with the console. Click the product code to navigate directly to the product details page for that console.
-
Label — Where applicable, a descriptive label applied to the console during configuration. For Tenable Enclave Security, this option is called Namespace.
-
Hostname — Where applicable, the hostname assigned to the console. For Tenable Enclave Security, this option is called Cluster ID.
-
Username (T1/VM Only) — The primary username associated with the console.
-
UUID (T1/VM Only) — The UUID associated with the console.
-
Size — The licensing size associated with the console.
-
Agents Managers On-prem — The number of on-prem agents provisioned versus the number of available on-prem agent managers. Click the number to navigate directly to the On-Prem Agent Managers tab within the console's product details.
-
Created Date — The date at which the console was created.
-
Expiration Date — The date at which the console expires.
To change the default columns within the list:
-
Click Columns
 .
.A list of available columns appears.
-
(Optional) Use the search bar to search for a specific column.
-
Select/delesect the check boxes to show or hide columns in the table.
-
(Optional) Click Reset Columns to reset all columns to their defaults.
In this section, you can also manage your consoles. For more information, see Manage Consoles.
Assigned Contacts
The Assigned Contacts tab on the product details page allows you to view and manage the contacts assigned to the product.

The Assigned Contacts list includes the following information:
-
Status — The status of the contact, for example Active or Disabled.
-
Name — The full name of the contact.
-
Email — The email address associated with the contact.
-
Contact Role — The role associated with the contact, for example Primary or Community.
-
Product Access — The product access associated with the contact, for example Owner or Read.
To change the default columns within the list:
-
Click Columns
.A list of available columns appears.
-
(Optional) Use the search bar to search for a specific column.
-
Select/delesect the check boxes to show or hide columns in the table.
-
(Optional) Click Reset Columns to reset all columns to their defaults.
In this section, you can also manage your assigned contacts. For more information, see Manage Assigned Contacts.
Child Products
The Child Products tab on the product details page shows information about all child products assigned to a parent application or console.

The Child Products list includes the following information:
-
Status — The status of the console, for example Active or Unactivated.
-
Code — The product code associated with the console. Click the product code to navigate directly to the product details page for that console.
-
Product Name — Where applicable, the hostname assigned to the console.
-
Label — Where applicable, a descriptive label applied to the console during configuration.
-
Size — The licensing size associated with the console.
-
Customer ID — The date at which the console was created.
-
Expiration Date — The date at which the console expires.
To change the default columns within the list:
-
Click Columns
.A list of available columns appears.
-
(Optional) Use the search bar to search for a specific column.
-
Select/delesect the check boxes to show or hide columns in the table.
-
(Optional) Click Reset Columns to reset all columns to their defaults.
In this section, you can manage your child products in the following ways:
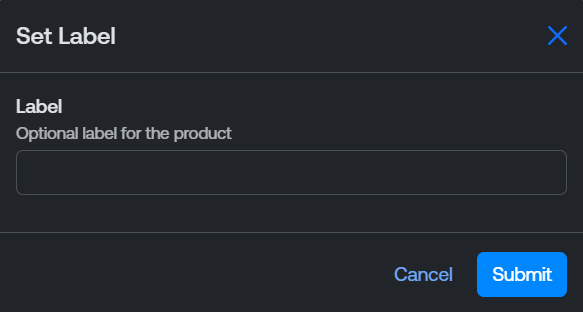
Set Label
You can set an optional label on any product, which appears in the Label column in the Products list.
To set a label on a child product:
-
In the Child Products list, in the row for the child product you want to label, click the
 button.
A menu appears.
-
Click
 Set Label.
The Set Label window appears.
-
In the Label text box, type a label for the product.
-
Click Submit.
The Tenable Account Management portal saves your changes and displays the label in the Child Products list.
Reset Activation
You can reset the activation for child products. Because an activation code can only be registered on one host, this option allows you to register it again, either on the same host or another host.
To reset the activation for a child product:
-
In the Child Products list, in the row for the child product whose activation you want to reset, click the
button.A menu appears.
-
Click Reset Activation.
A confirmation message appears.
-
Click Submit.
The Tenable Account Management portal resets the activation for the specified child product.
On-Prem Agent Managers (Consoles Only)
The On-Prem Agent Managers tab on the product details page highlights the on-premise agents associated with your Tenable Security Center child consoles.

The On-prem Agent Managers list includes the following information:
-
Status — The status of the on-prem agent, for example Active or Unactivated.
-
Code — The product code associated with the on-prem agent. Click the product code to navigate directly to the product details page for that cloud agent.
-
Label — Where applicable, a descriptive label applied to the on-prem agent during configuration.
-
Size — The licensing size associated with the on-prem agent.
-
Created Date — The date at which the on-prem agent was created.
-
Expiration Date — The date at which the on-prem agent expires.
To change the default columns within the list:
-
Click Columns
.A list of available columns appears.
-
(Optional) Use the search bar to search for a specific column.
-
Select/delesect the check boxes to show or hide columns in the table.
-
(Optional) Click Reset Columns to reset all columns to their defaults.
In this section, you can manage your on-prem agent managers in the following ways:
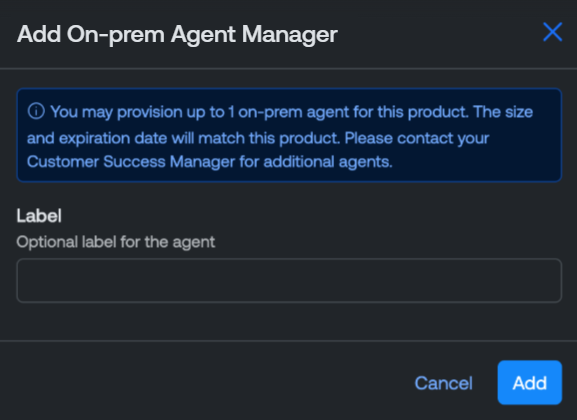
Add an On-Prem Agent
To add an on-prem agent manager to a Tenable Security Center console:
-
In the upper-right corner of the On-Prem Agents tab, click Manage Agents.
A menu appears.
-
Click
 Add On-Prem Agent Manager.
The Add On-Prem Agent window appears.
-
(Optional) In the Label text box, type a label for the on-prem agent manager. This label appears in the Label column across the Tenable Account Management portal.
-
Click Add.
The Tenable Account Management portal creates the on-prem agent manager and adds it to both the Tenable Security Center console and the On-Prem Agent Managers list.
Parent Product (Child Products Only)
The Parent Product tab on the product details page highlights key information about the parent products of Tenable Security Center consoles and Tenable One child products.

The Parent Overview section includes parent product information including, but not limited to:
-
Product Name — The name of the parent product, for example Tenable One or Tenable Security Center Plus.
-
Activation Code — The activation code associated with the parent product. Click the activation code to navigate directly to the product details page for the parent product.
-
Label — Where applicable, a descriptive label applied to the parent product during configuration.
-
Container Username — Where applicable, the username of the parent product container owner.
-
Container UUID — Where applicable, the UUID associated with the parent product.
-
Size — Where applicable, the licensing size associated with the parent product.
-
Customer ID — Where applicable, the customer ID linked to the parent product.
Sites (Tenable OT Security Only)
A site represents a single OT Security instance and defines the number of IP addresses licensed to that instance. The Sites tab on the product details page allows you to view and manage the sites assigned to your Tenable OT Security instance.

The Sites list includes the following information:
-
Status — The status of the site, for example Active or Unactivated.
-
Label — Where applicable, a descriptive label applied to the site during configuration.
-
Site ID — The ID of the site on which the site resides.
-
Size — The licensing size associated with the site.
-
Created Date — The date at which the site was created.
-
Expiration Date — The date at which the site expires.
To change the default columns within the list:
-
Click Columns
 .
.A list of available columns appears.
-
(Optional) Use the search bar to search for a specific column.
-
Select/delesect the check boxes to show or hide columns in the table.
-
(Optional) Click Reset Columns to reset all columns to their defaults.
In this section, you can also manage your sites. For more information, see Manage Sites.