Support
The Support workflow in the Tenable Account Management portal is your starting point for getting help from Tenable.
From the Support landing page you can:
-
Open a Customer Care case for non-technical questions (orders, contacts, login, account administration).
-
Open a Technical Support case for issues with Tenable products.
-
Start a chat session with Tenable Technical Support.
-
Manage your existing cases.
-
Look up phone numbers and your Support PIN for calling Tenable Support.
To access the Support page:
-
In the left navigation menu, click Support.
The Support page appears.

The Support page includes the following sections:
Non-Technical Issue
This tile directs users who need help with non-product-related issues, such as order assistance, managing account contacts, Tenable Connect login errors, and permission problems. It also links to a Customer Care Guide for self-service reference.
Technical Issues
This tile is for users experiencing problems with Tenable products themselves, such as scanning errors, installation issues, or products not behaving as expected. It also links to a Technical Support Guide for additional guidance.
Contact Support
This tile provides quick-action links to:
Create a Customer Care Case
A Customer Care case is the right choice for non-technical questions about your account, contacts, orders, or Tenable Connect login. Customer Care case creation is available to any contact who can sign in to the portal.
To create a Customer Care case:
-
On the Contact Support tile, click Create Customer Care Case.
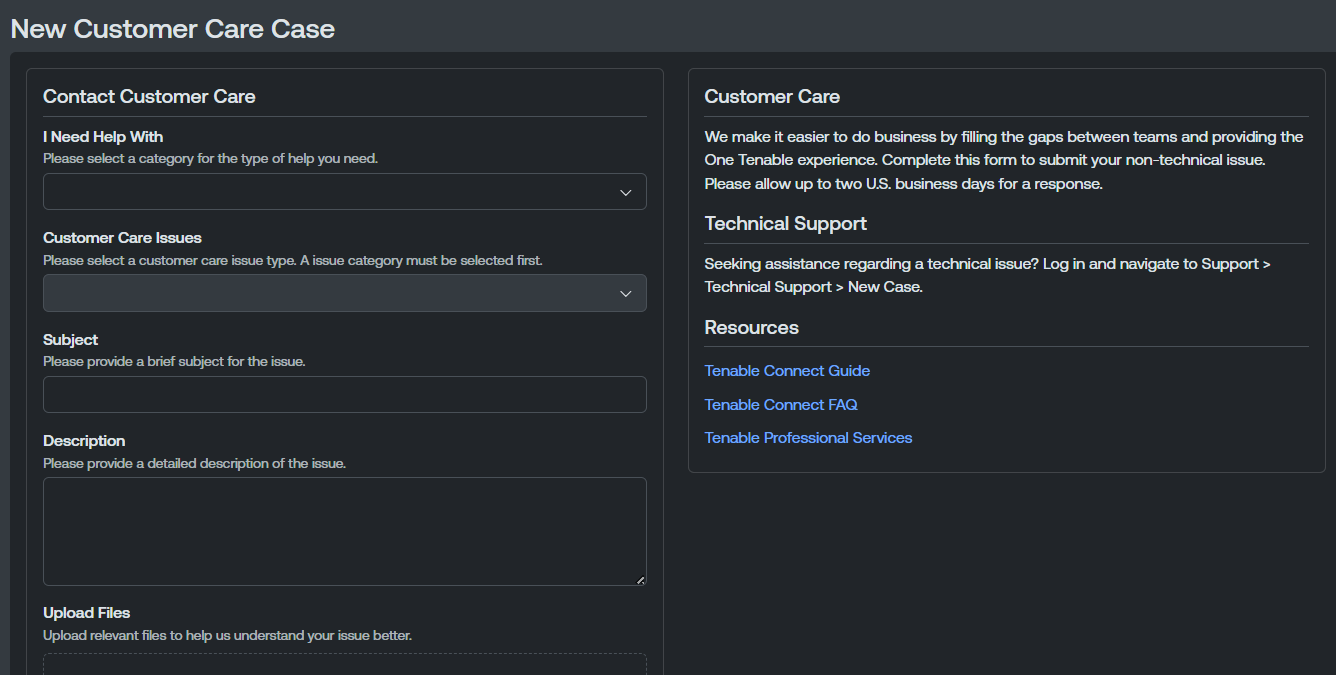
The New Customer Care Case window appears.
-
From the I Need Help With drop-down menu, select the category that best describes the type of help you need.
-
From the Customer Care Issues drop-down menu, select the issue type related to your request.
Tip: You must select a category in the I Need Help With drop-down menu before this option becomes available. -
In the Subject text box, type a brief subject for the issue.
-
In the Description box, type a detailed description of the issue you are experiencing. Be sure to include any relevant details that may help Tenable resolve it.
Tip: If your description contains text that looks like a credential or secret, the portal warns you before submission so you can remove it. -
(Optional) In the Upload Files section, upload any relevant files to help Customer Care better understand your issue.
Caution: If your account is FedRAMP-authorized, the file upload area displays a This account is FedRAMP authorized. Please do not upload any files containing FedRAMP data warning.Do one of the following:
-
Drag and drop files directly into the upload area.
-
Click Browse to locate and select files from your device.
Note: Up to 5 files can be uploaded at a time, with no maximum total number of files, no file size limit, and no file type restriction.Tip: If one or more files fail to upload, the portal does not block the remaining files. It reports an error for each failed file and offers details so you can retry. Click the failed file's row in the upload progress table to open File Upload Error Details where you can view information about why the upload failed. -
-
Click Submit.
The Tenable Account Management portal creates your Customer Care case. You can view and manage the case on the My Cases page.
Create a Technical Support Case
A Technical Support case is the right choice for issues with Tenable products — for example, scanning errors, installation errors, plugin issues, or unexpected product behavior.
- You must be signed in
- You must be assigned the Manage Cases permission
- You must have an active subscription with a defined service level
You can create a Technical Support case for product-related issues.
To create a Technical Support case:
-
On the Contact Support tile, click Create Technical Support Case.
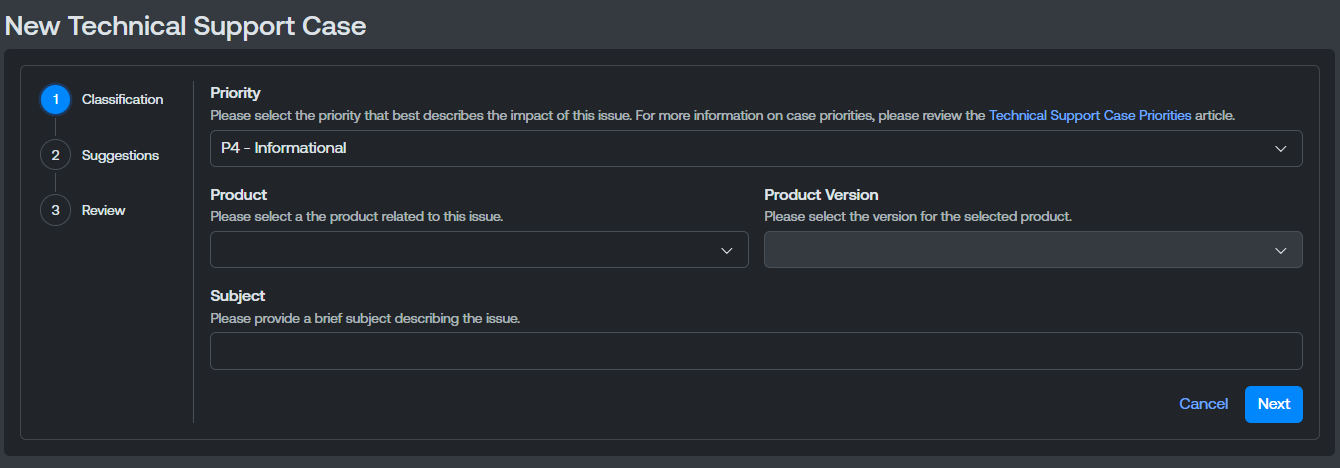
The New Technical Support Case page appears.
-
From the Priority drop-down menu, select the priority you want to assign to the support case.
-
From the Product drop-down menu, select the Tenable product related to your case.
-
If you select a product with a version, from the Product Version drop-down menu, select the appropriate version of the product related to your case.
-
In the Subject text box, type a brief subject of the issue.
-
Click Next.
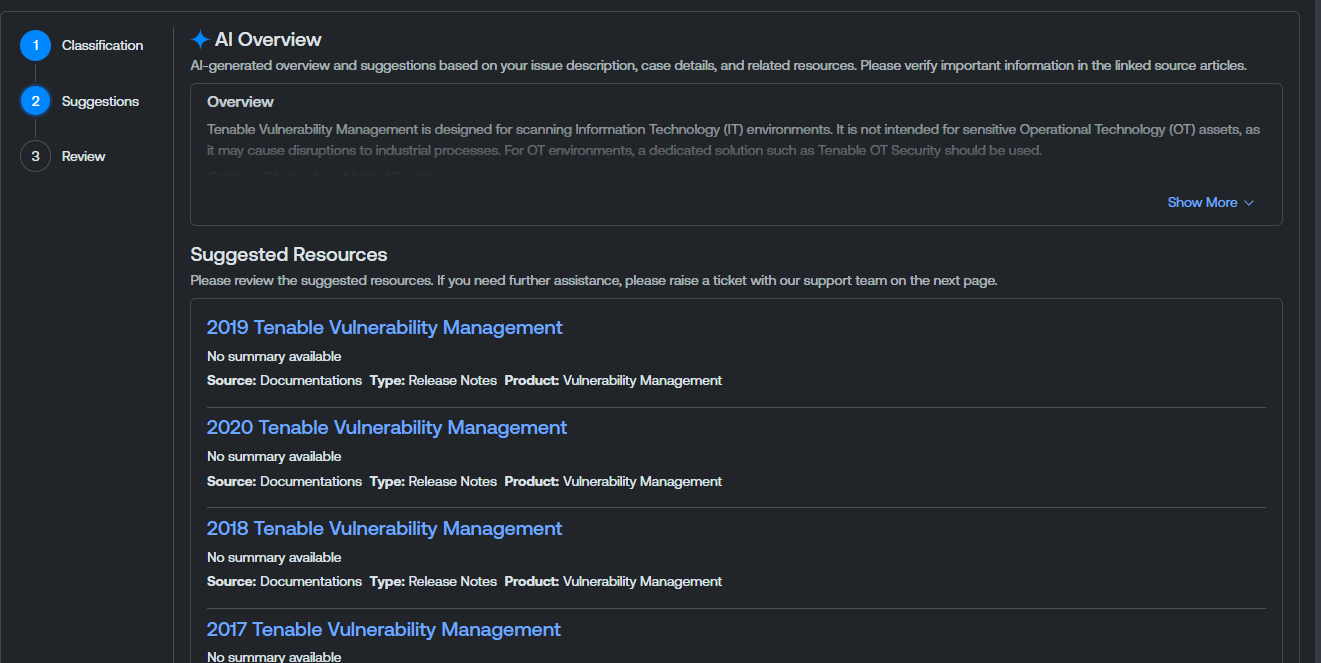
The Suggestions section appears.
-
Review the suggestions and resources provided to determine if you are able to resolve your issue without opening a support case.
-
If you are unable to resolve the issue yourself based on the suggestions, click Continue.
The Review section appears.
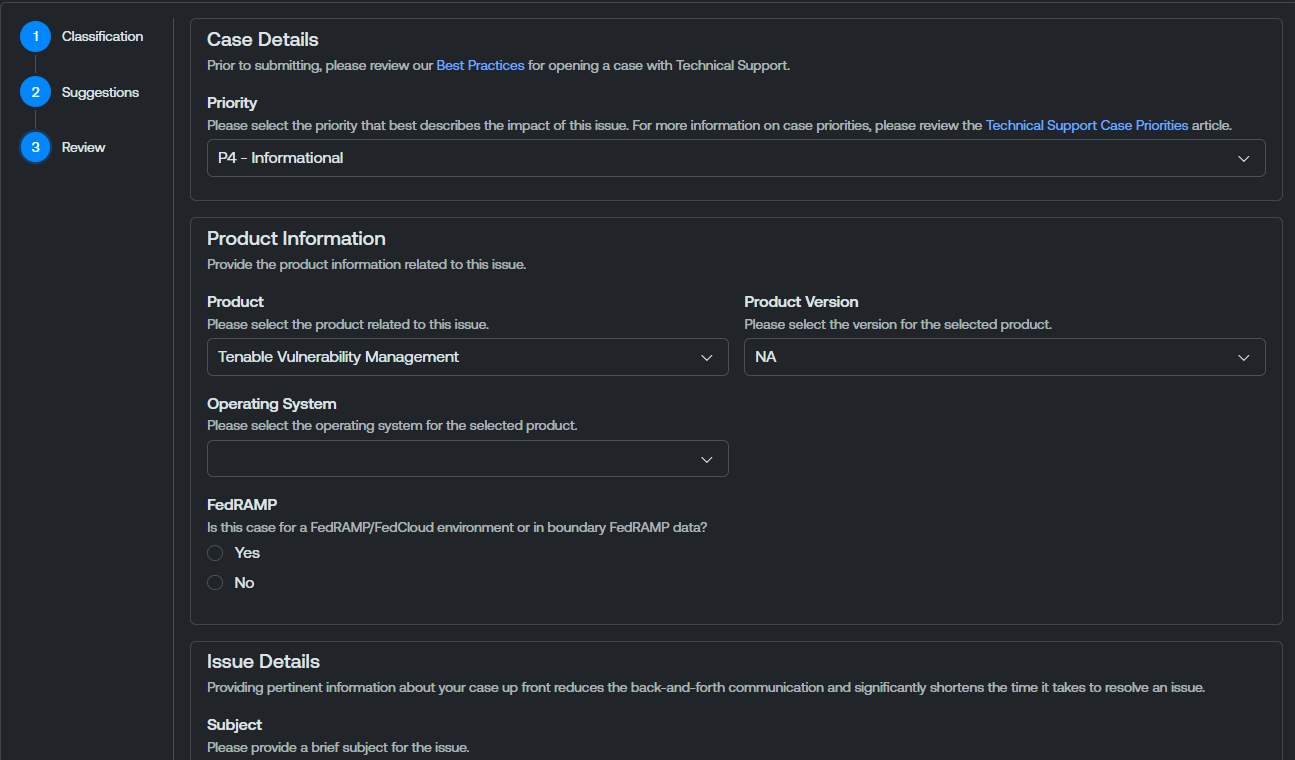
- From the Operating System drop-down menu, select the operating system on which the product is installed.
-
In the FedRAMP section, select the radio button to indicate whether or not the support case includes FedRAMP specific information.
Note: When you select Yes on the FedRAMP question, the Upload Files section is hidden and any files already added are removed from the case. FedRAMP cases route through a separate intake that does not accept file attachments at submission time. -
In the Issue Details section, in the Description text box, type a detailed description of the issue you are experiencing. Be sure to include any relevant details that may help Tenable resolve it.
-
(Optional) In the Upload Files section, upload any relevant files to help Tenable Support better understand your issue.
Caution: If your account is FedRAMP-authorized, the file upload area displays a This account is FedRAMP authorized. Please do not upload any files containing FedRAMP data warning.Do one of the following:
-
Drag and drop files directly into the upload area.
-
Click Browse to locate and select files from your device.
Note: Up to 5 files can be uploaded at a time, with no maximum total number of files, no file size limit, and no file type restriction.Tip: If one or more files fail to upload, the portal does not block the remaining files. It reports an error for each failed file and offers details so you can retry. Click the failed file's row in the upload progress table to open File Upload Error Details where you can view information about why the upload failed. -
-
Click Submit.
The Tenable Account Management portal submits the support case to the appropriate Tenable Support channels.
Chat with Technical Support
If you need to engage Tenable Technical Support live, you can start a chat session from the Support landing page for real-time assistance.
To chat with Technical Support:
-
On the Contact Support tile, click Chat with Technical Support.
The New Chat Support Session window appears.
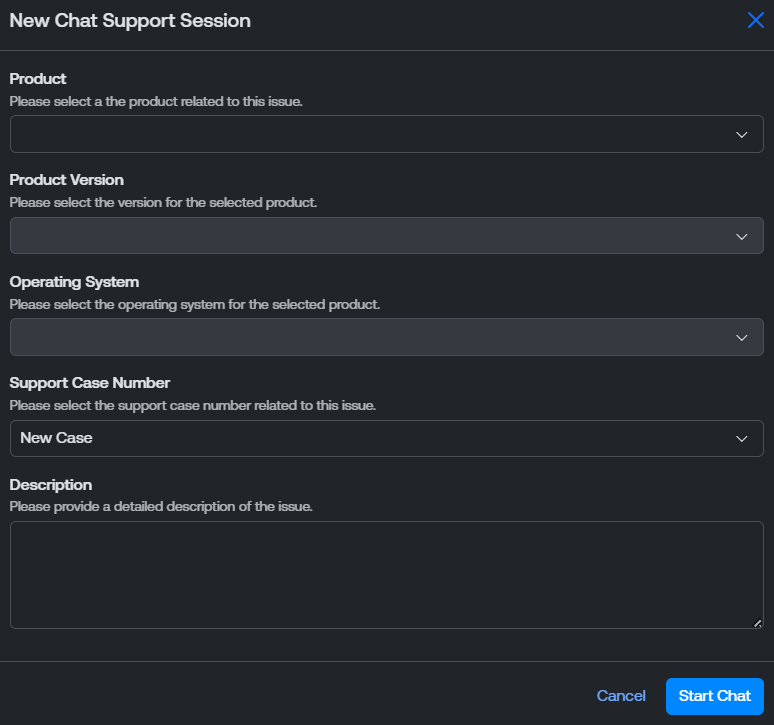
-
From the Product drop-down menu, select the product related to your issue.
-
If the product has a version number, from the Product Version drop-down menu, select the version of the product you are using.
-
From the Operating System drop-down menu, select the operating system on which the product is installed.
-
From the Support Case Number drop-down menu, select the support case number associated with your issue. If you do not have an existing case, select New Case.
-
In the Description text box, type a detailed description of the issue you are experiencing.
-
Click Submit.
The Tenable Account Management portal begins your chat session.
Manage My Cases
Navigate directly to the My Cases page to view and track existing support cases.
To manage your support cases:
-
On the Contact Support tile, click Manage My Cases.
You navigate directly to the My Cases page.
Phone Support
This tile lists direct phone numbers for reaching Technical Support across three regions — Americas, Europe, and Asia/Australia — covering countries like the US, France, Germany, Australia, Japan, and more. It also displays your Support PIN, which you need to verify your identity when calling in.
Support Eligibility
When you do not meet a prerequisite for Technical Support, the portal blocks the action and displays an explanatory message. The most common messages are:
-
Login is required to access Technical Support. — Displayed when you are not signed in.
-
Your account does not have any active products or subscriptions. Access to create Technical Support cases is restricted. Please contact Customer Care for assistance. — Displayed when your account has no active subscription with a defined service level.
-
You do not have access to Technical Support. Please contact the Primary Contact on your account to adjust your permissions or contact Customer Care for assistance. — Displayed when your contact does not have the Manage Cases permission on the account.