Uploads
The Uploads page in the Tenable Account Management portal l lets you upload, organize, and share files with Tenable independently of any specific support case. Here, you can upload one or more files at a time using a guided wizard; view, rename, comment on, download, and delete files; optionally attach uploaded files to an open Technical Support or Customer Care case; add per-file credentials; and generate a short-lived API access token to upload files programmatically.
To access the Uploads page:
-
In the left navigation menu, click Uploads.
- (Optional) To change the default columns within the list:
Click Columns
 .
.A list of available columns appears.
(Optional) Use the search bar to search for a specific column.
Select/delesect the check boxes to show or hide columns in the table.
(Optional) Click Reset Columns to reset all columns to their defaults.
The Uploads page appears. In the My Files list, you can view information about every file uploaded through the portal — whether uploaded standalone, attached to a case, or sent through the upload API.
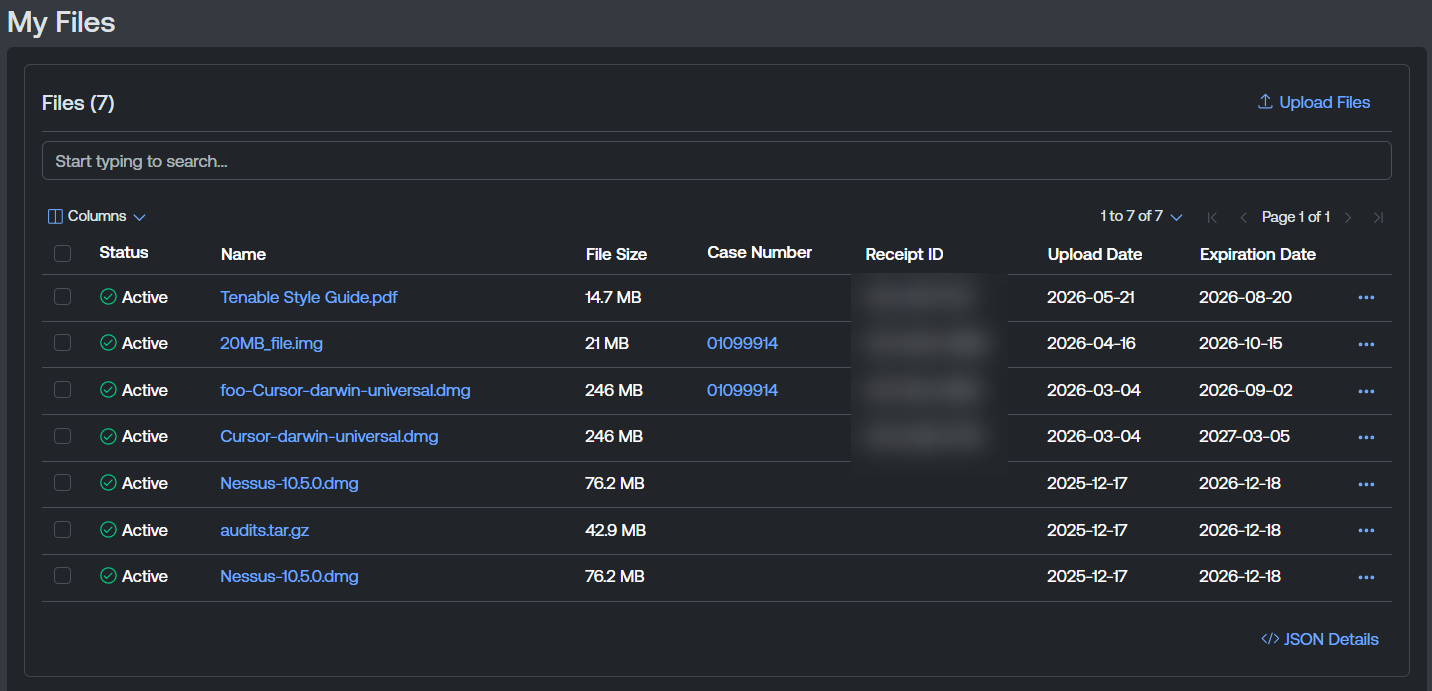
The My Files list includes the following information:
-
Status — The status of the file upload, for example Active or Expired.
-
Name — The name of the file upload. Click the file name to navigate directly to the Upload Details page.
-
File Size — The size of the file upload.
-
Case Number — Where applicable, the support case number associated with the file upload.
-
Receipt ID — Where applicable, the support receipt identification number associated with the file upload.
-
Upload Date — The date on which you uploaded the file to the portal.
-
Expiration Date — The date on which the file upload expires.
Manage Uploads
You can manage your trainings in the following ways:
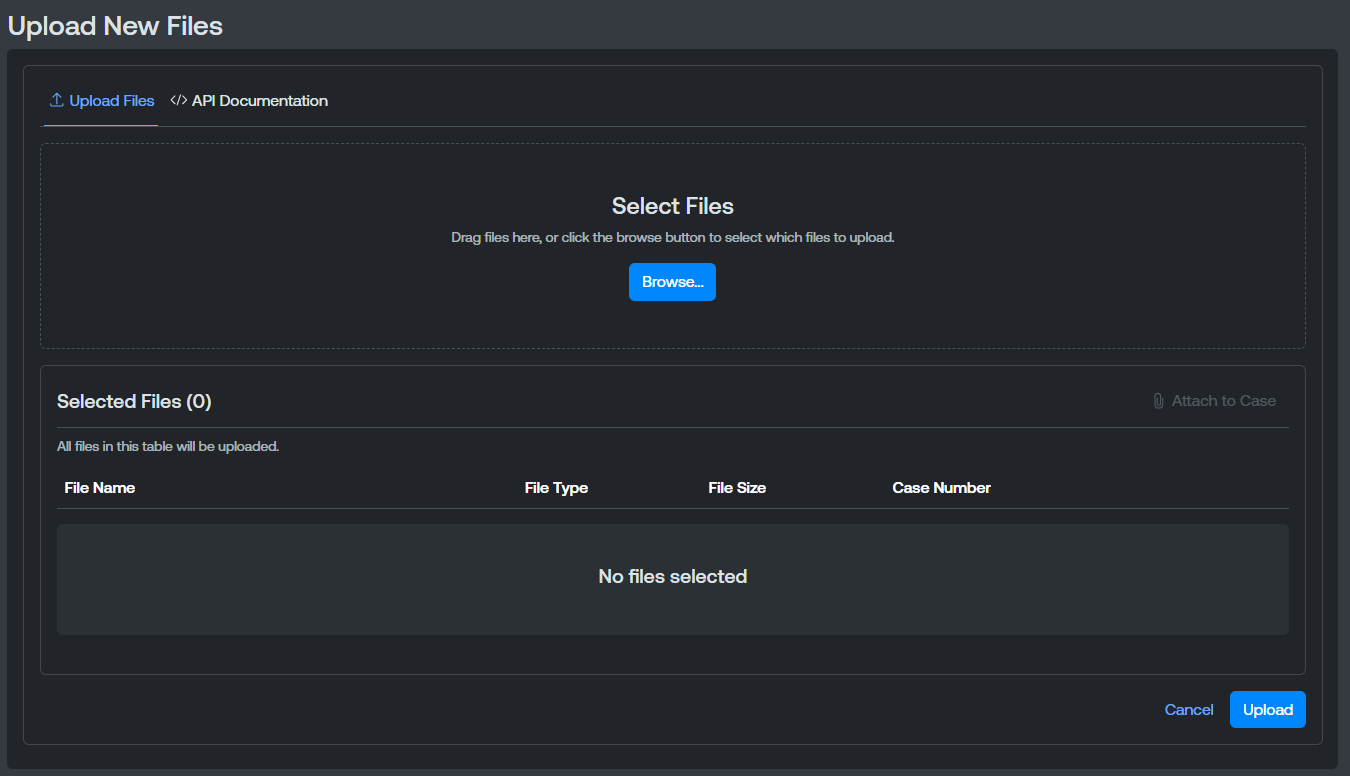
Upload Files
You can upload a file directly on the Uploads page, or via API.
To upload a file:
-
In the upper-right corner of the Uploads page, click
 Upload Files.
The Upload Files window appears.
-
Do one of the following:
-
To upload files via the user interface, use the
Upload Files tab.-
Click Browse.
-
In your file explorer, select the files you want to upload to the portal.
Once selected, the files appear in the Selected Files section.
-
Click Upload.
-
-
To upload files via API, click the
 API Documentation tab.
API authentication instructions appear.
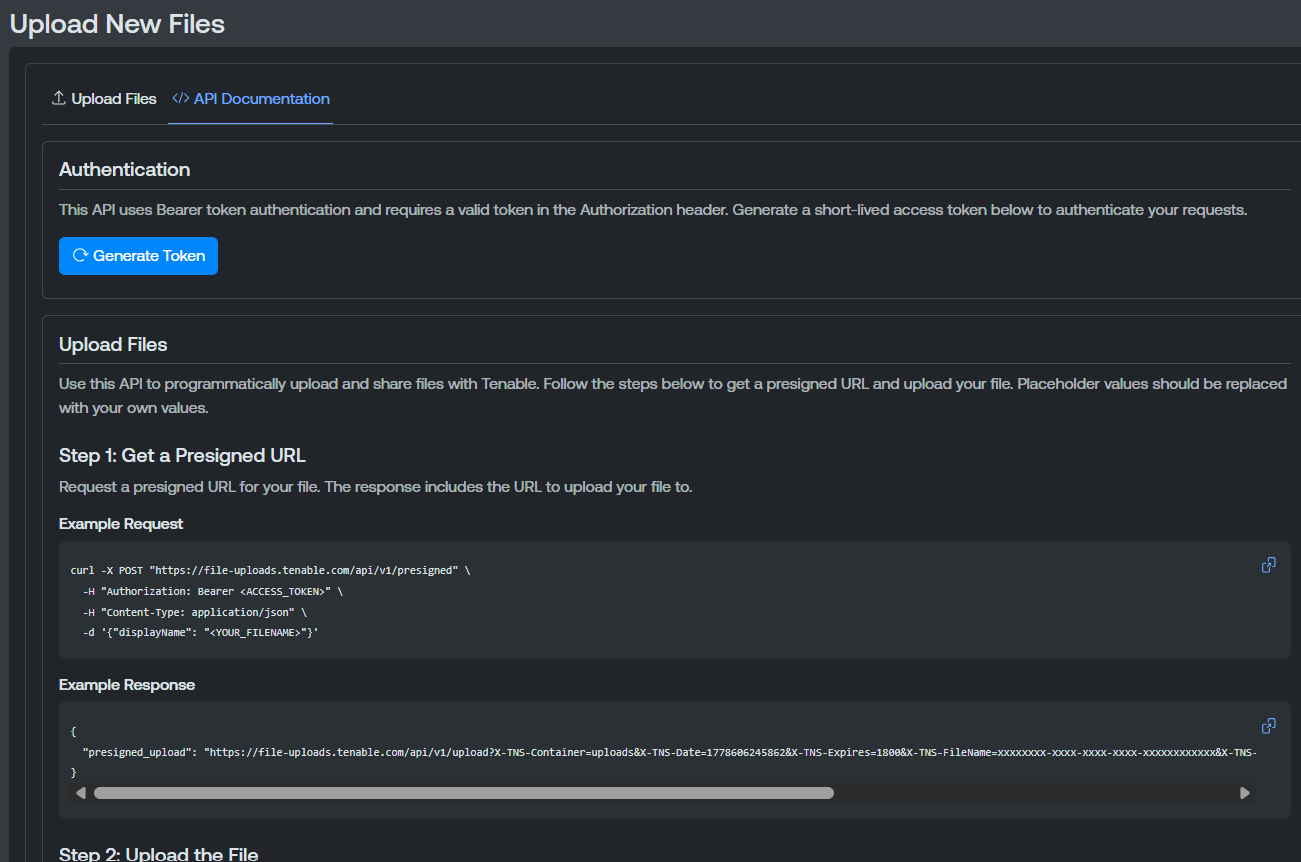
-
Click
 Generate Token to generate the API token needed to upload files via API.
The portal displays the token in an Access Token code block. Click the copy icon to copy it to your clipboard.
-
Follow the steps to upload a file via the API.
-
When the upload completes, the file appears in the My Files list on the Uploads page.
-

Download a File
To download an uploaded file:
-
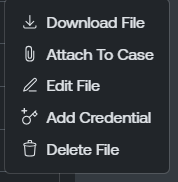
In the My Files list, in the row for the file you want to download, click the
 button.
A menu appears.
-
Click
 Download File.
The Tenable Account Management portal downloads the selected file. Depending on your browser settings, your browser may notify you that the download is complete.
Attach a File to a Support Case
In addition to attaching files during the upload wizard, you can attach an existing file to an open case at any time.
To attach a file to a support case:
-
In the My Files list, in the row for the file you want to download, click the
button.A menu appears.
-
Click Attach To Case.
The Attach File to Case window appears.
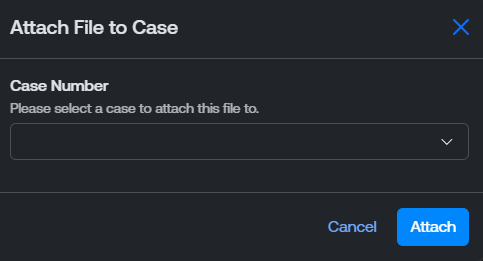
-
From the Case Number drop-down menu, select the case number to which you want to attach the uploaded file.
-
Click Attach.
Tenable attaches the selected file to the selected support case.
Edit a File
You can edit the name of any uploaded file in the My Files list.
To edit a file:
-
In the My Files list, in the row for the file you want to download, click the
button.A menu appears.
-
Click
 Edit File.
The Edit File window appears.
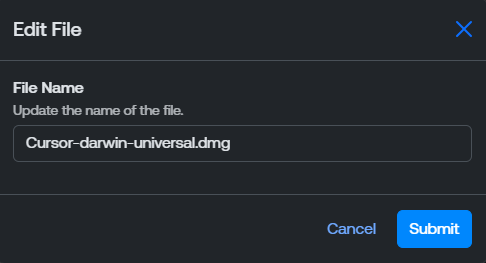
-
In the File Name text box, type a name for the uploaded file.
-
Click Submit.
Tenable updates the file name in the My Files list.
Add a Credential a File
For files that require a password or other credential to open, you can share the credential with Tenable Support directly from the file detail page. Credentials are encrypted at rest, hidden behind a Show Credentials affordance, and only accessible to authorized Tenable Support staff.
To add a credential to a file:
-
In the My Files list, in the row for the file you want to download, click the
button.A menu appears.
-
Click
 Add Credential.
The Add Credential window appears.
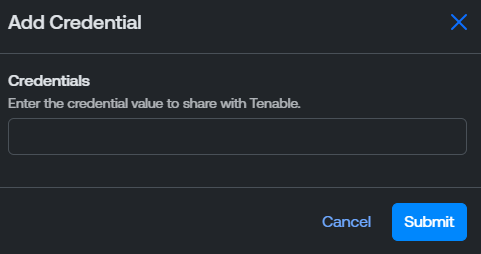
-
In the Credentials text box, type the file credential to share with Tenable.
-
Click Submit.
The Tenable Account Management portal stores the credential alongside the uploaded file. You can view additional credential information on the Upload Details page.
Delete One or More Files
To delete one or more files:
-
Do one of the following:
-
To delete a single file:
-
In the My Files list, in the row for the file you want to download, click the
button.A menu appears.
-
Click
 Delete File.
-
-
To delete multiple files:
-
In the My Files list, select the check box to the left of each file you want to delete.
-
In the upper-right corner of the page, click
Delete Selected.
-
A confirmation message appears.
-
-
Click Delete.
Tenable removes the files from the My Files list.