Manage Custom Roles
Required User Role: Administrator
In Tenable Vulnerability Management, you can manage your Custom Roles in the following ways:
Create a Custom Role
To create a custom role:
- Access the Roles page.
-
At the top of the table, click Add Role.
The Add Role page appears.

-
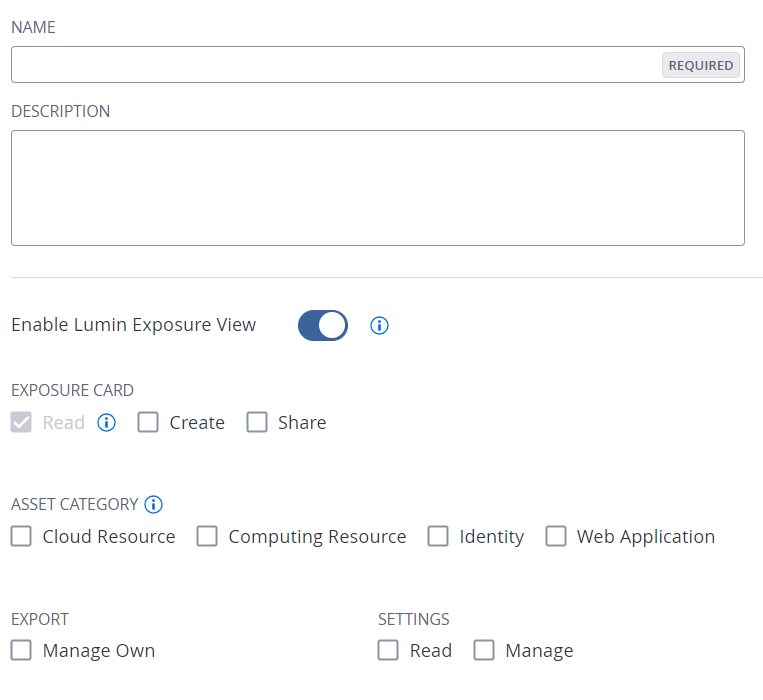
In the Name box, type a name for your custom role.
-
(Optional) In the Description box, type a description for your custom role.
-
Determine the applications to which the custom role has access:
-
In the left panel, click the application name.
An Enable toggle appears.
-
Click the Enable toggle to enable or disable access to this application for the custom role you're creating.
For some applications, privileges associated with the application appear.
-
Select the checkbox for each privilege you want to add to your custom role.
Tip: For more information about privileges, see Custom Role Privileges. For more information about how these privileges work within the application, see Custom Role Privilege Application.Note: When you create a custom role, you must include Read privileges for the General Settings, License, and My Account sections. If you do not include Read privileges for these sections, users assigned to the role cannot log in to Tenable Vulnerability Management.
-
-
Click Save.
Tenable Vulnerability Management saves the role and adds it to the roles table.
Duplicate a Custom Role
You can create a custom role by duplicating any existing custom role and then modifying the new role configurations as desired.
To create a custom role via duplication:
- Access the Roles page.
-
In the roles table, select the check box next to the role you want to duplicate.
The action bar appears at the top of the table.
-
In the action bar, click
 More.
More.A menu appears.
-
Click
 Duplicate.
A copy of the role appears in the table, with the prefix Copy of [role name].
-
Click the duplicated role.
The Roles Details page appears. The name, description, and selected privileges for the duplicate role are copied from the original role.
-
Configure the role settings as described in Create a Custom Role.
-
Click Save.
Tenable Vulnerability Management saves your changes to the duplicate role.
Edit a Custom Role
To edit a custom role:
- Access the Roles page.
-
In the roles table, click the role you want to edit.
The Roles Details page appears.
-
Update one or more of the following configurations:
-
Name — In the Name box, type a new name for the role.
-
Description — In the Description box, type a description for the role.
-
Privileges — Under each Tenable Vulnerability Management area, select or deselect the check box next to each privilege you want to add to or remove from the role.
Tip: For more information about privileges, see Custom Role Privileges. For more information about how these privileges work within the application, see Custom Role Privilege Application.
-
-
Click Save.
Tenable Vulnerability Management saves your changes.
Delete a Custom Role
Note: You can delete only custom roles. You cannot delete Tenable-Provided Roles and Privileges.
- Access the Roles page.
-
In the table, in the Actions column, click the
button next to the role you want to delete. A menu appears.
-
Click
 Delete.
Tenable Vulnerability Management deletes the role and removes it from the roles table.