Add Recast, Change Result, and Accept Rules
Using Recast, you can create rules to modify or accept severities for vulnerabilities and web applications. Similarly, you can change or accept results of host audits. You can also create these rules directly from the Findings table, as described in Create Recast Rules from the Findings Page.
Rule Evaluation: As new findings are imported, they are queued for evaluation against your recast rules. It is possible for a new finding to appear in the Explore > Findings view before your rule has been evaluated and applied to it.
View Caching: After a recast rule has been evaluated and the Revised Finding count is updated in the recast rules table, there is an additional cache period of up to 60 minutes for the Explore > Findings view to reflect this change.
The types of rules you can create are as follows:
| Rule | Description |
|---|---|
| Recast | In the Vulnerabilities and Web Applications tabs, modify the severity findings based on query criteria. |
| Accept | In the Vulnerabilities, Host Audits and Web Applications tabs, accept the risk of vulnerability findings for Vulnerabilities and Web Applications or accept the Original Result of host audit findings and hide them from the Findings table. |
| Change Result | In the Host Audits tab, change the Original Result of host audit findings, for example, by changing Failed to Passed. |
Create a Recast or Accept Rule
To create a Recast or Accept rule:
-
In the left navigation, click
 Recast.
The Recast page appears.
-
Click either the Vulnerabilities or Web Applications tab.
-
Above the table, click
 Add Rule.
The Add Recast Rule pane appears.
-
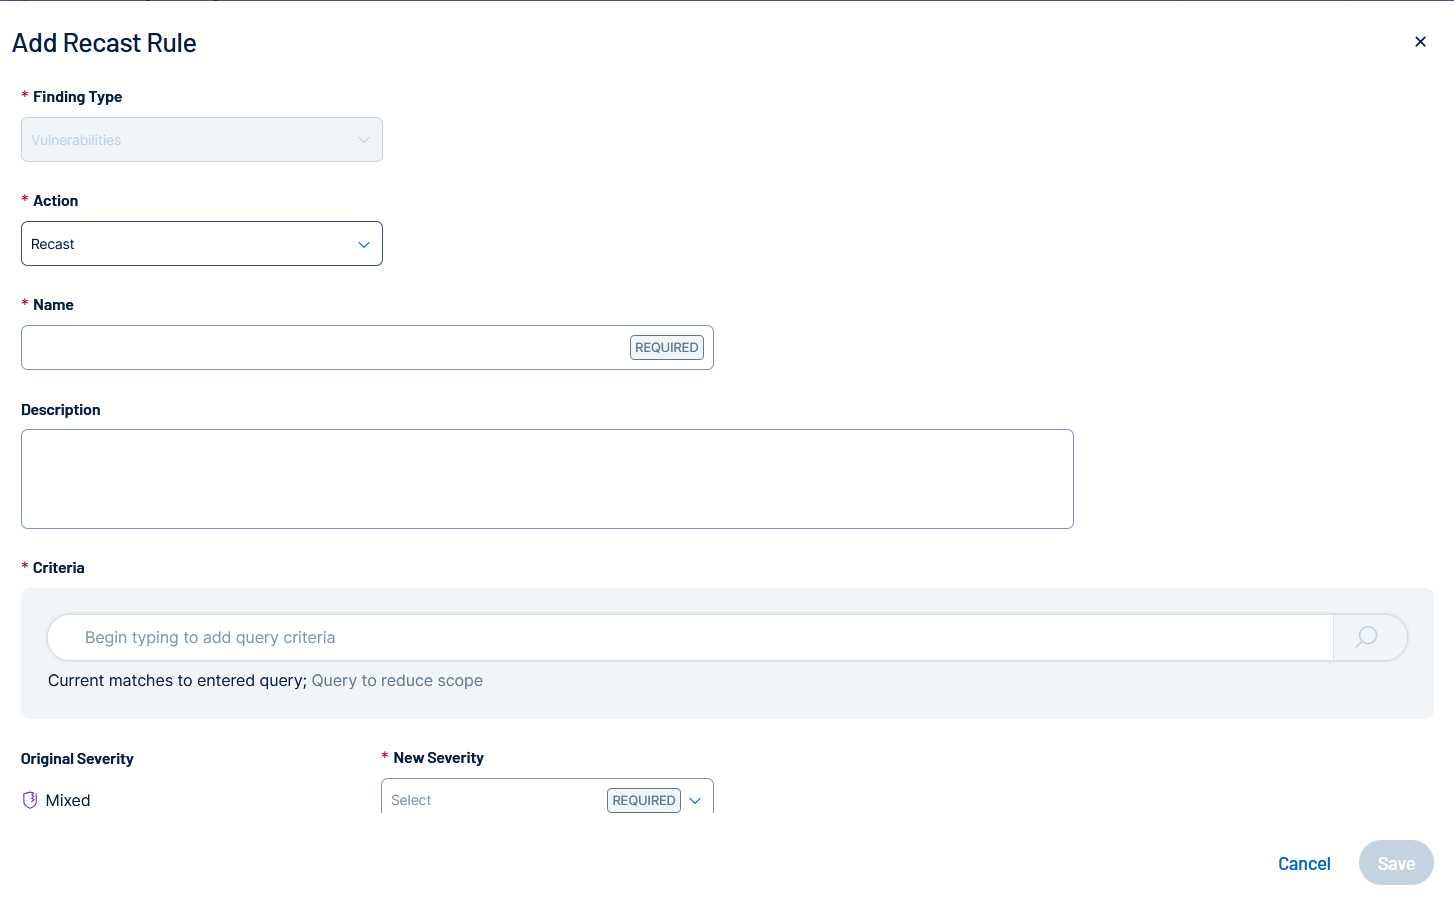
Configure the following options:
Option Description Action (required) Click Accept or Recast. To learn about these rule types, see About Recast and Accept Rules. Name (required) Type a name for this recast rule. Description Type a description for this recast rule. Criteria (required) Use this query bar to define the precise set of assets and/or findings to which this Recast rule will apply. You can construct a query using filters available in Recast Filters such as IPv4 Address, Plugin ID, FQDN, and Tags.
When you select a filter, you can select the desired Operator and Values for your query.
As you build your query, the system provides dynamic, real-time feedback by automatically displaying the exact number of Assets and Findings that match your specified criteria, allowing you to accurately scope your rule before final submission. These values appear in the Current matches to entered query below the Criteria query bar.
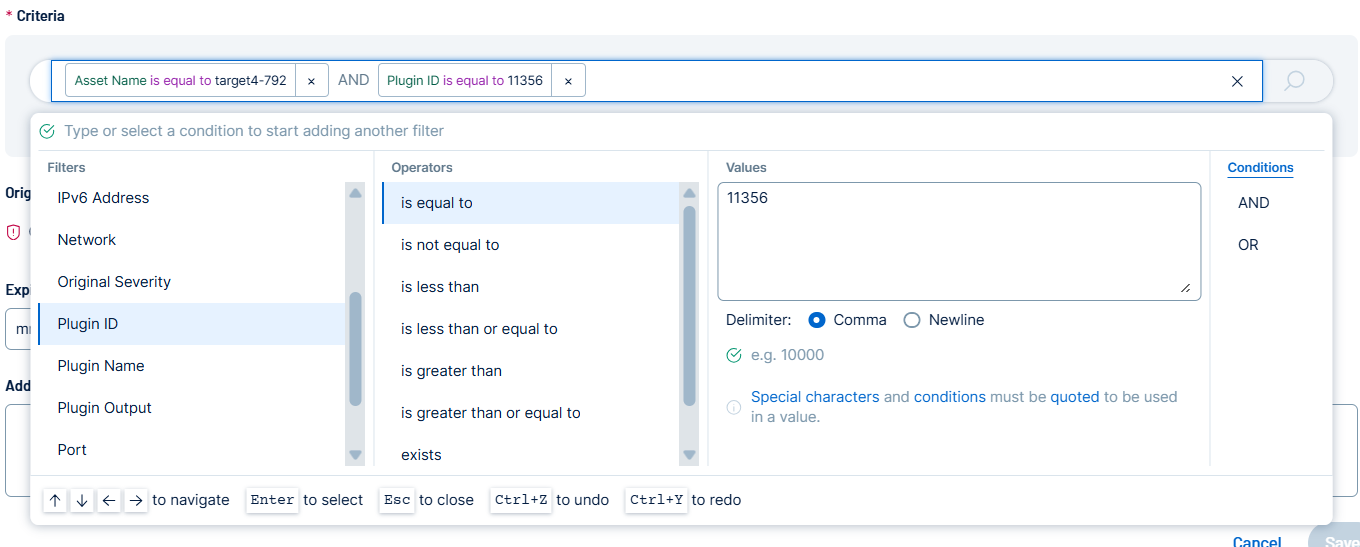 Tip: For more information on tags and how to create and manage them, see Tags.Tip: Use the AND / OR boolean operators to apply multiple filters to the rule.
Original Severity Shows the original severity identified by Tenable Vulnerability Management. New Severity (Recast rules only) Select the severity you want to change the corresponding vulnerability to, for example Low. Expires Type a date when the rule will expire or click the  icon and select a date.
Additional Comments Type comments to provide rule details. Report as false positive to Tenable (Accept rules only) Turn on this toggle when a plugin generates inaccurate findings and you want Tenable to review the results. -
Click Save.
The system processes the rule, which may take time if many findings are targeted. When complete, the rule appears in either the Vulnerabilities or Web Applications table and the system updates the Findings table.
Create a Change Result or Accept Rule
To create a Change Result or Accept rule:
-
In the left navigation, click
Recast.The Recast page appears.
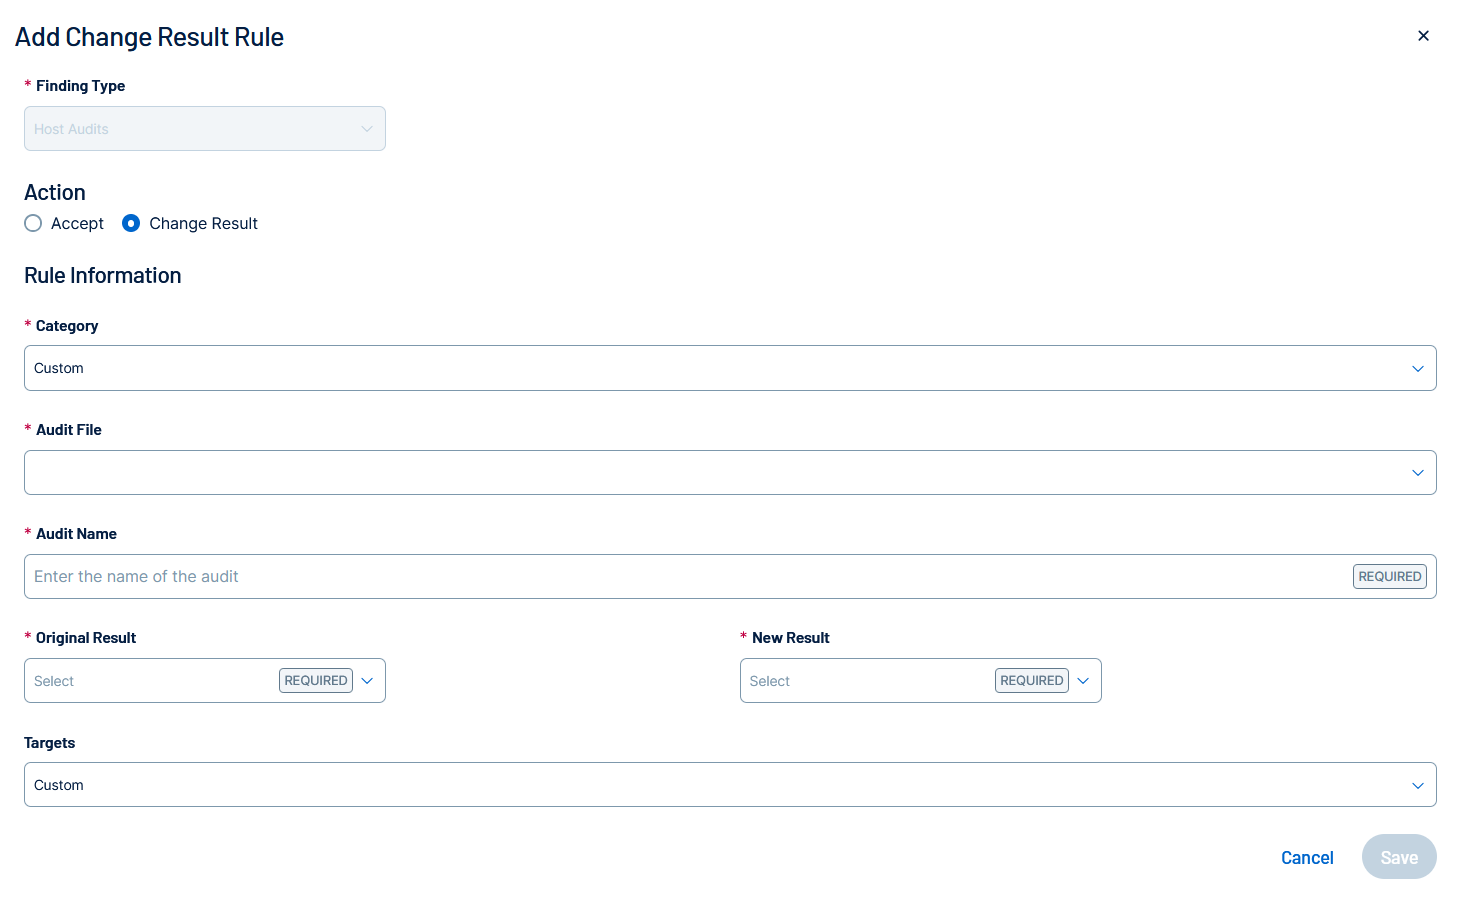
- Click the Host Audits tab.
-
Above the table, click
Add Rule.The Add Change Result Rule pane appears.
-
Configure the following options:
(missing or bad snippet) -
Click Save.
The system processes the rule, which may take time if many findings are targeted. When complete, the rule appears in the Host Audits table and the system updates the Findings table.