Finding Details
You can view the additional details for and further manage any finding within the Findings list.
To view finding details:
-
Access the Findings page.
-
In the findings list, click on the finding for which you want to view additional details.
The finding details panel appears.
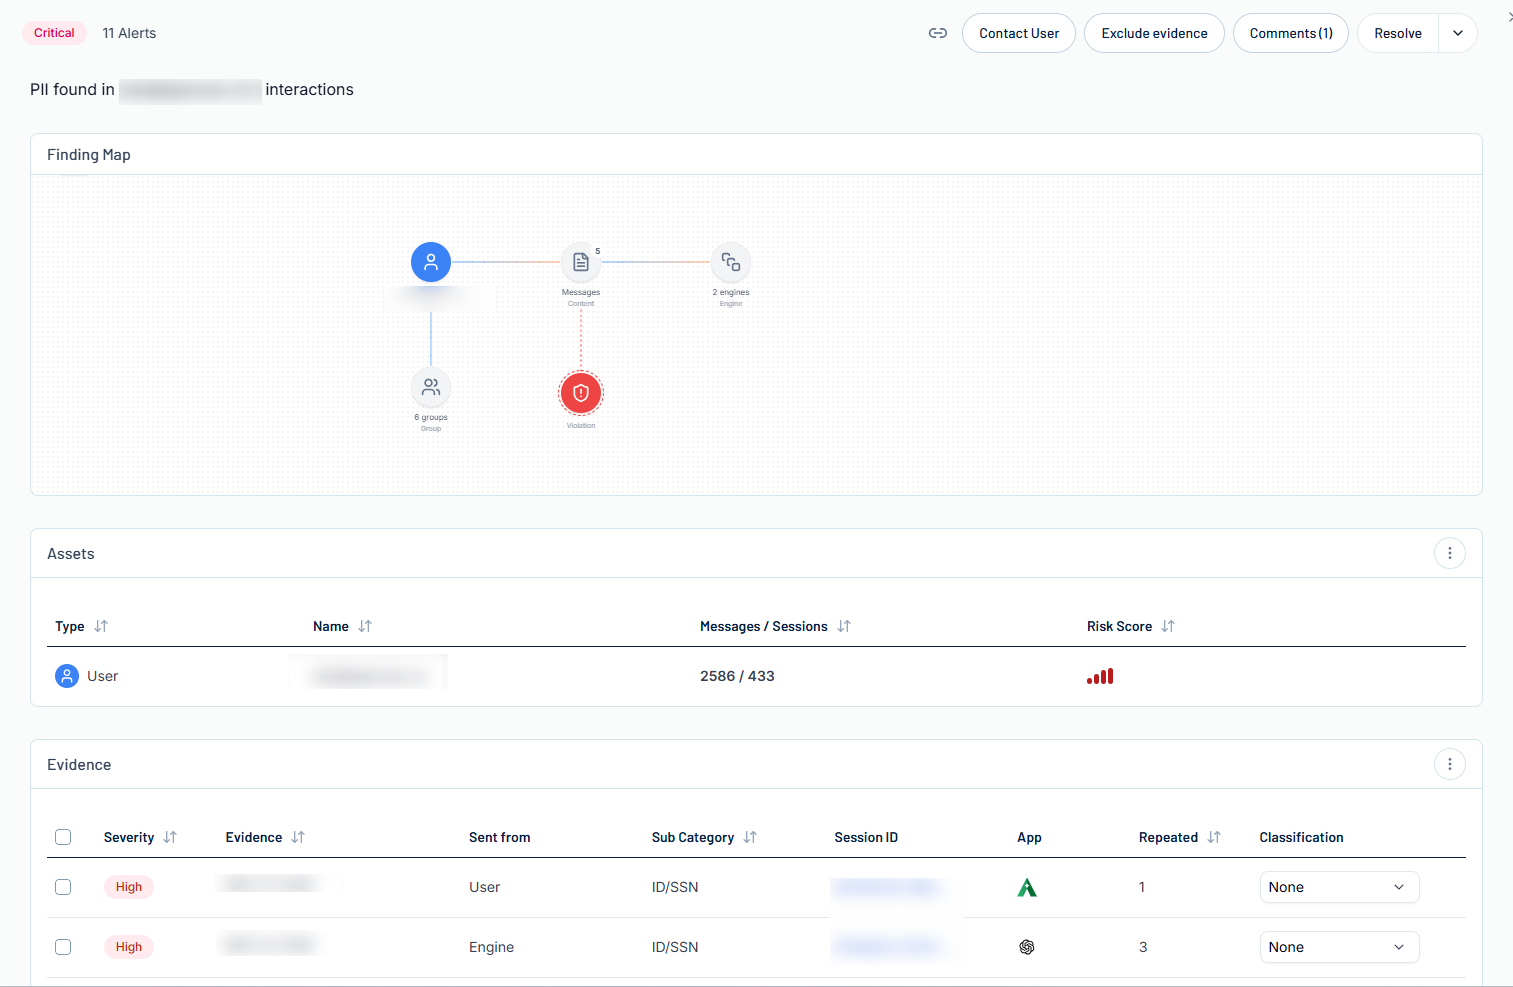
Here, you can:
-
In the upper-left corner of the page, view the finding's color coded severity category, as well as the total number of alerts that have been generated as part of this finding.
-
In the upper-right corner of the page, manage the finding in the following ways:
-
Click the
 button to copy the finding link.
 -
Click Contact User to contact the user responsible for the finding.
You navigate directly to an email window, where you can contact the responsible user.
-
Exclude Issue Evidence:
-
Click Exclude Evidence.
The Evidences to exclude panel appears.
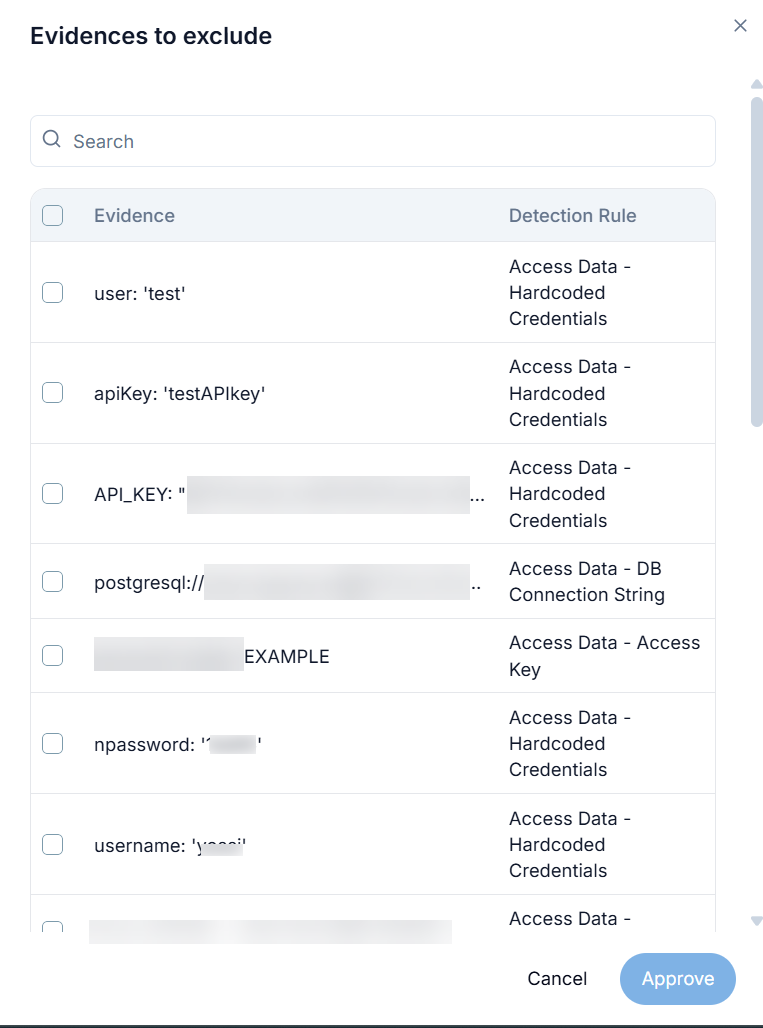 Tip: Use the Search bar to search for a specific piece of evidence to exclude.
 -
Select the check box next to each piece of evidence you want to exclude from the finding.
-
Click Approve.
Tenable AI Exposure creates an exclusion for the evidence, and adds it to the Exclusions page.
-
-
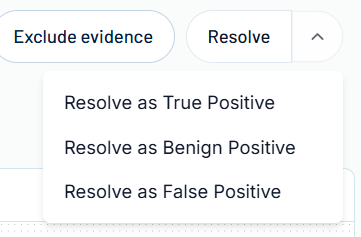
Resolve the finding:
-
Do one of the following:
-
To resolve the finding as a true positive, click Resolve Selected.
-
To resolve the finding another way, click the
 button.
A menu appears.
-
Select one of the following options:
-
Resolve as True Positive — Mark the finding(s) as a legitimate vulnerability that has been mitigated.
-
Resolve as Benign Positive — Mark the finding(s) as expected behavior that appears suspicious, but is actually benign.
-
Resolve as False Positive — Mark the finding(s) as alerts that were triggered incorrectly, and are not an actual risk.
-
-
A confirmation dialog appears.
-
-
(Optional) In the Add a reason text box, type a brief description of why you're resolving the finding.
-
Click Save.
-
-
The finding details panel also includes the following sections:
Finding Map
The Finding Map is a map-based graphical representation of the finding the areas it affects.
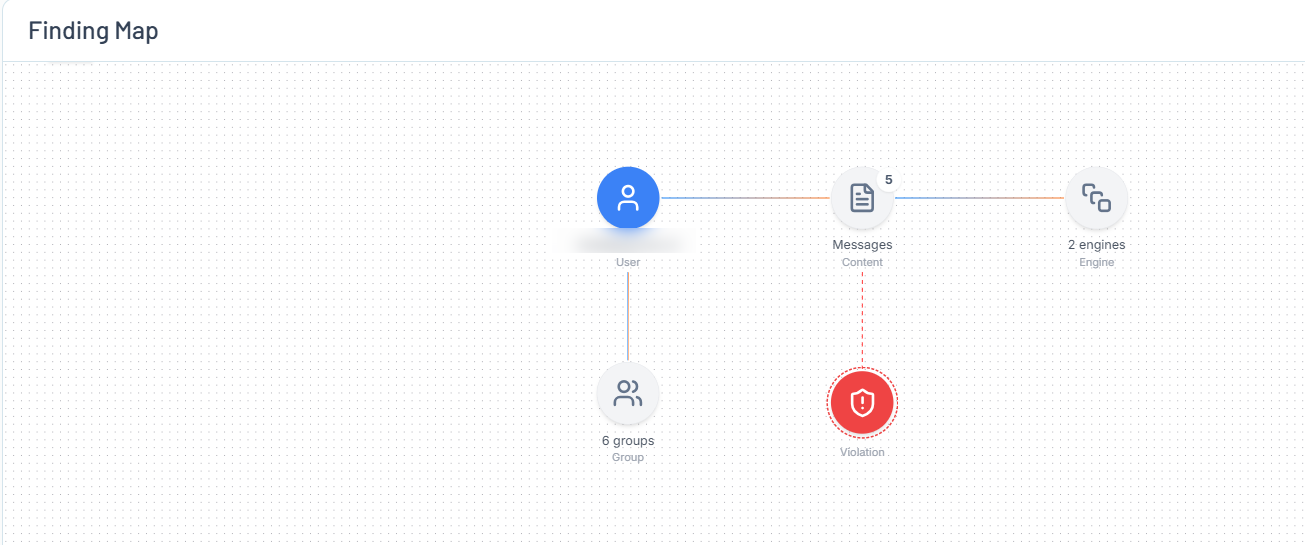
Here, you can visualize how the finding fits into your organization by viewing how the finding connects to your users, the messages they send and the applications they use to send them, their private keys, and more!
Assets
The Assets section lists information about the assets affected by the finding.

Here, you can view the following information about these assets:
-
Type — An icon that represents the type of asset, for example a user.
-
Name — The name of the asset.
-
Messages / Sessions — The number of individual messages sent as compared to the number of individual sessions created by the asset.
-
Risk Score — Where applicable, color coded user risk score associated with the asset.
-
Topics — Where applicable, the topics discussed in the messages sent between the user and the AI application.
-
Click the
 button to view additional options:
-
See activity — Click to navigate directly to the Sessions page, where you can view more information about the AI usage related to the asset.
-
See findings — Click to navigate directly to the Findings page, where you can view information about the findings associated with the asset,
-
Contact user via email — Click to contact the user responsible for the finding via email.
You navigate directly to an email window, where you can contact the responsible user.
-
Evidence
Evidence can be defined as a set of artifacts—such as logs, input/output traces, model weights, adversarial examples, or system telemetry—that substantiate the presence, cause, or effect of a security-related anomaly or attack on an AI system. The Evidence section lists information about the available evidence associated with the current finding.
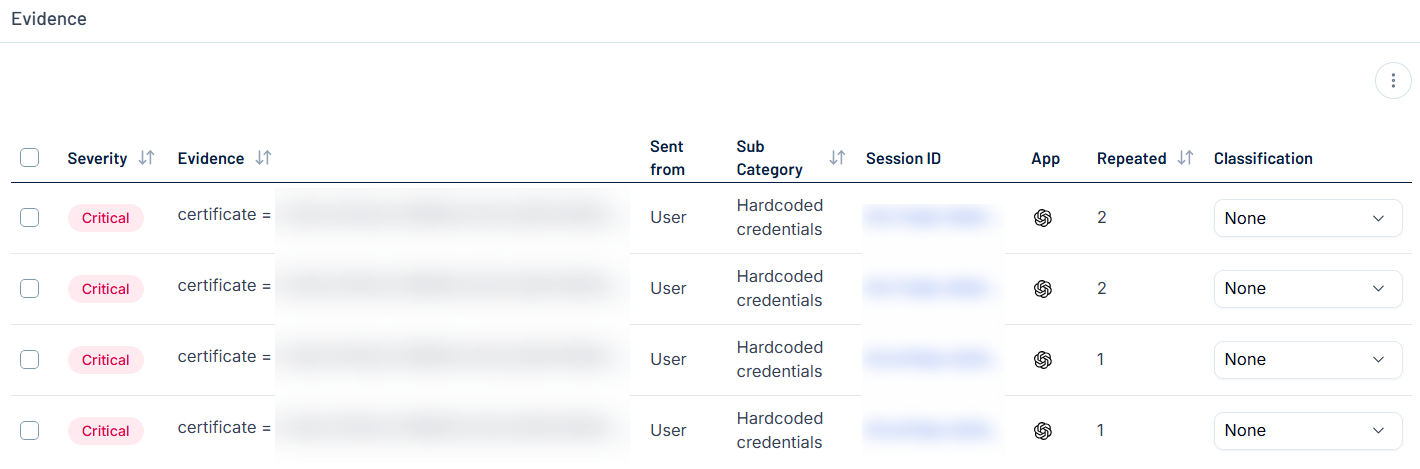
Here, you can view the following information about this evidence:
-
Severity — The color coded severity category associated with the evidence.
-
Evidence — A preview of the evidence.
-
Sent from — Who or what sent the evidence, for example, User.
-
Sub Category — The sub category to which the evidence belongs, for example, Private key.
-
Session ID — The ID of the session during which the evidence was collected.
-
App — The AI application from which the evidence was collected.
-
Repeated — Where applicable, the number of times the evidence appeared in the application.
-
Classification — Select a resolution to classify the evidence:
-
Click the
 button to expand the drop-down menu.
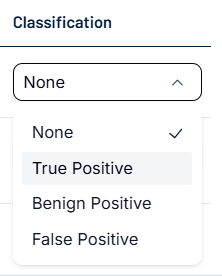
-
Select one of the following options:
-
True Positive — Mark the evidence as a legitimate piece of evidence that has been resolved.
-
Benign Positive — Mark the evidence as expected behavior that appears suspicious, but is actually benign.
-
False Positive — Mark the evidence as an alert that was triggered incorrectly, and is not an actual risk.
-
-