Connect and Configure Tenable for Jira Cloud (Legacy)
Required User Role: Administrator
Note: Tenable recommends using a new project when integrating with Jira. Using an existing project may create unforeseen conflicts when syncing vulnerabilities.
To configure Tenable Vulnerability Management:
- Log in to Tenable Vulnerability Management.
-
In the upper-left corner, click the
 button.
The left navigation plane appears.
-
In the left navigation plane, click Settings.
The Settings page appears.
-
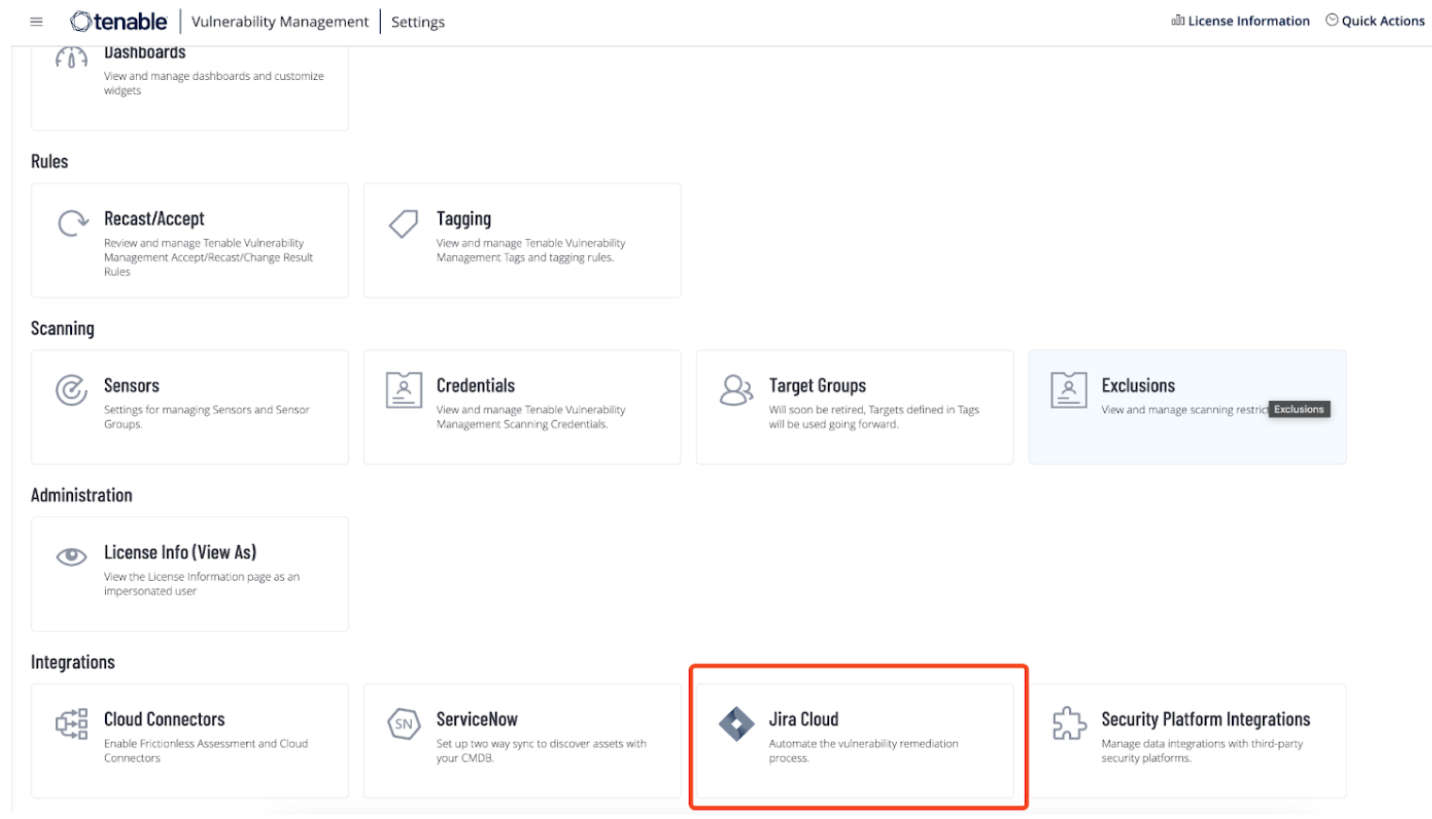
In the Integrations section, click the Jira Cloud tile.
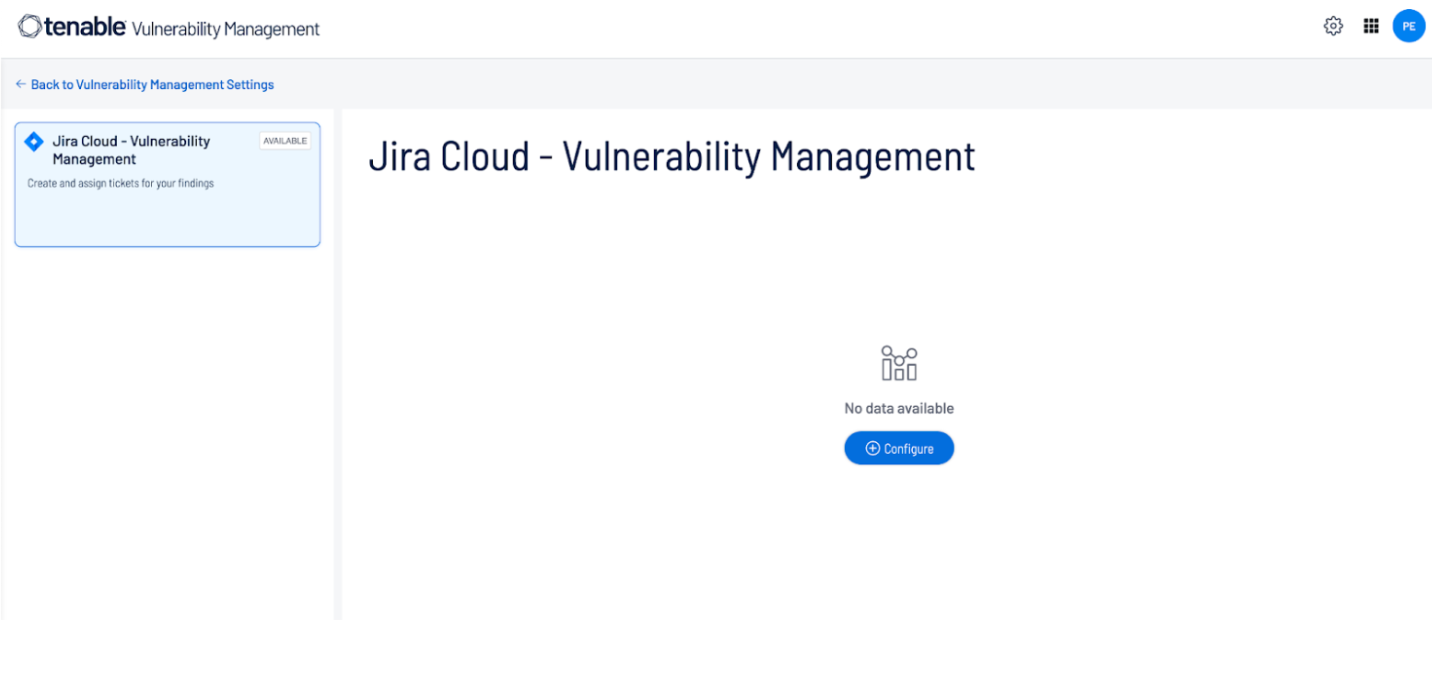
The Jira Cloud - Vulnerability Management page appears.
-
Click the Configuration button.
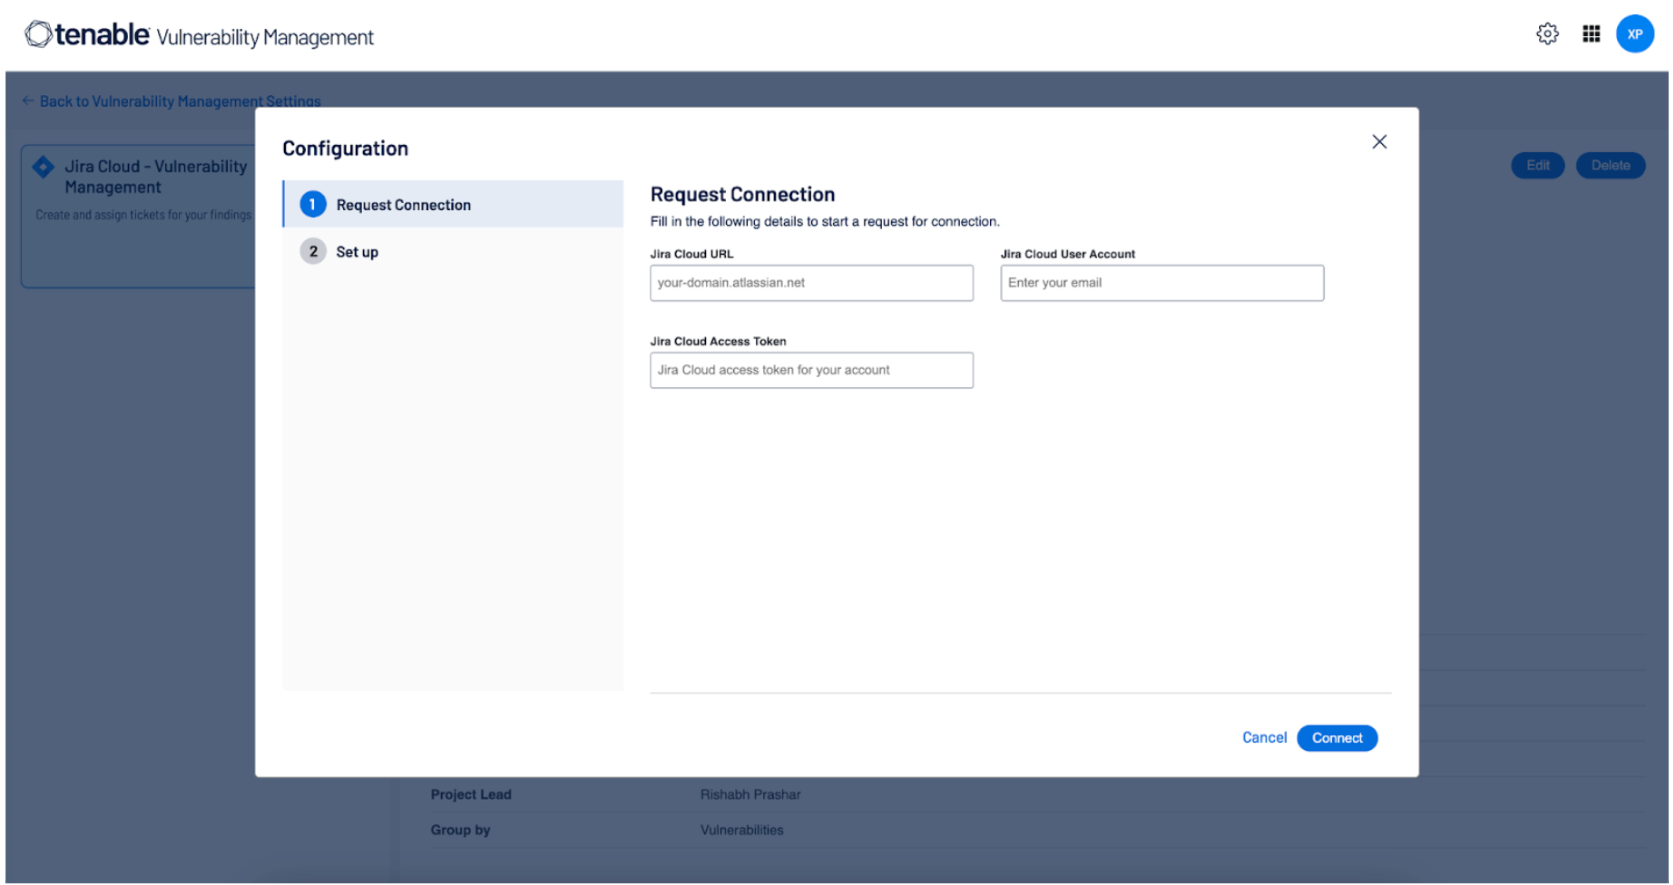
The Configuration pop-up appears. By default, the Request Connection tab is active:
-
Use the following table to fill in the appropriate Tenable for Jira Cloud (Legacy) options in the Request Connection tab.
Option Name Description Required Jira Cloud URL Your Jira cloud instance URL. (For example, yoursite.atlassian.net)
Note: The integration only supports Jira cloud URLs with a domain ending in *.atlassian.net.
yes Jira Cloud Access Key The Tenable for Jira Cloud (Legacy) integration requires a Site Admin Access Key to create the project, the custom fields, and link all elements to the correct screens.
Note: To create an API token, refer to the Atlassian documentation.
yes Jira User Email Address The Atlassian user email of the user whose key is provided in the Jira Cloud Access Key field. yes -
Click the Connect button.
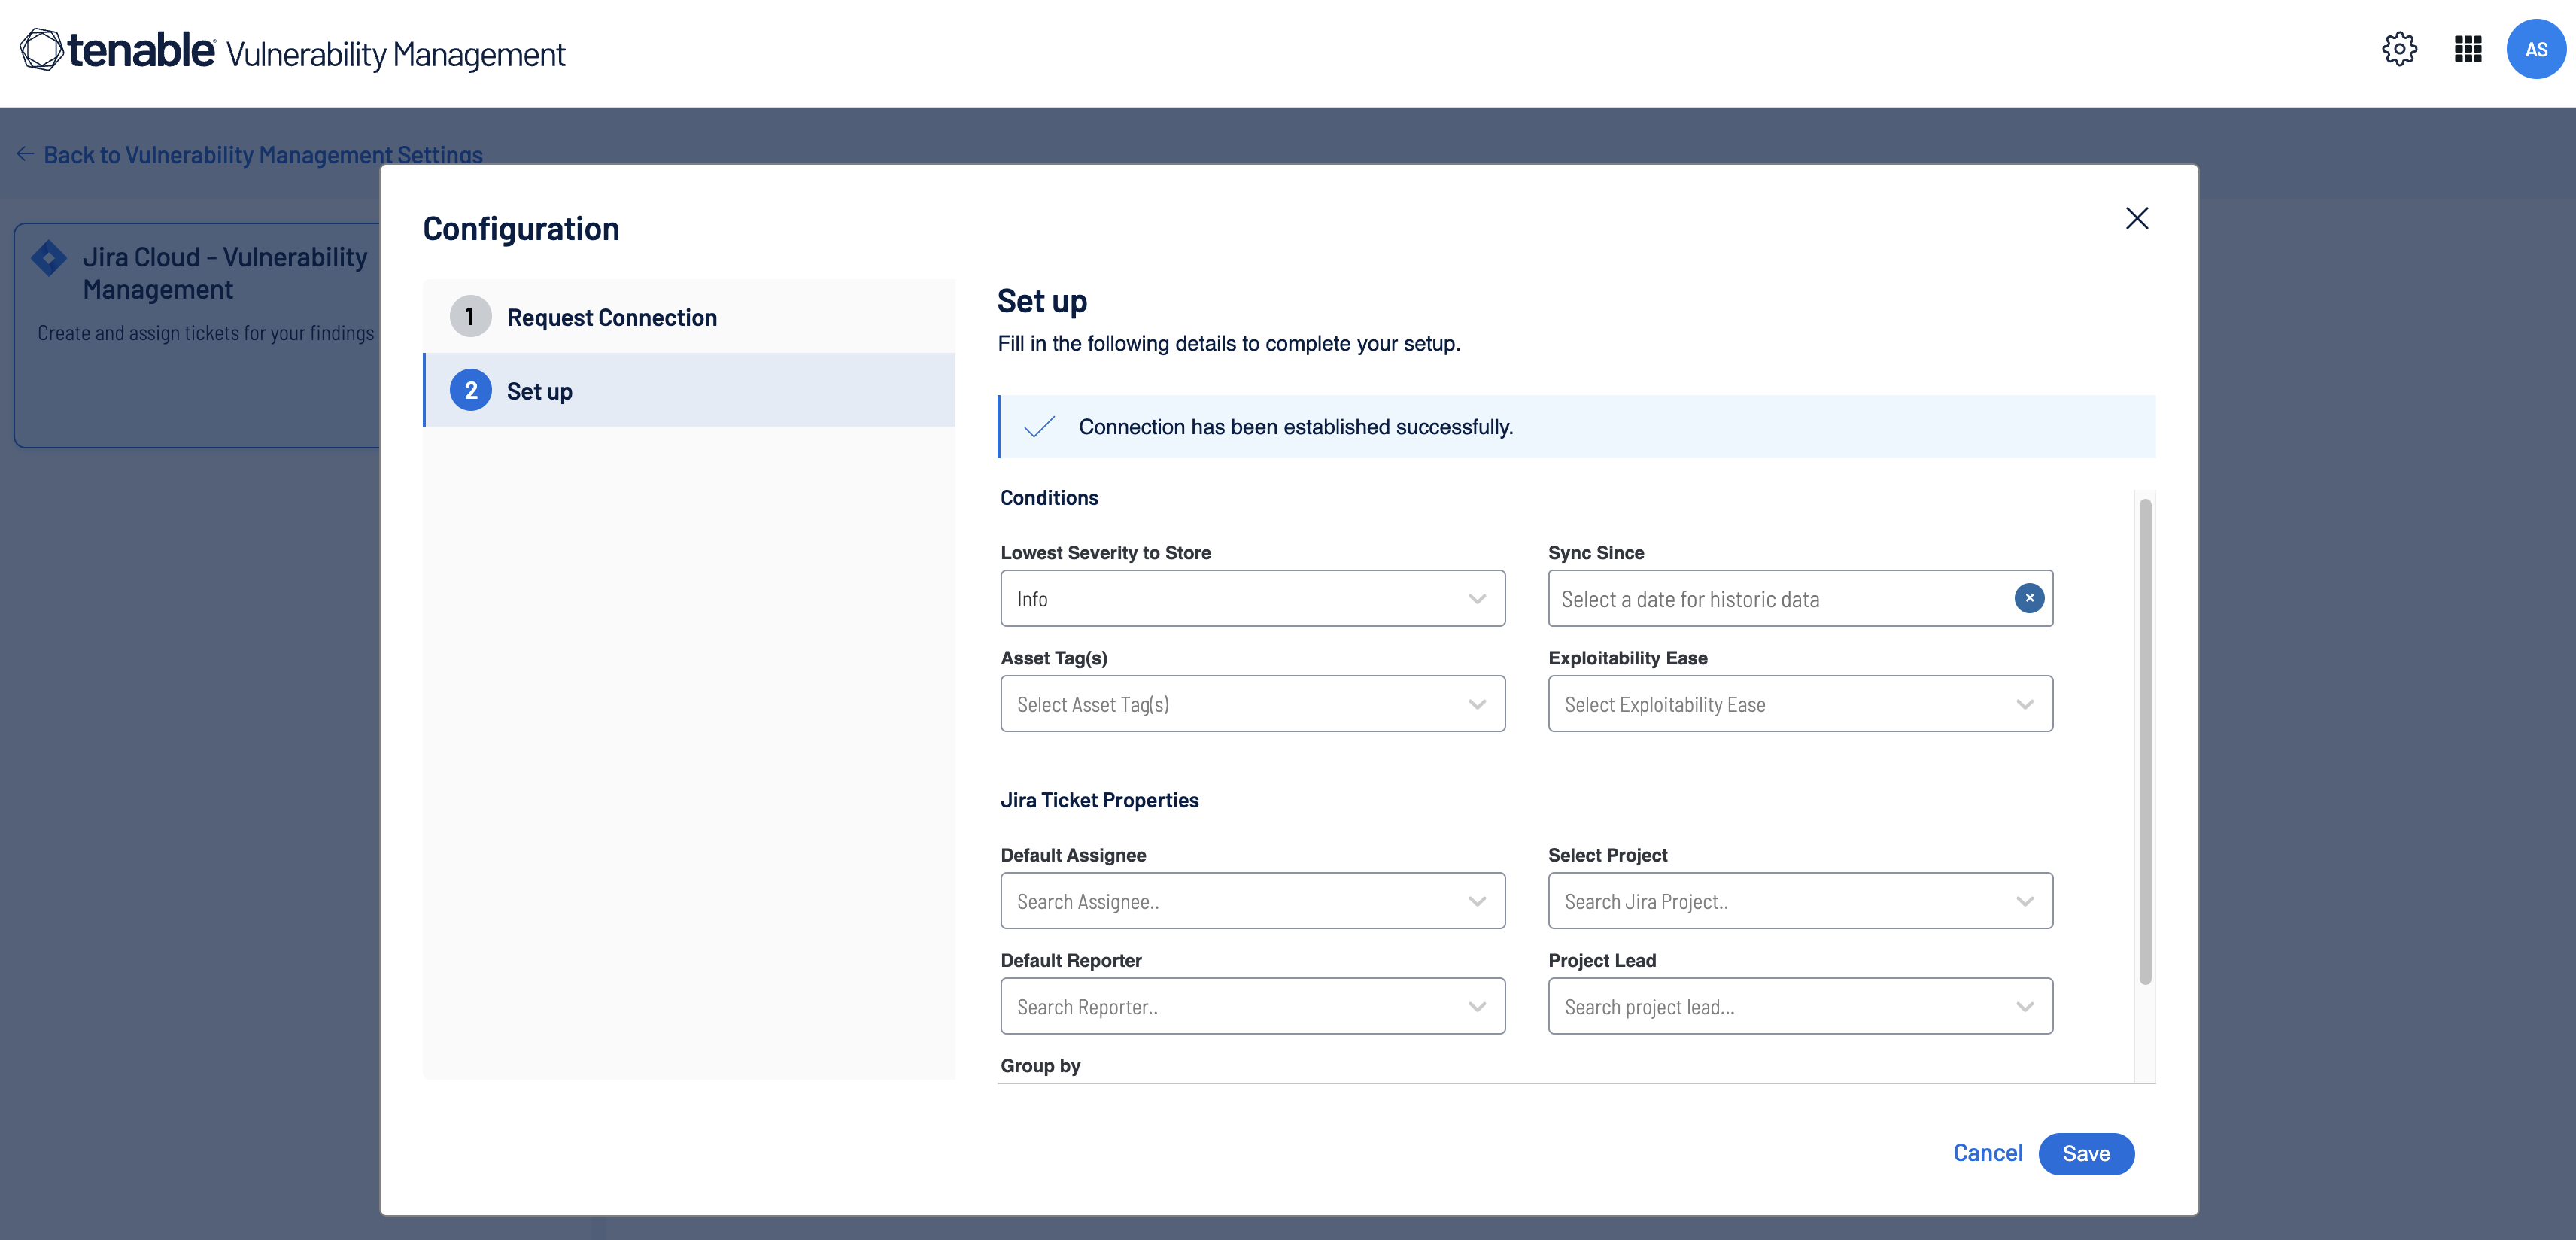
If your credentials are valid, the Set Up section appears to configure the integration:
-
Use the following table to fill in the Tenable for Jira Cloud (Legacy) options in the Set Up tab.
Option Name Description Required Set up Multiple fields to configure Tenable for Jira Cloud (Legacy), based on your requirements.
yes Lowest Severity to Store The lowest severity for which tickets are created. For example, if you select Medium severity, the integration creates a ticket of severity Medium, High, and Critical.
yes Sync Since If provided, the integration pulls historic data from that time. The maximum allowed past date is one month. yes Asset Tags (Required if Tags are provided) Tickets are only created for assets which include the provided tag. yes Exploitability Ease Get a list of findings based on the exploitability ease. For example, if you select Exploits available, the integration creates a ticket where exploits are AVAILABLE. Options:
-
Exploits available
-
No known exploits are available
-
No exploit is required
Note: If you want to collect all vulnerabilities regardless of the exploitable ease value, leave this option blank.
no Default Assignee If selected, all the tickets are assigned to the selected user. If not selected, the Tenable for Jira Cloud (Legacy) user who configured the integration is used by default. yes Select Project You can create a project by providing a unique name or by selecting a project already created in Tenable for Jira Cloud (Legacy), By default, this integration uses the Business project in Tenable for Jira Cloud (Legacy). For more information about project types, see Product Features and Project Types in the Atlassian documentation.
Note: This integration supports classic (Company-managed) Jira projects, You must create a Company-managed project and select that project in this field.
yes Default Reporter If selected, the selected user is used as the default reporter on all tickets, If not provided, the Tenable for Jira Cloud (Legacy) user who configured the integration is used by default.
Note: You must have appropriate permissions to assign the default reporter. If not, the Default Reporter is not assigned.
yes Project Lead The lead user for the project. yes Group by You can group tickets by either Asset or Vulnerability. yes -
-
Click Save to complete the setup.
What to do next:
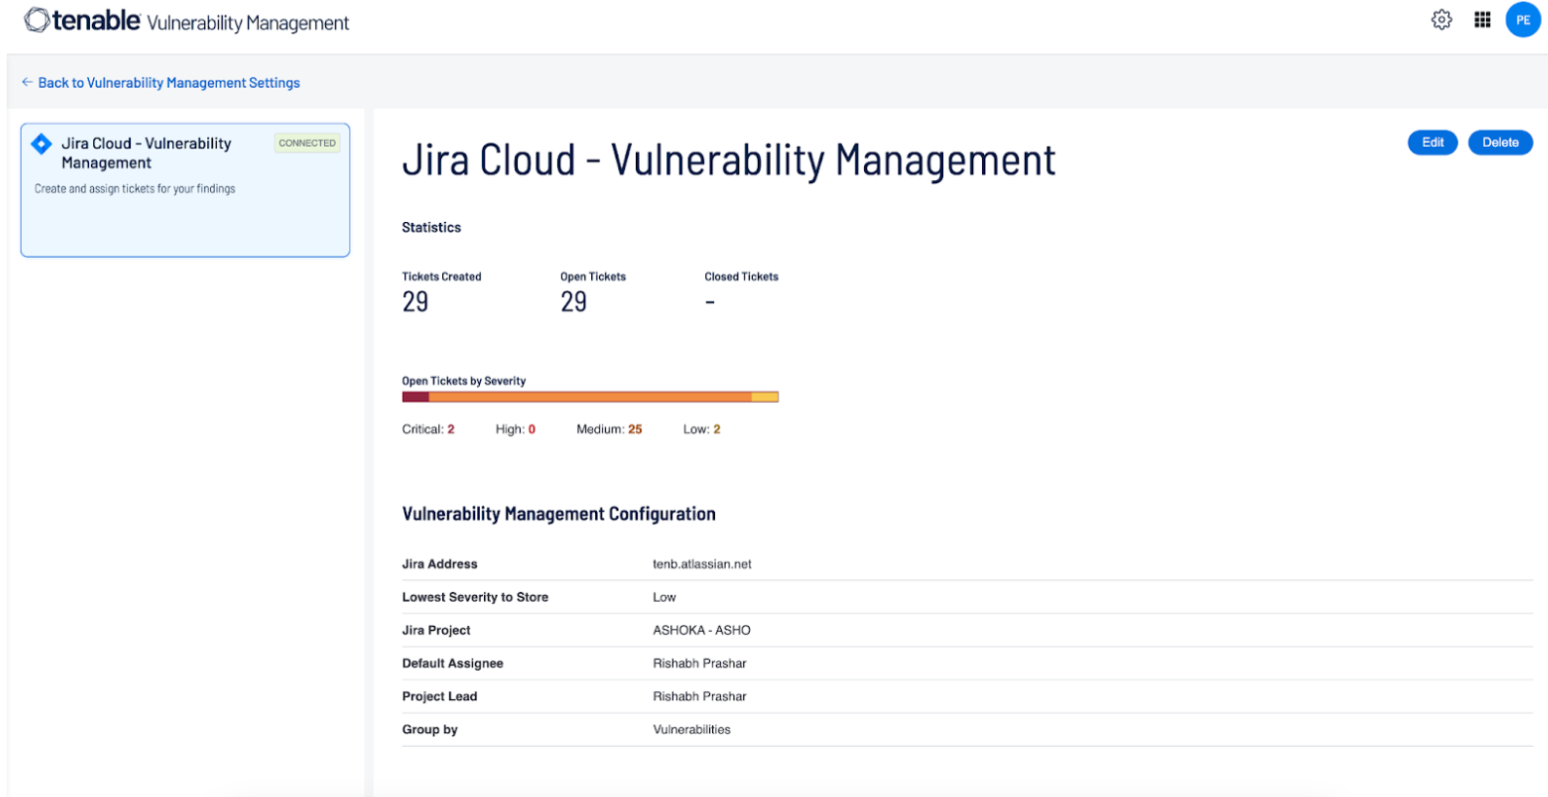
Tenable for Jira Cloud (Legacy) creates a "Tenable Vulnerability Workflow" to manage the transition of the Jira tickets. It may take several minutes to setup projects and custom fields in Tenable for Jira Cloud (Legacy). Details are refreshed on-screen once they are created. As soon as the configuration is saved, Tenable for Jira Cloud (Legacy) starts listening to new findings discovered by the scans, providing near real-time vulnerability data into Tenable for Jira Cloud (Legacy). When Tenable for Jira Cloud (Legacy) starts creating tickets, the Waiting for ticket creation on Jira instance notification banner is removed.
Next, Tenable for Jira Cloud (Legacy) fetches metrics and shows them on the Tenable for Jira Cloud (Legacy) dashboard, as shown in the following image: