Deploy One-Click Tenable Agent
Tenable supports a one-click deployment of the Tenable Agent through the Microsoft Azure portal. This solution installs the latest version of Tenable Agent on Azure virtual machines (whether Linux or Windows) by either clicking on an icon within the Microsoft Azure Portal, or by writing a short PowerShell script.
Alongside Tenable Vulnerability Management and Tenable Nessus Manager, Tenable Sensor Proxy is a first-class linking target of the One-Click Agent. If you choose to link to Sensor Proxy, the agent downloads the Nessus Agent RPM (or equivalent) through Tenable Sensor Proxy and then links to Tenable Vulnerability Management (also through Tenable Sensor Proxy).
Before you begin:
-
Ensure you have either a Tenable Vulnerability Management account, Tenable Nessus Manager account, or access to a configured Tenable Sensor Proxy.
-
Ensure you have a Microsoft Azure account with one or more Windows or Linux virtual machines.
-
Retrieve your Nessus Linking Key. For information on where to find your linking key, see Retrieve the Tenable Nessus Agent Linking Key.
Deploy with the Microsoft Azure Portal and Tenable Vulnerability Management user interface:
-
Log in to Microsoft Azure.
-
Select one of your virtual machines.
-
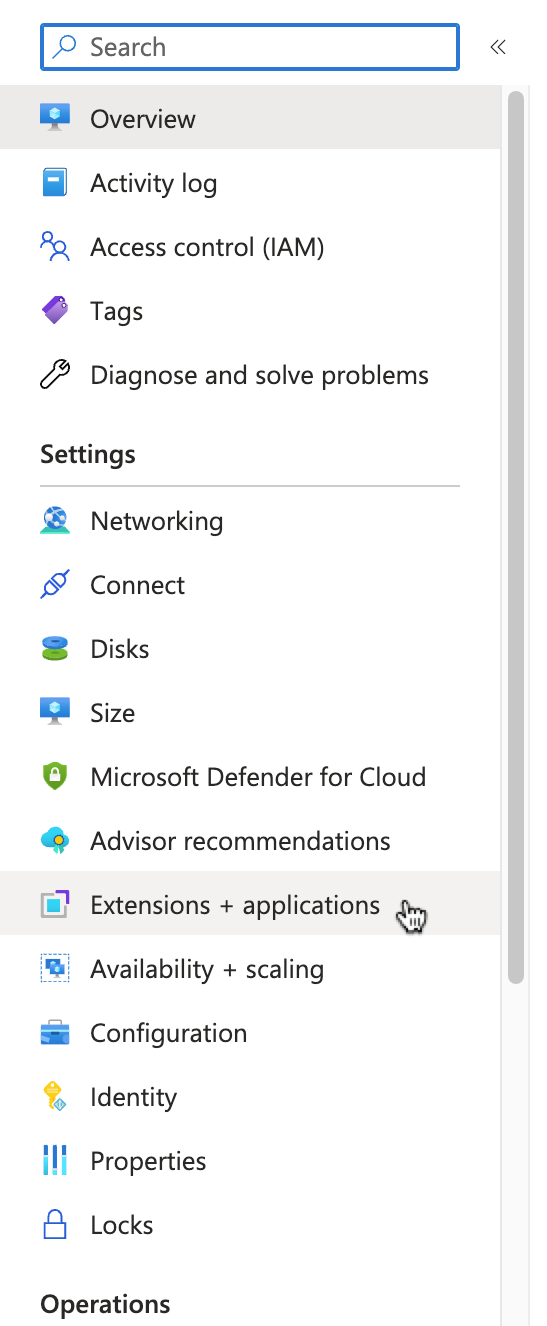
In the left column, click Extensions + applications.
-
Click + Add.
-
In the gallery, scroll down to "N" (for Nessus Agent) or type "nessus" in the search bar.

-
Select the Nessus Agent tile and click Next.
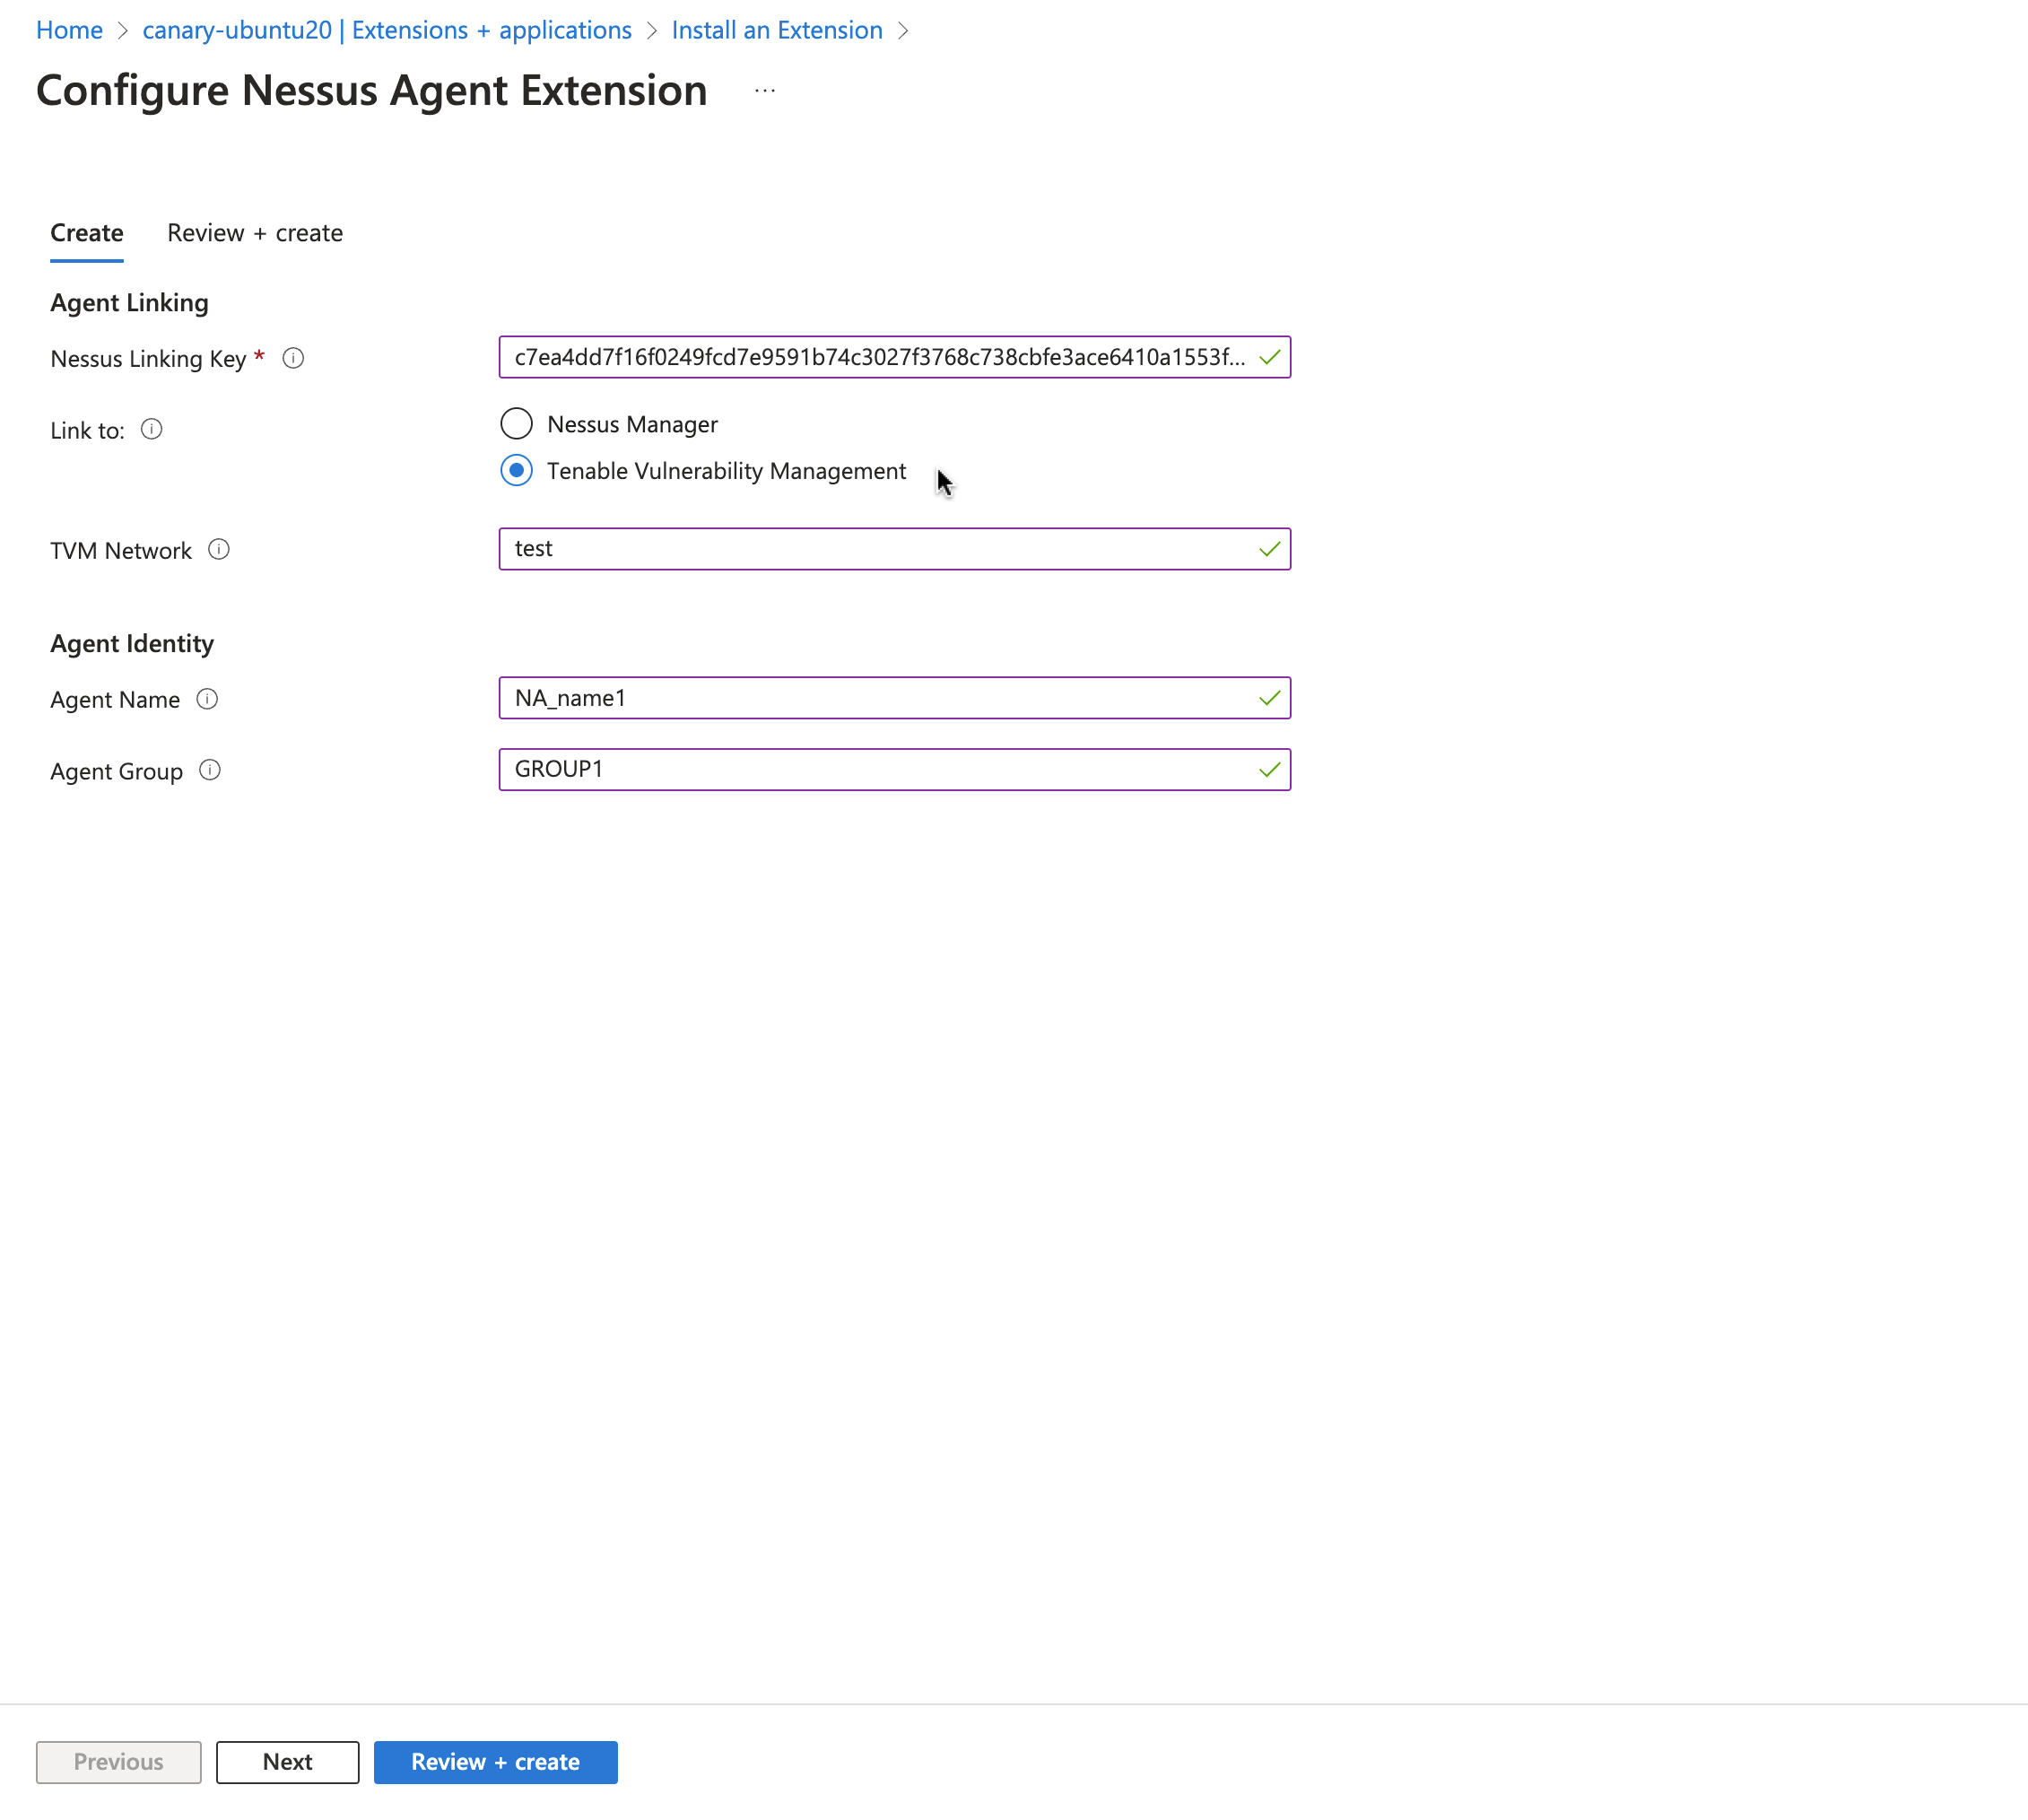
The Configure Extension options appear.
-
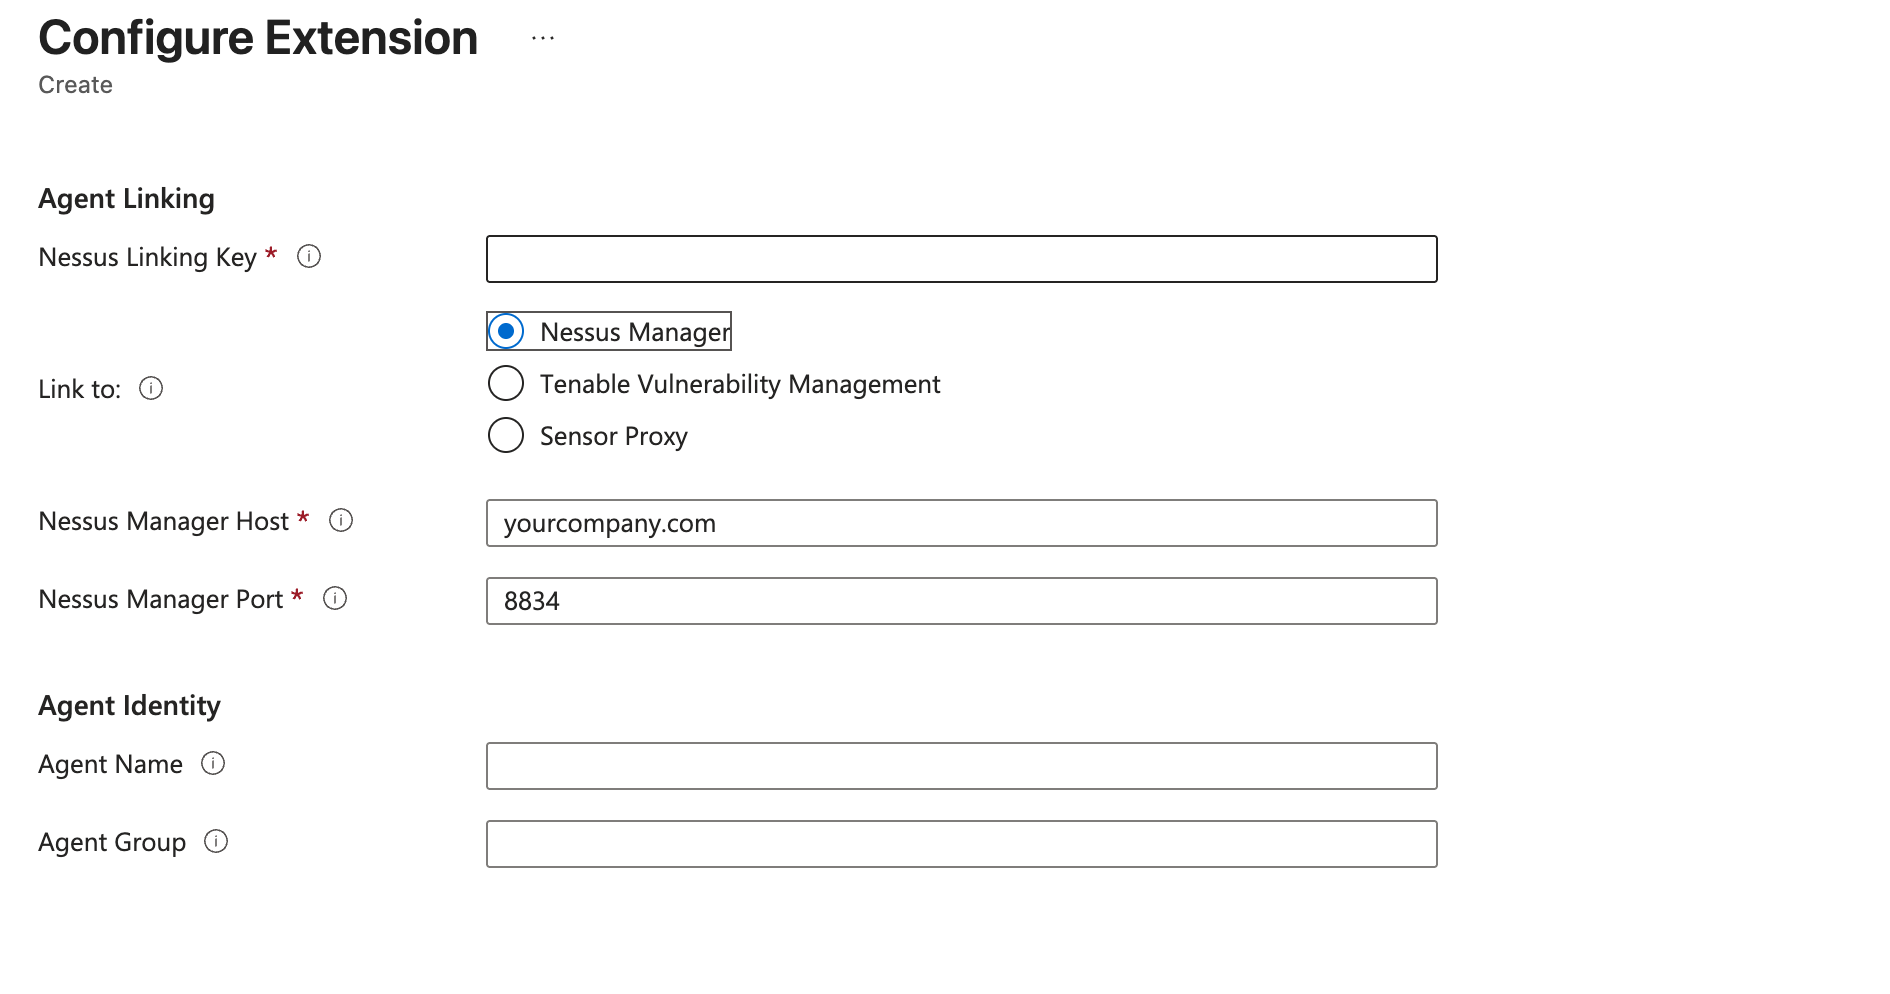
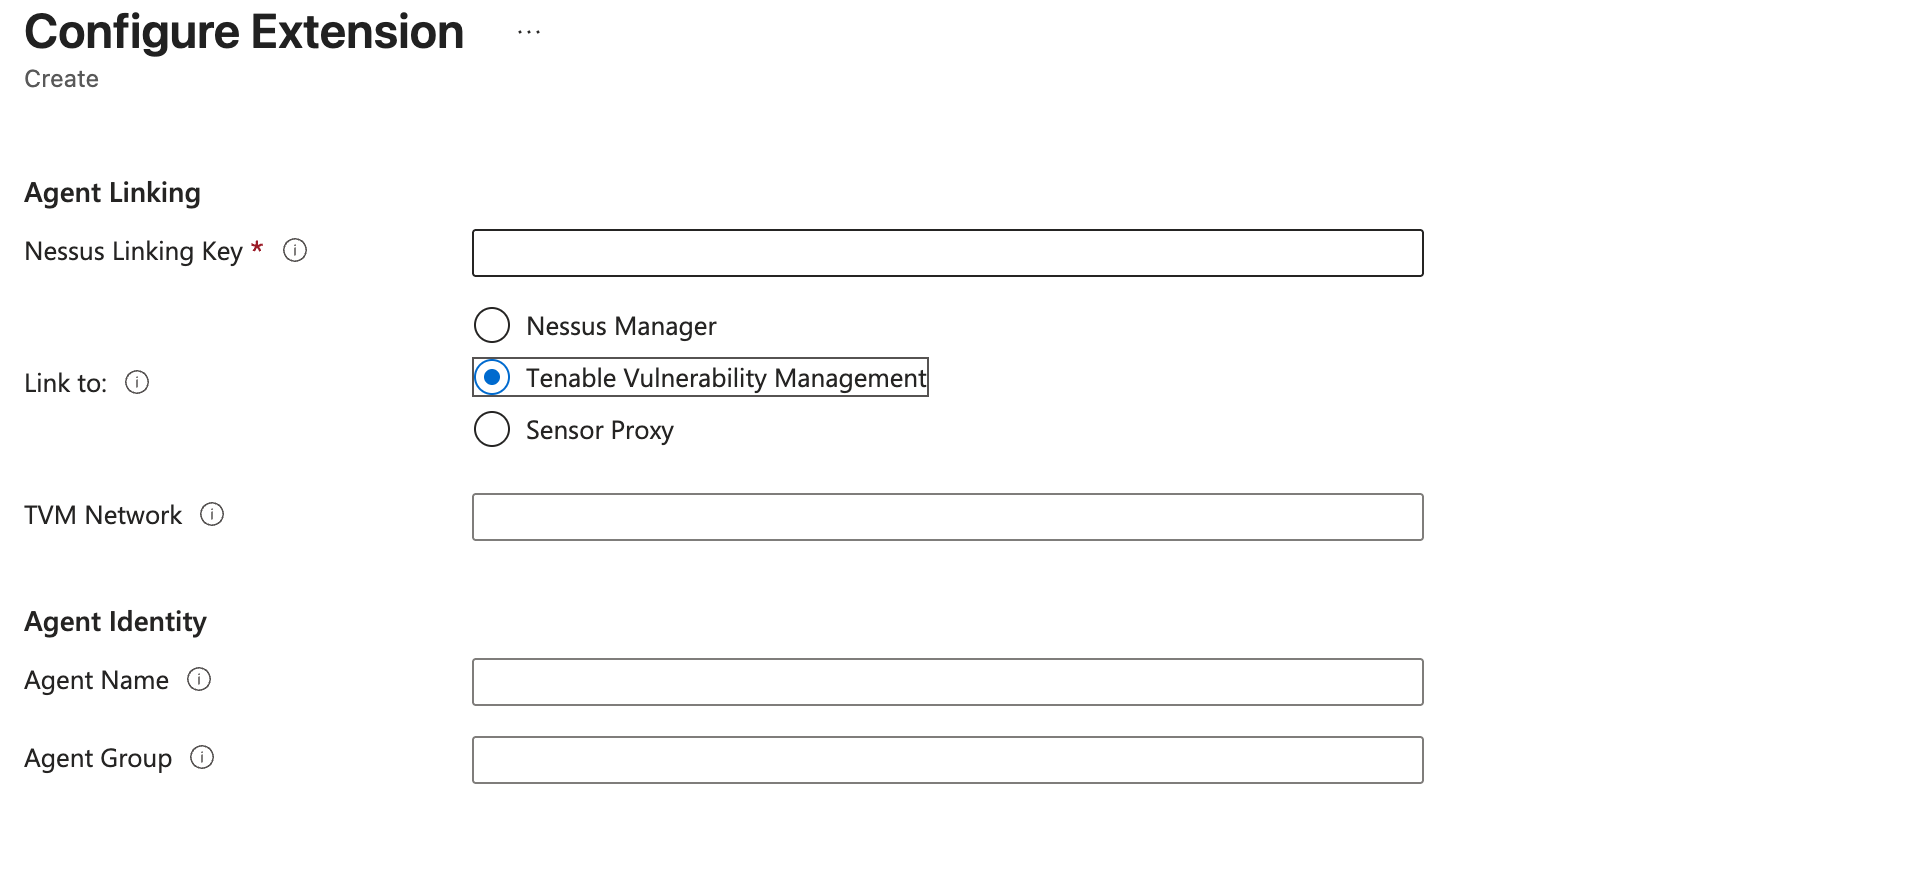
Select the Tenable Manager App you want to link to.
Each selection may have required options:
-
Local - Tenable Nessus Manager (requires Nessus Manager Host and Nessus Manager Port)
-
Cloud - Tenable Vulnerability Management
-
Sensor Proxy - for linking through Tenable Sensor Proxy (requires Sensor Proxy Host and Sensor Proxy Port)
-
-
Complete the Agent Identity parameters in the user interface.
-
Click Review + create.
Deploy from the command-line interface
You can deploy from the command-line interface available through PowerShell.
For example, you can type:
PS> $publisherName="Tenable.NessusAgent"
PS> $typeName="Linux" (or $typeName="Windows")
PS> $name = $publisherName + "." + $typeName
PS> $version="1.0"
PS> $Settings = @{"nessusManagerApp" = "cloud"; "nessusAgentName" = "example1"; "nessusAgentGroup" = "EXAMPLE1"}
PS> $ProtectedSettings = @{"nessusLinkingKey" = "abcd1234vxyz5678abcd1234vxyz5678abcd1234vxyz5678abcd1234vxyz5678"}
PS> Set-AzVMExtension -ResourceGroupName "EXAMPLE-resource-group" -Location "East US 2" -VMName "canary-example" -Name $name -Publisher $publisherName -ExtensionType $typeName -TypeHandlerVersion $version -Settings $Settings -ProtectedSettings $ProtectedSettings
Note: Lines 1-4 identify the One-Click Agent extension. Lines 5-6 in the PowerShell example are equivalent to Steps 8-9 in the user interface procedure. This is where you enter your configuration parameters for your Nessus Agent installation.
In the PowerShell interface, specify nessusLinkingKey under -ProtectedSettings so that Azure encrypts it. All other fields are passed unencrypted through -Settings. You can choose to link with Tenable Nessus Manager, directly to Tenable Vulnerability Management, or indirectly to Tenable Vulnerability Management through Sensor Proxy. Do this by setting nessusManagerApp to local, cloud, or proxy, respectively, in the command-line interface as shown in the following table.
| Tenable Product Linking Target | nessusManagerApp Setting |
|---|---|
| Tenable Nessus Manager | local |
| Tenable Vulnerability Management | cloud |
| Sensor Proxy | proxy |
You have the following three choices:
-
If you choose Tenable Nessus Manager, you must provide the Tenable Nessus Manager host (nessusManagerHost) and port number (nessusManagerPort). The extension accepts an IP address or fully qualified domain name.
-
If you choose Tenable Vulnerability Management, there is an optional field called tenableIoNetwork.
-
If you choose Sensor Proxy, you must provide the Sensor Proxy host (sensorProxyHost) and port number (sensorProxyPort). The extension accepts an IP address or fully qualified domain name.
The Agent Name (nessusAgentName) and Agent Group (nessusAgentGroup) are always optional. For more definitions of these parameters, see Nessuscli.
Note: Both Agent Name and Agent Group are each a comma-separated list of group names.
Parameters
| Parameter names | Equivalent Nessuscli parameters | Required |
|---|---|---|
| nessusLinkingKey | --key | yes |
| nessusManagerApp | N/A (unique to One-Click Agent) | no |
| nessusManagerHost | --host | Yes, when nessusManagerApp is set to local. |
| nessusManagerPort | --port | Yes, when nessusManagerApp is set to local. |
| tenableIoNetwork | --network | no |
| nessusAgentName | --name | no |
| nessusAgentGroup | --groups | no |
| sensorProxyHost | --proxy-host | Yes, when nessusManagerApp is set to proxy. |
| sensorProxyPort | --proxy-port | Yes, when nessusManagerApp is set to proxy. |
Verify Agent linking
As of June 2026, the One-Click Agent extension completes in approximately 1 minute and exits with success after initiating the agent linking process. The extension does not wait for the agent to complete linking, which can take up to 8.5 minutes.
After deployment, verify that the agent successfully linked:
-
For Tenable Vulnerability Management and Tenable Nessus Manager: Navigate to Sensors and locate the new agent in the linked agents table.
Note: For more information on linked agent verification, see the Verify an Linked Agent section in the Tenable Agent user guide.
Verify from the Azure VM command line
Linux:
/opt/nessus_agent/sbin/nessuscli agent status
Windows:
& "C:\Program Files\Tenable\Nessus Agent\nessuscli.exe" agent status
A successfully linked agent shows Linked to: <manager-address> and Status: Running.