Manage Vulnerabilities
Use the following procedures to manage vulnerabilties. For more information about vulnerabilities, see Vulnerabilities.
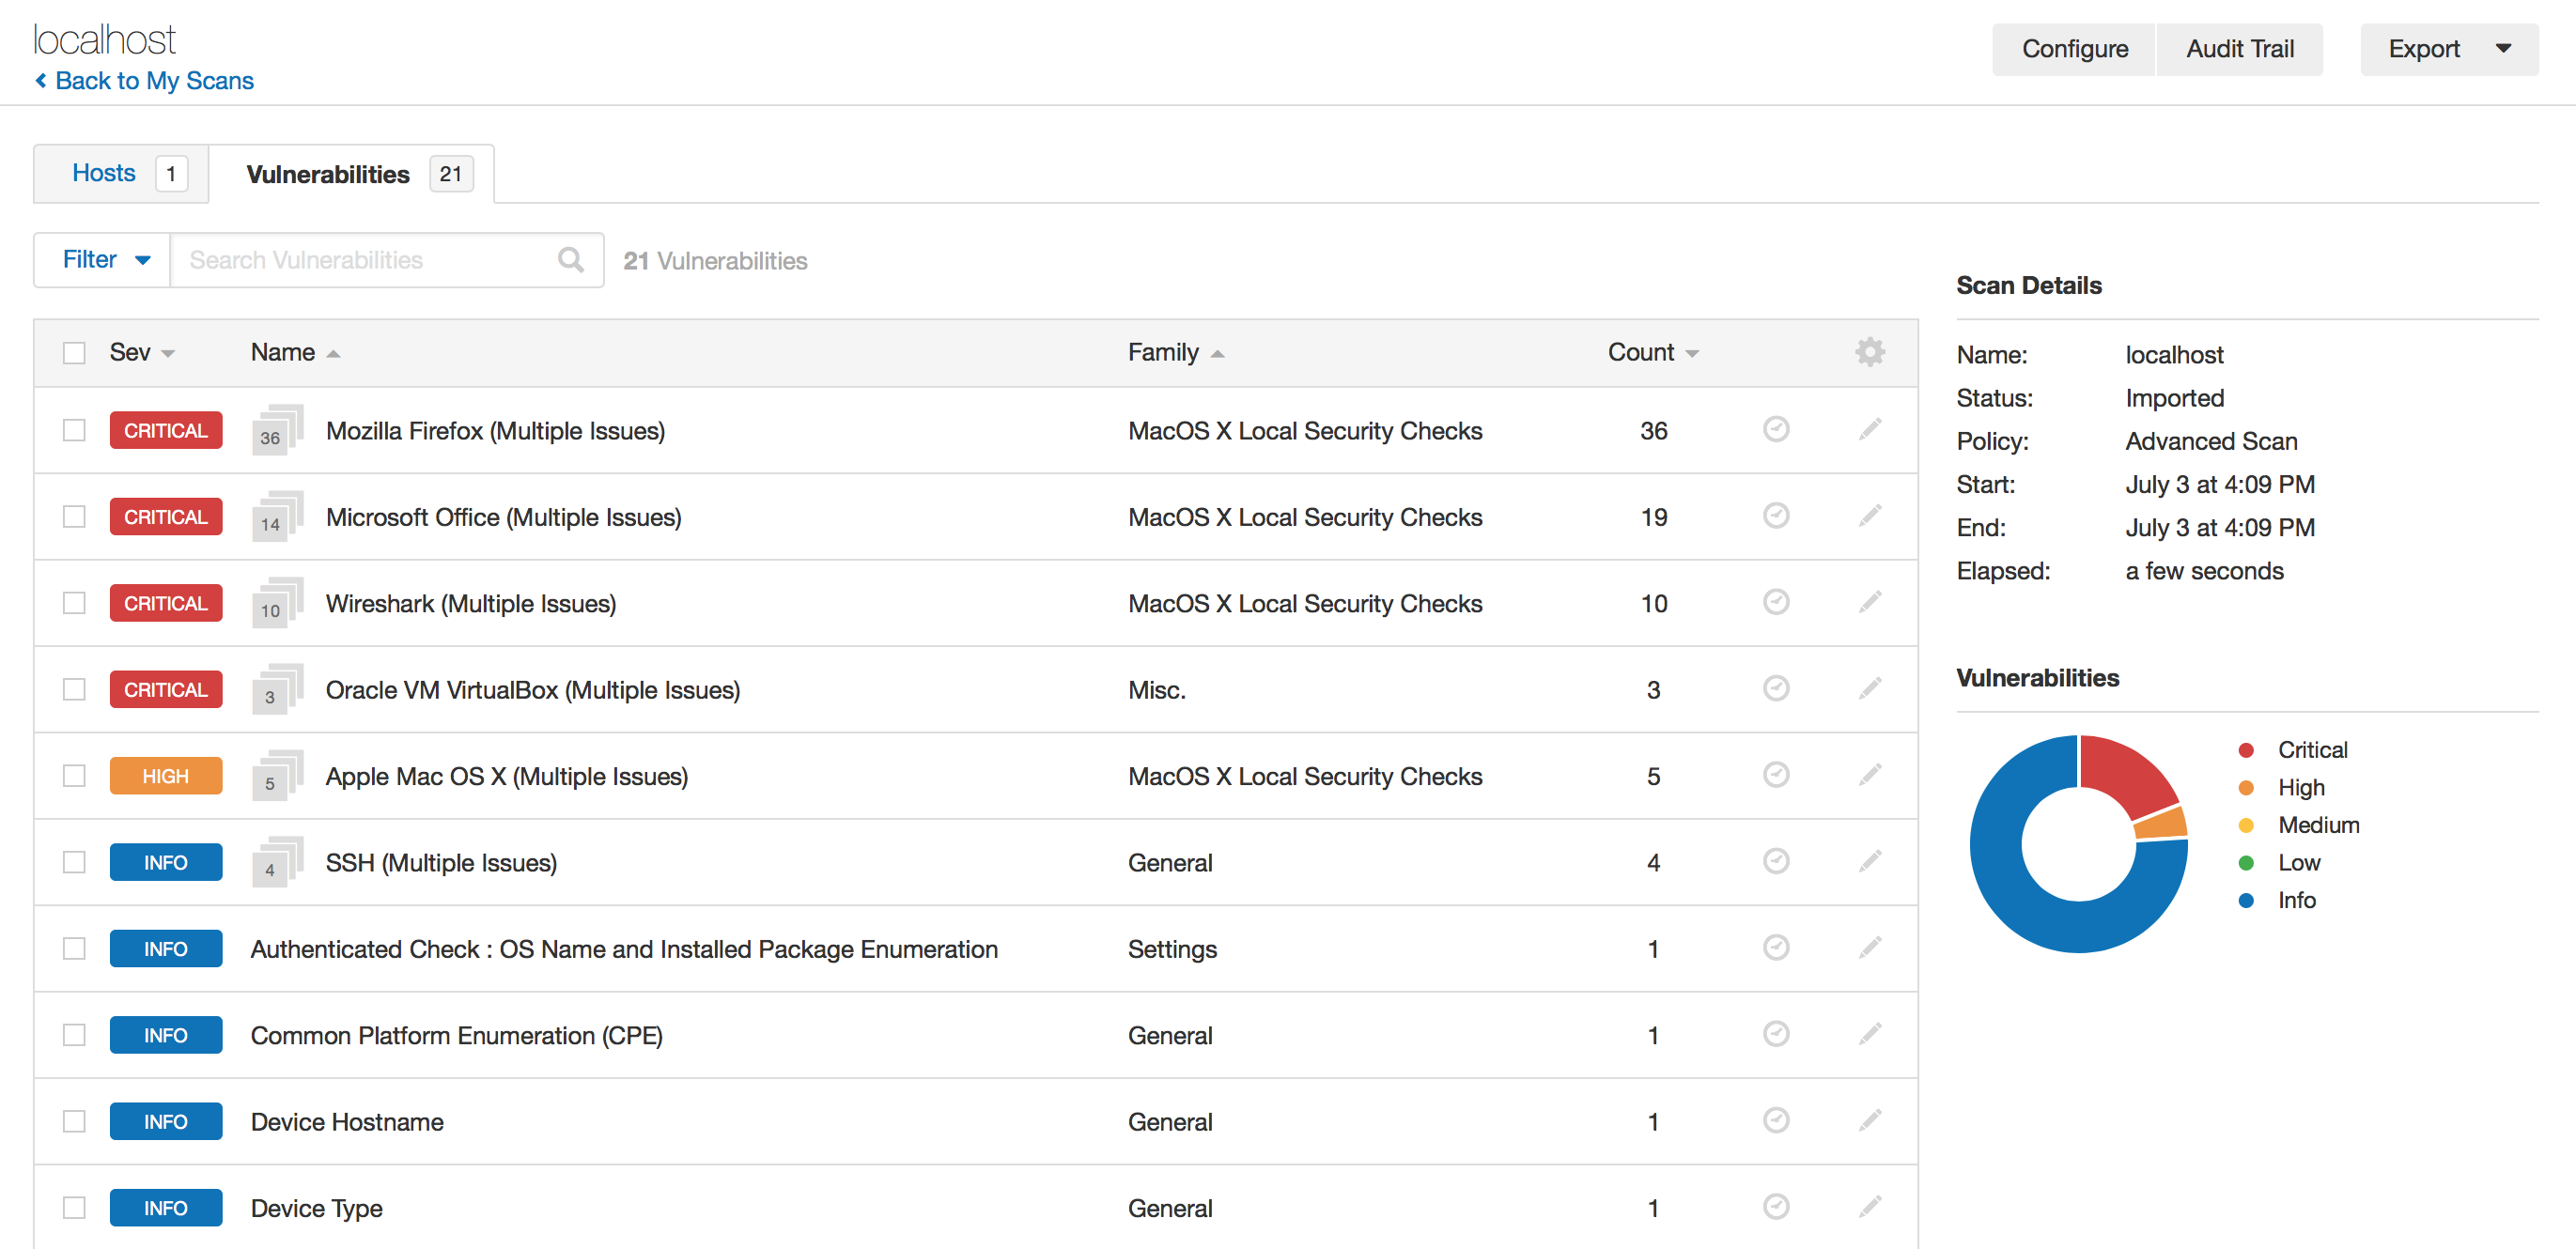
View Vulnerabilities
Required user role when using Tenable Nessus Manager: Basic, Standard, Administrator, or System Administrator
You can view all vulnerabilities found by a scan, or vulnerabilities found on a specific host by a scan. When you drill down on a vulnerability, you can view information such as plugin details, description, solution, output, risk information, vulnerability information, and reference information.
Tip: To view vulnerabilities by VPR, click  in the table header, click Disable Groups, and sort the table by VPR Score.
To view vulnerabilities:
-
In the top navigation bar, click Scans.
The My Scans page appears.
-
Click the scan for which you want to view vulnerabilities.
The scan's results page appears.
-
Do one of the following:
-
To view vulnerabilities on a specific host, click the host.
-
To view all vulnerabilities, click the Vulnerabilities tab.
The Vulnerabilities tab appears.
-
- (Optional) To sort the vulnerabilities, click an attribute in the table header row to sort by that attribute.
-
To view details for the vulnerability, click the vulnerability row.
The vulnerability details page appears and shows plugin information and output for each instance on a host.
Group Vulnerabilities
Required user role when using Tenable Nessus Manager: Basic, Standard, Administrator, or System Administrator
When you group vulnerabilities, plugins with common attributes such as Common Platform Enumeration (CPE), service, application, and protocol nest under a single row in scan results. Grouping vulnerabilities gives you a shorter list of results, and shows your related vulnerabilities together.
When you enable groups, the number of vulnerabilities in the group appears next to the severity indicator, and the group name says (Multiple Issues).
The severity indicator for a group is based on the vulnerabilities in the group. If all the vulnerabilities in a group have the same severity, Tenable Nessus shows that severity level. If the vulnerabilities in a group have differing severities, Tenable Nessus shows the Mixed severity level.
To group vulnerabilities:
-
In the top navigation bar, click Scans.
The My Scans page appears.
-
Click on the scan for which you want to view vulnerabilities.
The scan's results page appears.
-
Do one of the following:
-
Click a specific host to view vulnerabilities found on that host.
-or-
-
Click the Vulnerabilities tab to view all vulnerabilities.
The Vulnerabilities tab appears.
-
-
In the header row of the vulnerabilities table, click
 .
.Note: The cog icon (
) only appears when there are vulnerabilities that can be grouped. -
Click Enable Groups.
Tenable Nessus groups similar vulnerabilities in one row.
Ungroup Vulnerabilities
-
In the header row of the vulnerabilities table, click
.Note: The cog icon (
) only appears when there are vulnerabilities that can be grouped. -
Click Disable Groups.
Vulnerabilities appear on their own row.
View Vulnerabilities in a Group
-
In the vulnerabilities table, click the vulnerability group row.
A new vulnerabilities table appears and shows the vulnerabilities in the group.
Set Group Severity Types to the Highest Severity in the Group
-
Set the advanced setting scans_vulnerability_groups_mixed to no.
Modify a Vulnerability
Required user role when using Tenable Nessus Manager: Standard, Administrator, or System Administrator
You can modify a vulnerability to change its severity level or hide it. This allows you to re-prioritize the severity of results to better account for your organization’s security posture and response plan. When you modify a vulnerability from the scan results page, the change only applies to that vulnerability instance for that scan unless you indicate that the change should apply to all future scans. To modify severity levels for all vulnerabilities, use Plugin Rules.
To modify a vulnerability:
-
In the top navigation bar, click Scans.
The My Scans page appears.
-
Click the scan for which you want to view vulnerabilities.
The scan's results page appears.
-
Do one of the following:
-
Click a specific host to view vulnerabilities found on that host.
-
Click the Vulnerabilities tab to view all vulnerabilities.
The Vulnerabilities tab appears.
-
-
In the row of the vulnerability you want to modify, click
 .
.The Modify Vulnerability window appears.
-
In the Severity drop-down box, select a severity level or Hide this result.
Note: If you hide a vulnerability, you cannot recover it and you accept its associated risks.
-
(Optional) Select Apply this rule to all future scans.
If you select this option, Tenable Nessus modifies this vulnerability for all future scans. Tenable Nessus does not modify vulnerabilities found in past scans.
-
Click Save.
Tenable Nessus updates the vulnerability with your setting.
Snooze a Vulnerability
Required user role when using Tenable Nessus Manager: Basic, Standard, Administrator, or System Administrator
When you snooze a vulnerability, it does not appear in the default view of your scan results. You choose a period of time for which the vulnerability is snoozed – once the snooze period age outs, the vulnerability awakes and appears in your list of scan results. You can also manually wake a vulnerability or choose to show snoozed vulnerabilities. Snoozing affects all instances of the vulnerability in a given scan, so you cannot snooze vulnerabilities only on a specific host.
When you snooze a vulnerability, you only snooze the vulnerability for the scan result that you are working in. The vulnerability still appears in other existing scan results, and in future scan results.
To snooze a vulnerability:
-
In the top navigation bar, click Scans.
The My Scans page appears.
-
Click on the scan for which you want to view vulnerabilities.
The scan's results page appears.
-
Do one of the following:
-
Click a specific host to view vulnerabilities found on that host.
-or-
-
Click the Vulnerabilities tab to view all vulnerabilities.
The Vulnerabilities tab appears.
-
-
In the row of the vulnerability you want to snooze, click
 .
.The Snooze for drop-down box appears.
-
Choose the period of time you want the vulnerability to snooze:
-
Click 1 Day, 1 Week, or 1 Month.
-or-
-
Click Custom.
The Snooze Vulnerability window appears.
-
-
In the Snooze Vulnerability window:
- If you selected a preset snooze period, click Snooze to confirm your selection.
- If you selected a custom snooze period, select the date you want the vulnerability to snooze until, then click Snooze.
Tenable Nessus snoozes the vulnerability for the selected period of time and does not appear in the default view of scan results.
Show Snoozed Vulnerabilities
-
In the header row of the vulnerabilities table, click
.A drop-down box appears.
-
Click Show Snoozed.
Snoozed vulnerabilities appear in the list of scan results.
Wake a Snoozed Vulnerability
-
In the row of the snoozed vulnerability click
 .
.The Wake Vulnerability window appears.
-
Click Wake.
The vulnerability is no longer snoozed, and appears in the default list of scan results.