Tenable Identity Exposure: Okta IdP
One of the most common IdPs used to configure SAML with Tenable Identity Exposure is Okta. The following steps guide you through the configuration process from start to finish.
Manual configuration requires the following:
-
URL of the SAML server: A value that corresponds to the IdP provider SSO URL within Okta.
-
Assert endpoint of the Tenable.ad service provider: A value that corresponds to the Audience URI (SP Identity ID) within Okta.
-
Trusted Certificate Authorities: The SAML server certificate in PEM-encoded format, beginning with -----BEGIN CERTIFICATE ----- and ending with -----END CERTIFICATE -----, provided by Okta in the X.509 certificate section.
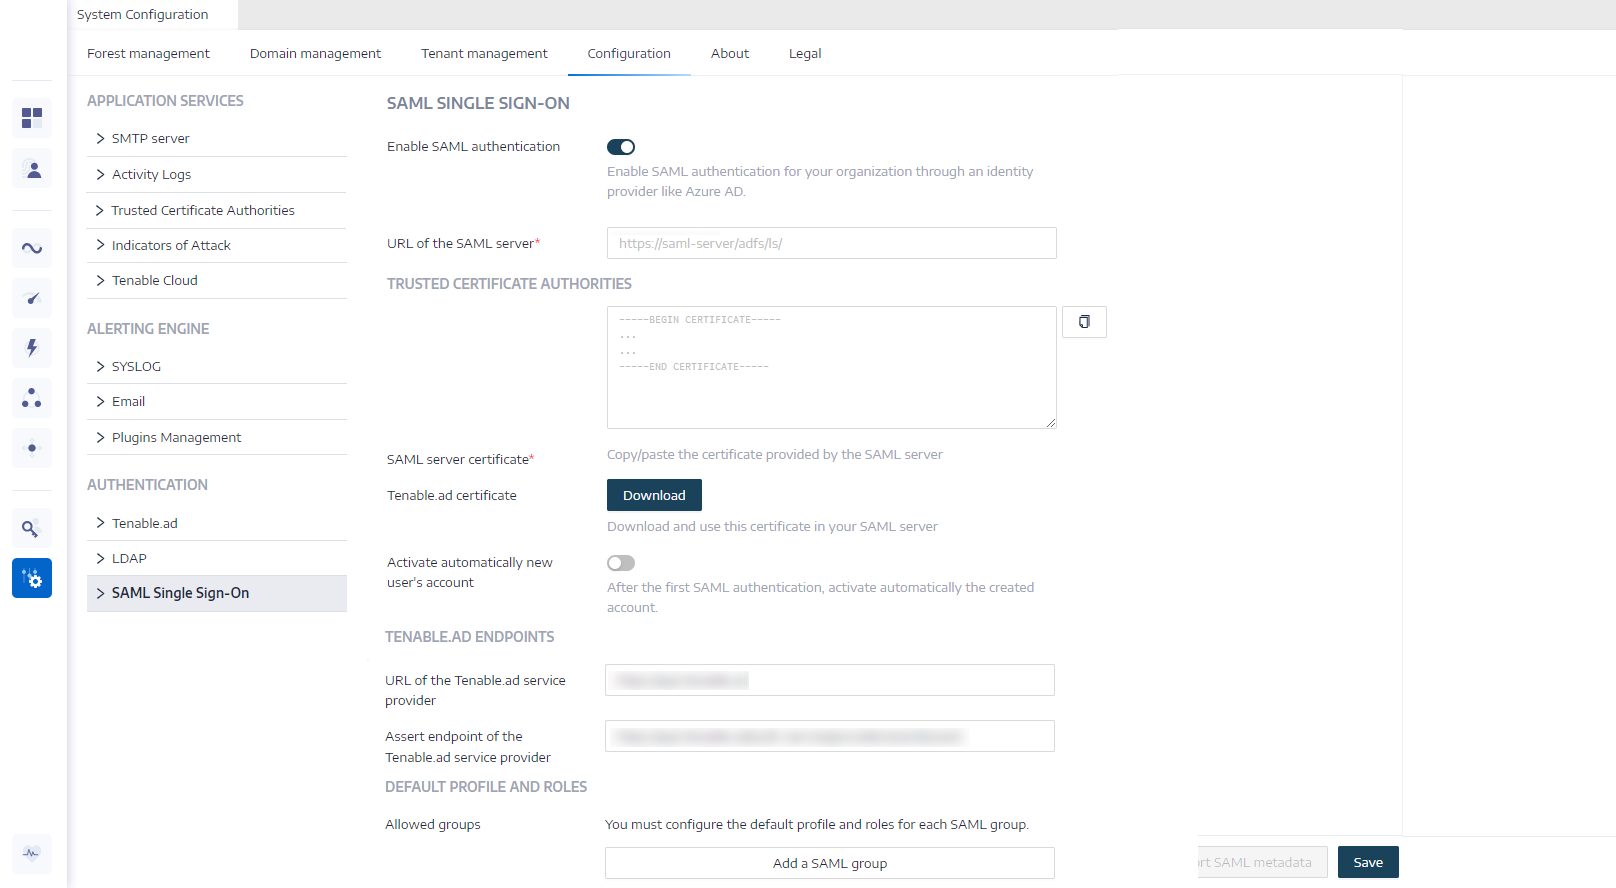
Enable Tenable Identity Exposure SAML
The first step in configuring SAML for use with Tenable Identity Exposure is to enable the configuration in the Tenable Identity Exposure application. Then, you can download your certificate file to use in your IdP.
To enable the Tenable Identity Exposure SAML configuration:
- In your browser, navigate to Tenable Identity Exposure.
-
Navigate to Systems > Configuration.
The configuration pane appears.
-
Under the Authentication section, click SAML Single Sign-on.
-
Click the Enable SAML authentication toggle.
A SAML information form appears.
-
In the Tenable.ad Certificate section, click Download.
Your browser downloads the certificate needed to connect with your IdP.
-
In the Tenable.ad Endpoints section, copy the following values for use within your IdP:
-
URL of the Tenable.ad service provider
-
Assert endpoint of the Tenable.ad service provider
-
You can now use the downloaded certificate and copied values to set up the connection with your IdP.
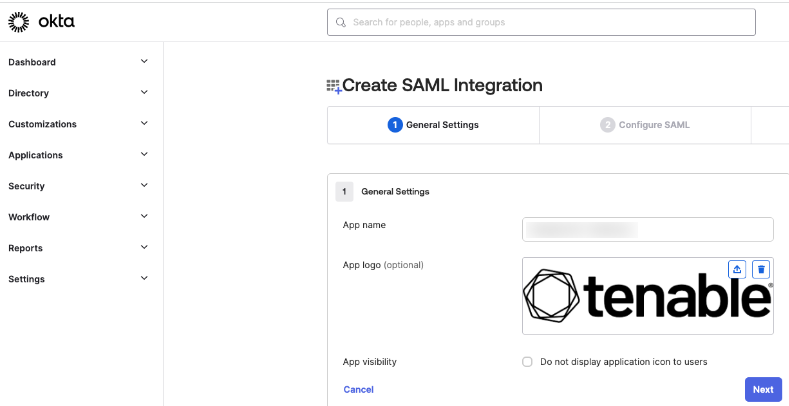
Okta: Configure Application Integration and Upload Certificate
Now that you have enabled the Tenable Identity Exposure SAML configuration, you can create a Tenable application in Okta.
-
In your browser, navigate to the Okta Admin portal.
-
In the left navigation menu, click Applications > Applications.
The Applications page appears.
-
Click Create App Integration.
The Create a new app integration window appears.

-
Select the SAML 2.0 radio button.

-
Click Next.
The General Settings options appear.
-
In the App name text box, type a name for your application.
-
(Optional) To add a custom logo for the application, in the App logo section, upload a .png, .jpeg, or .gif file and click Apply.

-
Click Next.
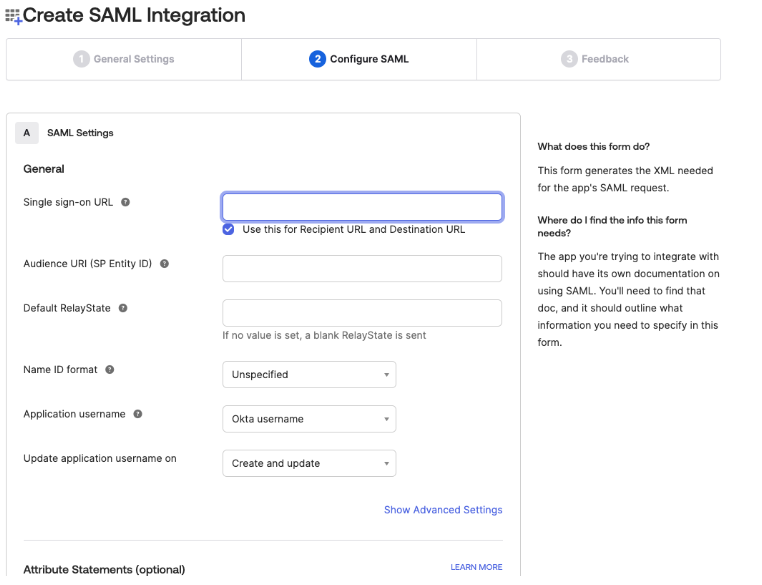
The Configure SAML options appear.
-
In the Single sign-on URL text box, paste the URL of the Tenable.ad service provider value you copied from Tenable Identity Exposure.
-
In the Audience URI (SP Identity ID) text box, paste the Assert endpoint of the Tenable.ad service provider value you copied from Tenable Identity Exposure.
-
Click Show Advanced Settings.
-
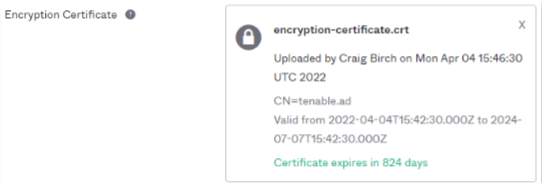
In the Assertion Encryption drop-down, select Encrypted.

-
Click the Encryption Certificate field, and, in your browser, select the certificate you downloaded from Tenable Identity Exposure.
Okta saves the certificate.
-
In the Group Attribute Statements section, insert the following values:
-
In the Name text box, type groups.
-
In the Name format drop-down, select Unspecified.
-
In the Filter boxes, select Starts with and then type Tenable.

-
-
Click Next.
-
Select I'm an Okta customer and adding an internal app.
-
Click Finish.
-
On the Sign-On tab, click the View Setup Instructions button.

-
Save the following for use with Tenable Identity Exposure:
-
IdP provider SSO URL
Tip: You'll later paste this as the URL of the SAML server within Tenable Identity Exposure. -
X.509 certificate
Tip: You'll later paste the contents of this certificate in the Trusted Certificate Authorities section of Tenable Identity Exposure.
-
Create Okta Groups and Assign Users
To create groups and assign users:
-
In Okta, navigate to Directory Groups > Add Group.
-
Create the following groups for use with Tenable Identity Exposure:
-
Create a Tenable_users group. Add any users with Standard User Access to this group.
-
Create a Tenable_admins group. Add any Administrators to this group.
Tip: You'll later paste these as the SAML group name within Tenable Identity Exposure. -
You can now finish your SAML configuration within the Tenable Identity Exposure application.
Assign the Okta Application to your Users
To assign the application to your users or groups:
-
In the left navigation menu, click Applications > Applications.

-
Next to your newly created application configuration, click the
 button.
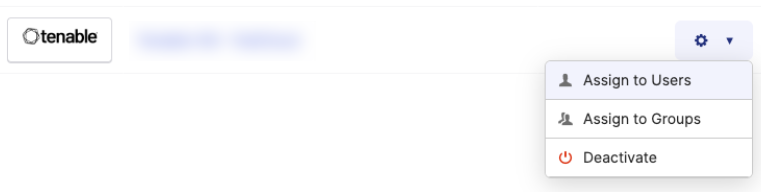
-
Assign the application to one or more users or groups:
-
Click Assign to Users.
-
Click Assign to Groups.
An Assign window appears.
-
-
Next to the user or group to which you want to assign the application, click Assign.
A confirmation window appears.
-
Click Save and Go Back.
-
Repeat for each user or group to which you want to assign the application.
-
Click Done.
Okta saves your changes, and you can now configure the final piece of the SAML configuration within Tenable Identity Exposure.
Finalize the Tenable Identity Exposure SAML Configuration
Once you've set up your application within your IdP, you can finalize your SAML configuration via the Tenable Identity Exposure interface.
To finalize the Tenable Identity Exposure SAML configuration:
- In your browser, navigate to Tenable Identity Exposure.
-
Navigate to Systems > Configuration.
The configuration pane appears.
-
Under the Authentication section, click SAML Single Sign-on.
-
Click the Enable SAML authentication toggle.
A SAML information form appears.
-
In the URL of the SAML server box, paste the value you copied from your IdP. This value identifies the SAML server where Tenable Identity Exposure must connect.
-
In the Trusted Certificate Authorities box, paste certificate values that you copied from your IdP, beginning with -----BEGIN CERTIFICATE ----- and ending with -----END CERTIFICATE -----.
-
Enable the Activate automatically new user's account toggle.
-
In the Default Profiles and Roles section, configure at least one Allowed Group. This group name should match the name and description of the group you created in your IdP.
-
 A group for your administrators that matches the group you created in your IdP:
-
In the SAML group name text box, type the name of the group you created in your IdP.
-
In the Default profile text box, select the default profile you want to use for the group.
-
In the Default roles box, select the default role you want to use for the group. For example, if the group is for Administrator use only, select Global Administrator.
-
-
-
Click Save.
Tenable Identity Exposure saves your changes, and your SAML configuration is ready for use.
Additional Resources
For more information on Okta IdP configuration, see the following resources: