Tenable Security Center: Microsoft Entra ID IdP
One of the most common IdPs used to configure SAML with Tenable One is Microsoft Entra ID. The following steps guide you through the configuration process from start to finish.
Manual configuration requires the following:
-
Reply URL: A custom URL in the following format:
https://PLACEHOLDER/saml/module.php/saml/sp/saml2-acs.php/1Where PLACEHOLDER is the IP address or hostname for your Tenable Security Center instance.
-
Identifier (Entity ID): A custom ID in the following format:
https://tenable.scNote: This value must be in URL format. -
A certificate within the SAML metadata object that matches the data originally sent to Tenable.
Note: Tenable does not support the use of multiple certificates and only extracts the first certificate from the metadata object. If the object includes multiple certificates, you must specify which certificate to use if it is not the first one listed.
Microsoft Entra ID: Create Initial Application
To create an application in Microsoft Entra ID:
-
In your browser, navigate to the Azure Admin portal.
-
In the navigation menu, navigate to All services > Enterprise Applications.
The application gallery appears.

-
Click Create your own application.
The Create your own application window appears.

-
In the What's the name of your app? text box, type a name for your application.
-
In the What are you looking to do with your application section, select the Integrate any other application you don't find in the gallery radio button.
-
Click Create.
Microsoft Entra ID redirects you to the application overview page.
-
In the Getting Started section, click the Set up single sign on tile.
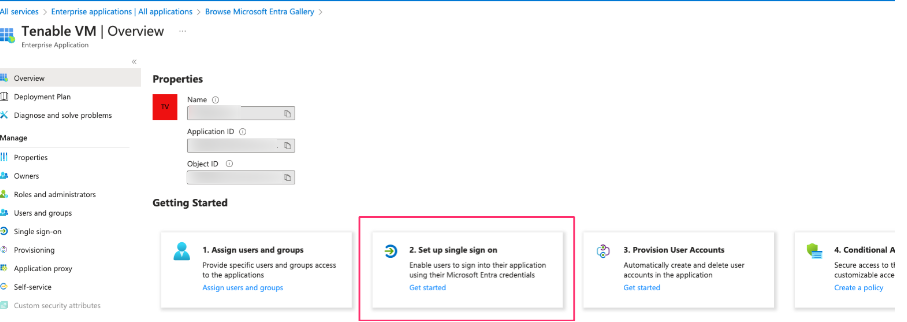
The Single Sign-on options appear.

-
Click the SAML tile.
The SAML-based Sign-on page appears.
-
On the Basic SAML Configuration tile, click the
 button.
Action items appear.
-
Click Edit.
The Basic SAML Configuration page appears.

-
In the Identifier (Entity ID) text box, type the following text:
https://tenable.sc -
In the Reply URL text box, type the following text:
https://PLACEHOLDER/saml/module.php/saml/sp/saml2-acs.php/1Where PLACEHOLDER is the IP address or hostname for your Tenable Security Center instance.
-
Click Save.
You return to the SAML-based Sign-on page.
-
On the SAML Certificates tile, in the Federation Metadata XML section, click Download.

Your browser downloads the metadata.xml file.
Enable Tenable Security Center SAML
Once you have downloaded your medata.xml file, you can use it to configure SAML in Tenable Security Center. You can configure this directly in the Tenable Security Center application.
To set up the Tenable Security Center SAML configuration:
- In your browser, navigate to Tenable Security Center.
-
In the left navigation, click System > Configuration.
The Configuration page appears.
-
Click the SAML button.
The SAML Configuration page appears.
-
In the General section, confirm the SAML toggle is enabled.
-
In the Source drop-down box, select Import.
The page updates to display additional options.
-
In the Type drop-down box, select SAML 2.0.
-
Click Choose File and browse to the SAML metadata file from your identity provider.
Note: The metadata file must match the Type you selected. If Tenable Security Center rejects the file, contact your identity provider for assistance.
-
Click Submit.
Tenable Security Center saves your configuration.
-
For the configuration you just created, click Download SAML Configuration XML.
Your browser downloads the metadata.xml file. You can now use this file for final configuration in your IdP.
Microsoft Entra ID: Configure Final Application and Upload Metadata
Now that you have downloaded the completed metadata file, you can upload that file to your Tenable application in Microsoft Entra ID.
-
In your browser, navigate to the Azure Admin portal.
-
In the navigation menu, navigate to All services > Enterprise Applications.
The application gallery appears.
-
Select the newly created application.
-
In the Getting Started section, click the Set up single sign on tile.
-
Click Upload Metadata file.
-
In your file manager, select the Service Provider metadata.xml file that you downloaded from Tenable Security Center.
Microsoft Entra ID imports the metadata from the file.
-
Click Save.
Microsoft Entra ID saves your changes to the permanent application.
Create and Assign Microsoft Entra ID Users
To create groups and assign users:
-
In Microsoft Entra ID, in the left navigation menu, click Users and Groups.
The Users and Groups page appears.
-
Click Add User.
The Add Assignment page appears.
-
Click the Users and Groups section.
-
In the selection plane, select the users and/or groups you want to assign to the group for use with Tenable Security Center.

-
Once you've selected the users you want to assign, click Assign.
Microsoft Entra ID saves your changes, and you can now finish your SAML configuration within the Tenable Security Center application.
Finalize the Tenable Security Center SAML Configuration
Once you've set up your application within your IdP, you can finalize your SAML configuration via the Tenable Security Center interface.
To finalize the Tenable Security Center SAML configuration:
-
Log in to Tenable Security Center via the user interface.
Note: You must log in with a user account belonging to the organization where you want to create a new user. -
Click Users > Users.
The Users page appears.
-
Click Add.
The Add User page appears.
-
(Optional) Type a First Name and Last Name for the user.
-
In the Type drop-down list, select SAML.
-
In the Username box, type the user's SAML username exactly as it appears in the IdP user configuration that you created for the user.
-
Select a Time Zone.
-
(Optional) Select a Scan Result Default Timeframe.
-
(Optional) Enable Cached Fetching.
-
Select a Role. For more information, see User Roles in the Tenable Security Center User Guide.
-
Select a Group. For more information, see Organizations and Groups in the Tenable Security Center User Guide.
-
(Optional) To customize the user's object and user account management permissions, modify the Group Permissions. For more information, see Custom Group Permissions in the Tenable Security Center User Guide.
-
(Optional) To share an asset list with the user, select an Asset. For more information, see Assets in the Tenable Security Center User Guide.
-
(Optional) Type Contact Information for the user.
-
Click Submit.
Tenable Security Center saves your changes, and your SAML configuration is ready for use.
Additional Resources
For more information on Microsoft Entra ID IdP configuration, see the following resources: