Contact Details
You can view additional details about any contact listed on he Contacts page.
To access the Contact Details page:
- Access the Contacts page.
- Click the email of the contact for which you want to view additional details.
The Contact Details page appears.
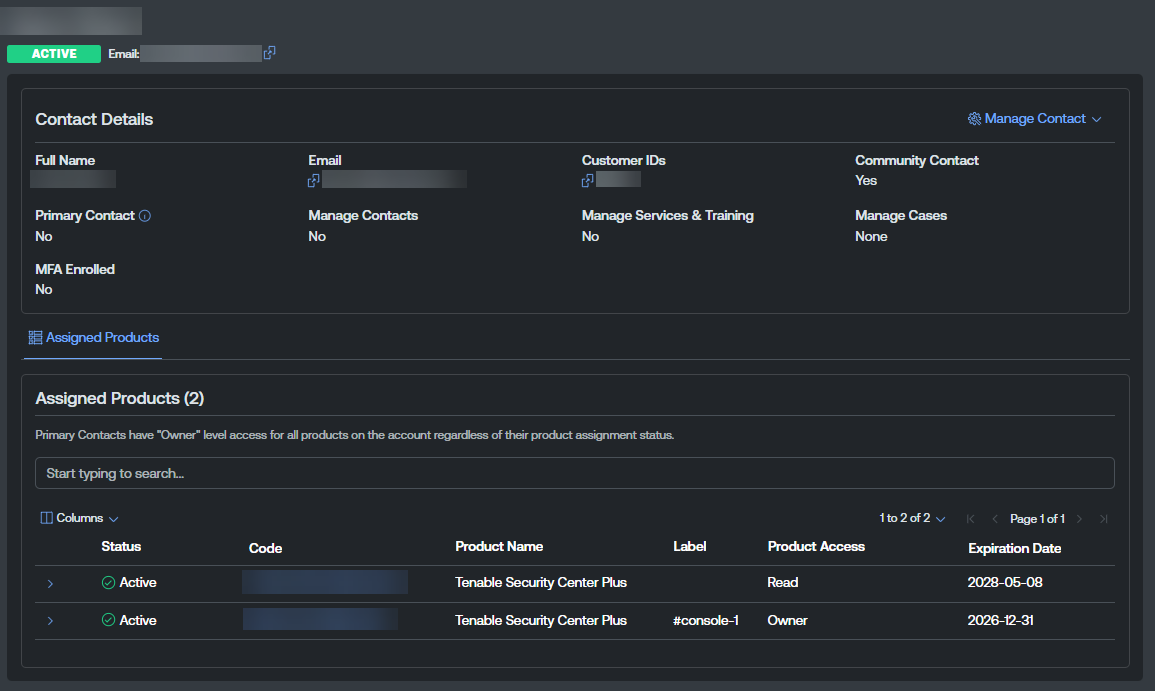 Tip: At the top of the page, you can view the status of the contact, for example Active or Disabled.
The page includes the following sections:
Contact Details
The Contact Details section includes the following information:
-
Full Name — The full name of the contact.
-
Email — The email address associated with the contact.
Tip: Click the button to copy the email directly to your clipboard.
 -
Customer IDs — The customer ID associated with the contact.
Tip: Click the button to copy the ID directly to your clipboard. -
Community Contact — Indicates whether or not the contact is a community contact.
-
Primary Contact — Indicates whether or not the contact is a primary contact.
-
Manage Contacts — Indicates whether or not the contact can manage other contacts within the Tenable Appliance portal.
-
Manage Services & Training — Indicates whether or not the contact can manage services and trainings within Tenable Professional Services.
-
Manage Cases — Indicates whether or not the contact can manage customer support cases, including their own.
-
MFA Enrolled — Indicates whether or not the contact is enrolled in multi-factor authentication.
Assigned Products
The Assigned Products section on the Contact Details page lists all products assigned to the selected contact.
The list includes the following product information:
-
Status — The status of the product, for example Active or Expired.
-
Code — The product code associated with the product. Click the product code to navigate directly to the Product Details page.
-
Product Name — The name of the product.
-
Label — Where applicable, a descriptive label applied to the product during configuration.
-
Product Access — The type of access the contact has to the product, for example Read or Owner.
-
Expiration Date — The date on which the product expires.
To change the default columns within the list:
-
Click Columns
 .
.A list of available columns appears.
-
(Optional) Use the search bar to search for a specific column.
-
Select/delesect the check boxes to show or hide columns in the table.
-
(Optional) Click Reset Columns to reset all columns to their defaults.