Ticket Creation in Tenable Exposure Management
Within Tenable Exposure Management, you can create tickets based on findings directly from the Findings page. These tickets help you to address vulnerabilities in your environment and ensure work items for vulnerability findings are being created and assigned quickly and effectively.
Before you Begin
Review the Prerequisites and ensure you have the appropriate permissions and configurations enabled for ticket creation.
Create a Ticket in Tenable Exposure Management
You can create the following kinds of tickets within Tenable Exposure Management:
Jira
To create a Jira ticket based off of a finding:
-
In Tenable Exposure Management, access the Findings view.
-
In the findings list, select the check box next to each finding you want to include in the ticket.
-
In the upper-right corner of the page, click
 Take Action.
A drop-down menu appears.
-
Click Create Jira Ticket.
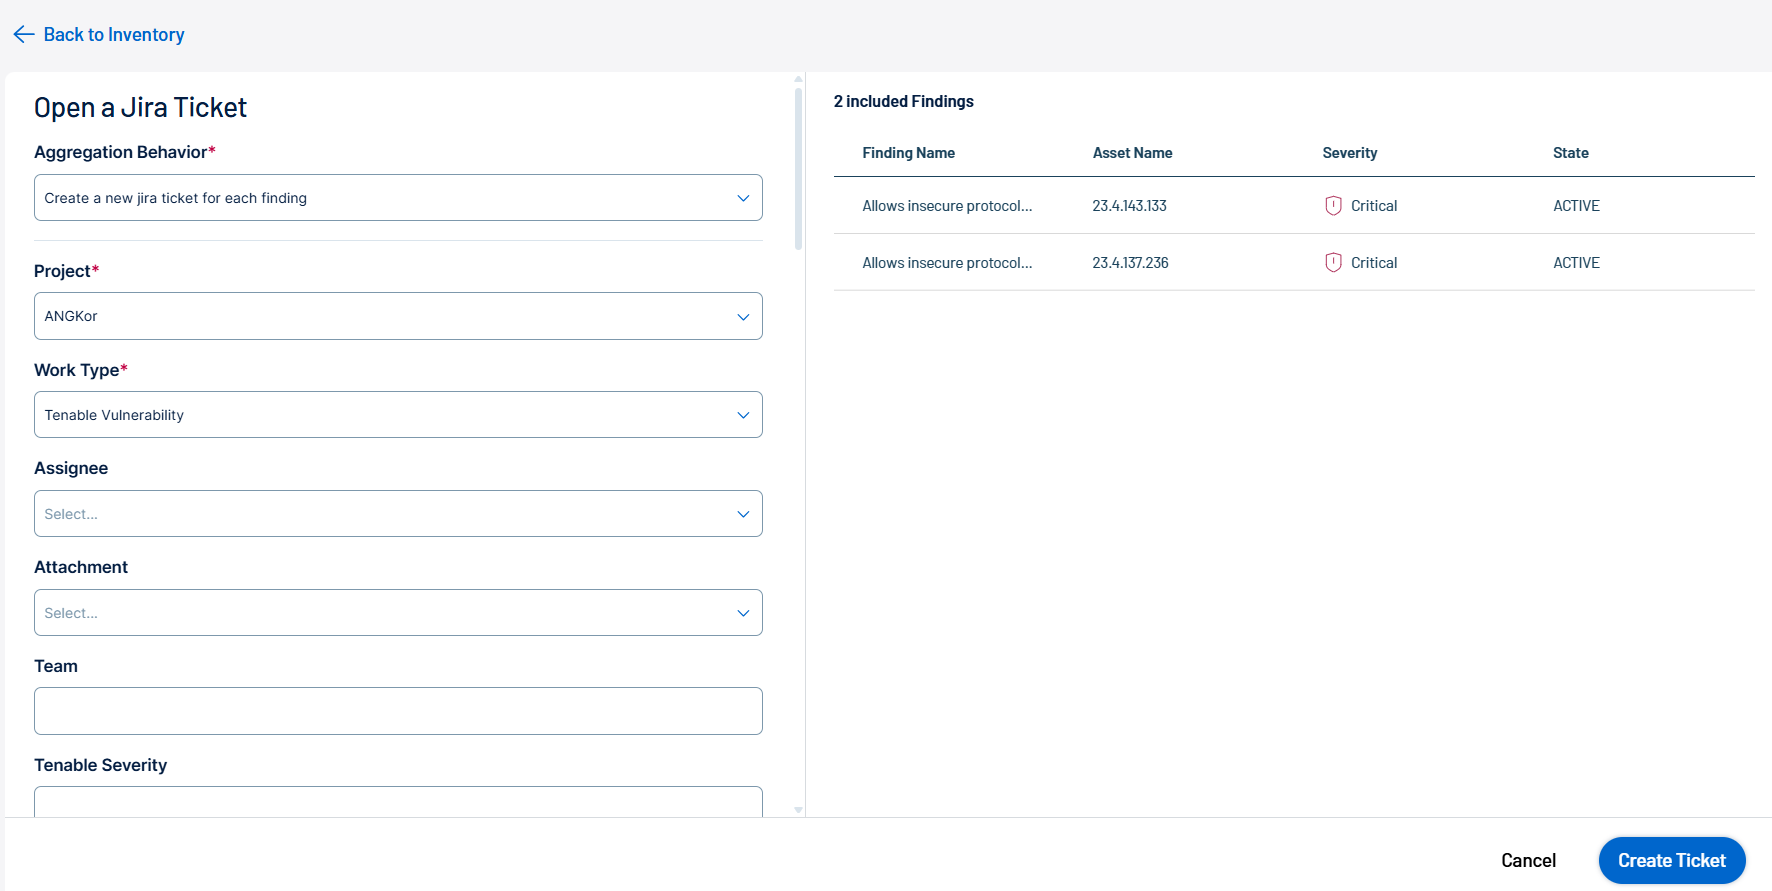
The Open Jira Ticket page appears.
-
Configure the following options. Depending on the Work Type, these can include, but are not limited to:
Tip: For more information about Jira ticket creation fields and options, see Configuring Built-In Fields in the Administering Jira Applications Support Guide.Option Description Aggregation Behavior Select one of these two options:
-
Create a new jira ticket for each finding — Every time a finding appears, a new ticket gets created in Jira.
-
New findings create subtasks on an existing ticket — Every time a finding appears, a subtask gets created on an existing Jira ticket.
Existing Jira Ticket drop-down box Select the existing Jira ticket on which you want subtasks to be created.
Note: You see this option only if you choose New findings create subtasks on an existing ticket.Project drop-down box Select the Jira project in which you want tickets to be created. Work Type drop-down box Select the type of ticket you want to create in Jira, for example, Task or Epic. Assignee drop-down box Select the user to which you want to assign the ticket. Attachment drop-down box Where applicable, select any attachments you want to include in the ticket. Team text box Type the team name to which you want to assign the ticket. Due Date text box Type the date at which the work for the ticket is due. Optionally, click the  button and select a date from the calendar.
Labels text box Type any labels you want to assign to the ticket. Priority drop-down box Select the priority you want to assign to the ticket, for example, Low or High. Reporter drop-down box Select the user you want to assign as the reporter of the ticket. -
-
Click Create Ticket.
Tenable Vulnerability Management creates the ticket within Jira based on the selected finding data.
ServiceNow
To create a ServiceNow ticket based off of a finding:
-
In Tenable Exposure Management, access the Findings view.
-
In the findings list, select the check box next to each finding you want to include in the ticket.
-
In the upper-right corner of the page, click
Take Action.A drop-down menu appears.
-
Click Create ServiceNow Ticket.
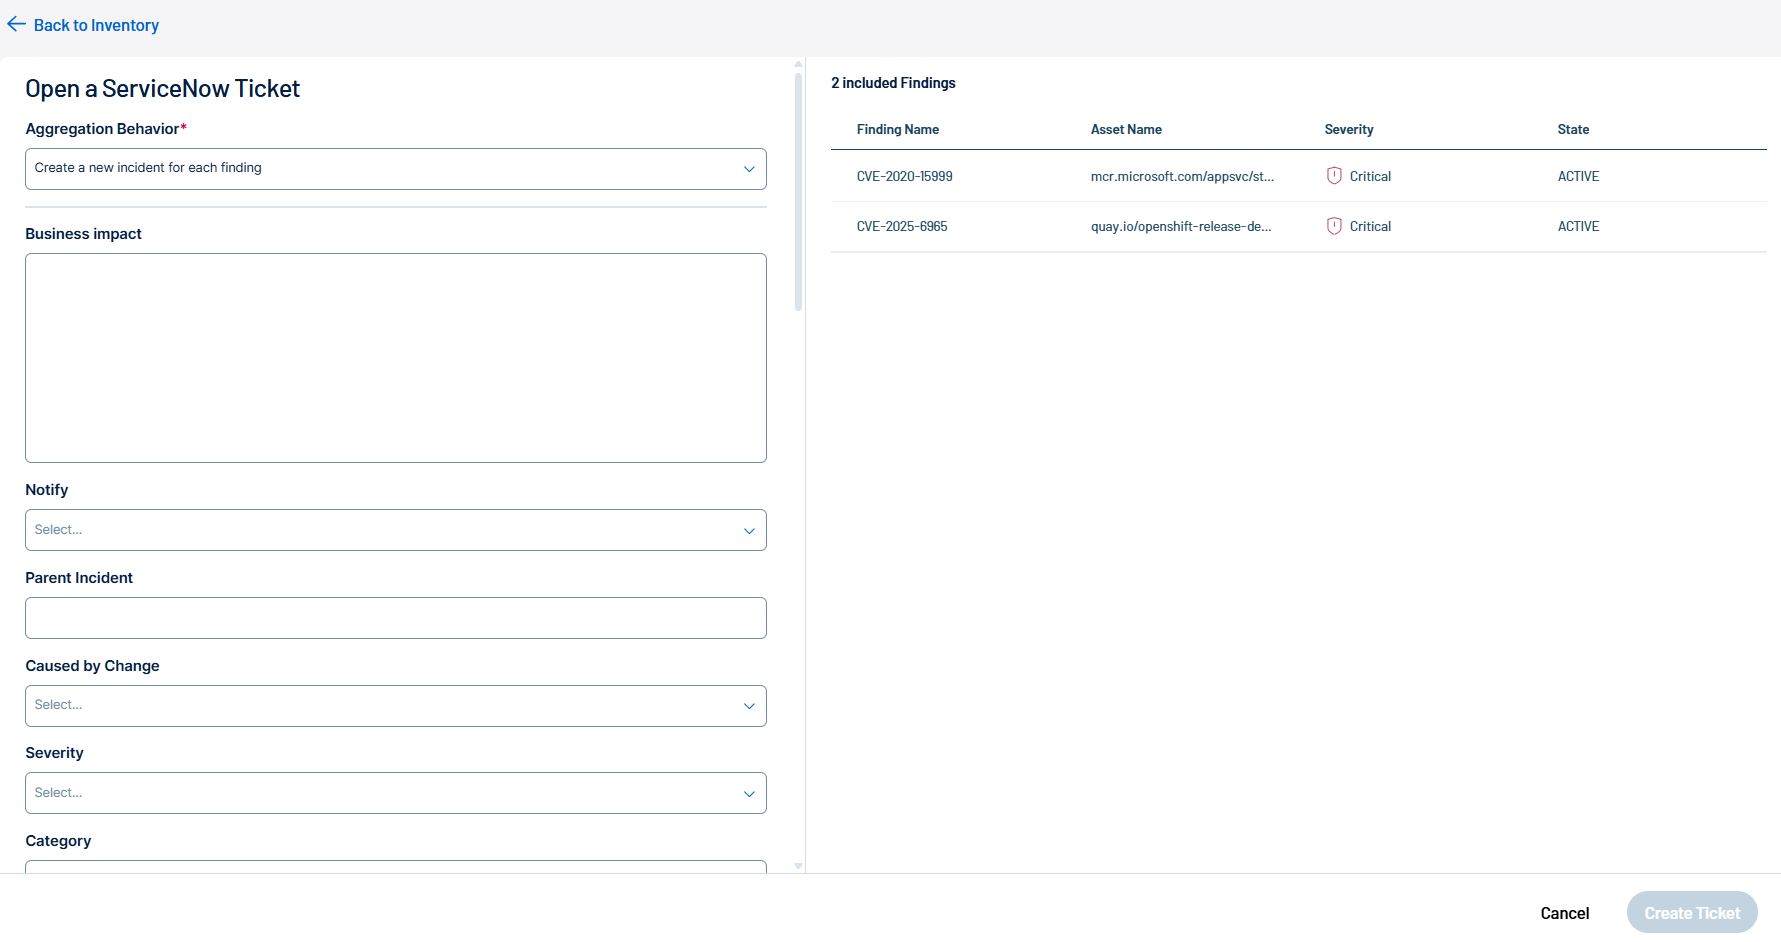
The Open a ServiceNow Ticket page appears.
-
Configure the following options:
Option Description Aggregation Behavior Select one of these two options:
-
Create a new incident for each finding
Every time a finding appears, a new incident gets created in ServiceNow.
-
New findings create subtasks on an existing incident
Every time a finding appears, a child incident gets created on an existing ServiceNow incident.
Parent Incident (optional) Select the existing ServiceNow incident from the drop-down list.
Note: You see this option only if you choose New findings create child incidents on an existing incident.Caller The user who originally reported or requested the issue. Assignment Group The team or group responsible for managing and resolving the ticket. Assignee The individual user currently responsible for resolving the ticket. Category A high-level classification of the issue or request, for example, Hardware, Network, Software. Subcategory A more detailed breakdown within the selected Category, for example, Laptop, Wireless, OS. Impact The measured effect this issue has on the business process or service. Values are Default, High, Medium or Low.
Note: Set this to Default to allow the finding severity to set the impact based on your ServiceNow instance configuration. See Configure ServiceNow. You can override it here.Urgency The speed required to resolve the issue, based on business needs. Values are Default, High, Medium or Low. Note: Set this to Default to allow the urgency to be set by the finding severity based on your ServiceNow instance configuration. See Configure ServiceNow. You can override it here.Tags Any tags or labels you want to apply to the incident. Short Description This value is appended to the name of the finding. Description Additional descriptive information for this incident. -
-
Click Create Ticket.
Tenable Vulnerability Management creates the incident within ServiceNow based on the selected finding data. It can take up to 10 minutes to see the updated ticket information in both Tenable Vulnerability Management and ServiceNow.
What to do Next
View your newly created tickets within the selected ticketing system. The tickets include information about the findings selected upon ticket creation within Tenable Exposure Management.