Create an Agent Group
You can place agents into one or many agent groups, and you can link agents to agent groups at the time of installation or afterwards in the Tenable Vulnerability Management user interface. You can name agent groups based on characteristics of where you deploy the agent, the type of asset, or other similarities.
To create an agent group in Tenable Vulnerability Management:
-
Log in to Tenable Vulnerability Management.
-
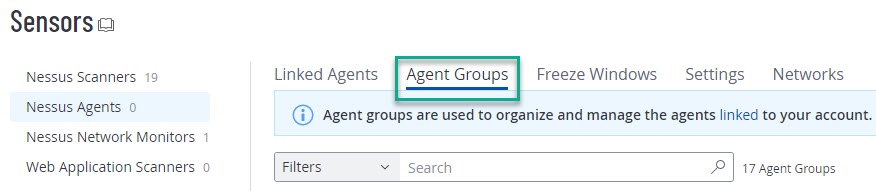
Navigate to the Sensors page and select Agent Groups under the Nessus Agents section.

-
In the upper-right corner of the page, click the
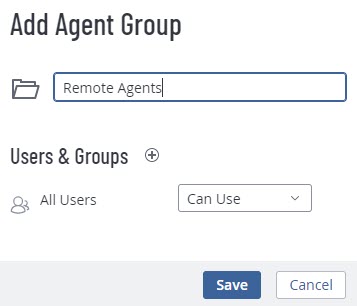
 Add Agent Group button.
-
In the Group Name box, enter a name for the agent group.

-
(Optional) In the Users & Groups section, configure which users can access the agent group.
-
Click Save. Tenable Vulnerability Management saves the new agent group, and the Agent Groups table updates with your new agent group.

Now that you create the agent group, you can begin assigning your linked agent or agents to the group:
-
In the Agent Groups table, click your new agent group.
The agent group details page opens.
-
Click the
Assign Agents button.
The Assign Agents page opens.
-
Select the linked agent or agents that you want to add to the agent group.
-
Click the Assign button.
Tenable Vulnerability Management adds the selected agent or agents to the agent group.

Now that you populated your agent group, you can set up and run a scan targeting that agent group.