Create a Tenable Agent Scan
Now that you installed, linked, and assigned your agent or agents to an agent group, you can now create a scan that targets your new agent group. This process is similar to creating a vulnerability scan that uses a Tenable Nessus scanner. The main difference is that your targets for the scan are based on the new agent group.
To create a Tenable Agent scan in Tenable Vulnerability Management:
-
In the upper-left corner, click the
 button.
The left navigation plane appears.
-
In the left navigation plane, click Scans.
The Scans page appears with the Vulnerability Management Scans tab open.
-
In the upper-right corner of the page, click
 Create Scan.
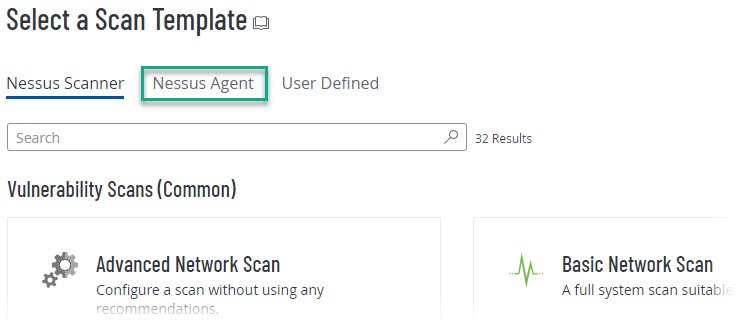
The Select a Scan Template page appears.
-
Click the Nessus Agent tab to view available templates for your scan.

A list of different scan templates that you can use with agents appears.
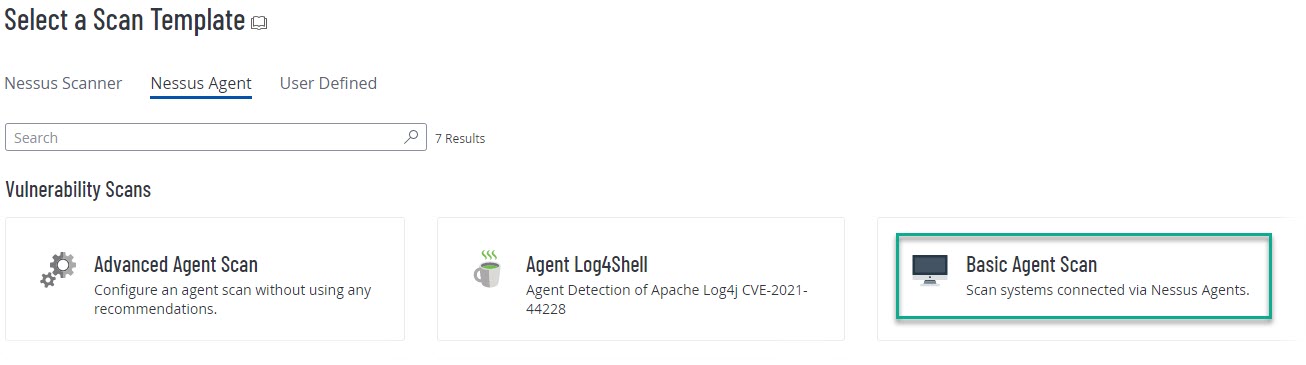
-
For this particular scenario, select the Basic Agent Scan: a comprehensive vulnerability template that scans the agent or agents for all known plugins.

-
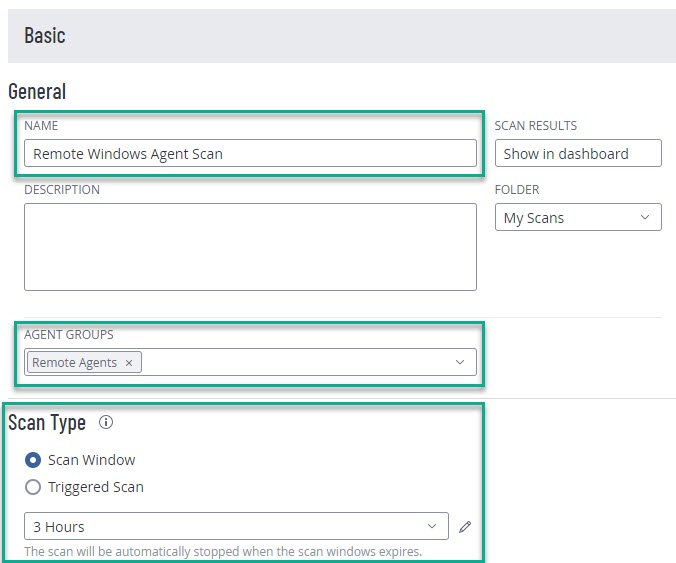
Configure the scan settings.

The three main template settings are a descriptive name, the agent group or groups that you want to target during the scan, and the Scan Type:
-
A Scan Window is the duration of time that an agent has from the scheduled scan start time to check into Tenable Vulnerability Management, receive the scan job, run the vulnerability scan, and upload those results to Tenable Vulnerability Management. For testing purposes, you can leave the scan window at the default three hours.
-
A Triggered Scan configuration allows the agent or agent group to launch the scan without any FedRAMP or user intervention. Agents can launch triggered scans using three different methods:
-
Interval trigger — Configure agents to scan at a certain time interval (for example, every 12 hours or every 24 hours).
-
File Name trigger — Configure agents to scan whenever a file with a specific file name is added to the agent trigger directory.
-
Nessuscli trigger — Launch an existing triggered scan manually by running the following command in the Tenable Agentnessuscli utility:
# nessuscli scan-triggers --start --UUID=<scan-uuid>
You can also set multiple triggers for a single scan, and the scan searches for the triggers in their listed order (in other words, if the first trigger does not trigger the scan, it searches for the second trigger). For more information about triggered scans, see Triggered Agent Scans in the Tenable Vulnerability Management User Guide.
-
-
-
Once you configure those three settings, and any additional optional settings, click either Save or Save and Launch if you are ready to start the scan immediately.