Attack Scenarios (< v. 3.36)
You define an attack scenario by selecting the types of attack for Tenable Identity Exposure to monitor on specific domains.
In order to modify the attack scenario, you must have a user role with the following permissions:
-
In Data Entities, "Read" access for:
-
All Indicators of Attack
-
All domains
-
-
In Interface Entities, access for:
-
Management > System > Configuration
-
Management > System > Configuration > Application Services > Indicators of Attack
-
Management > System > Configuration > Application Services > Indicators of Attack > Download installation file
-
For more information about role-based permissions, see Set Permissions for a Role.
-
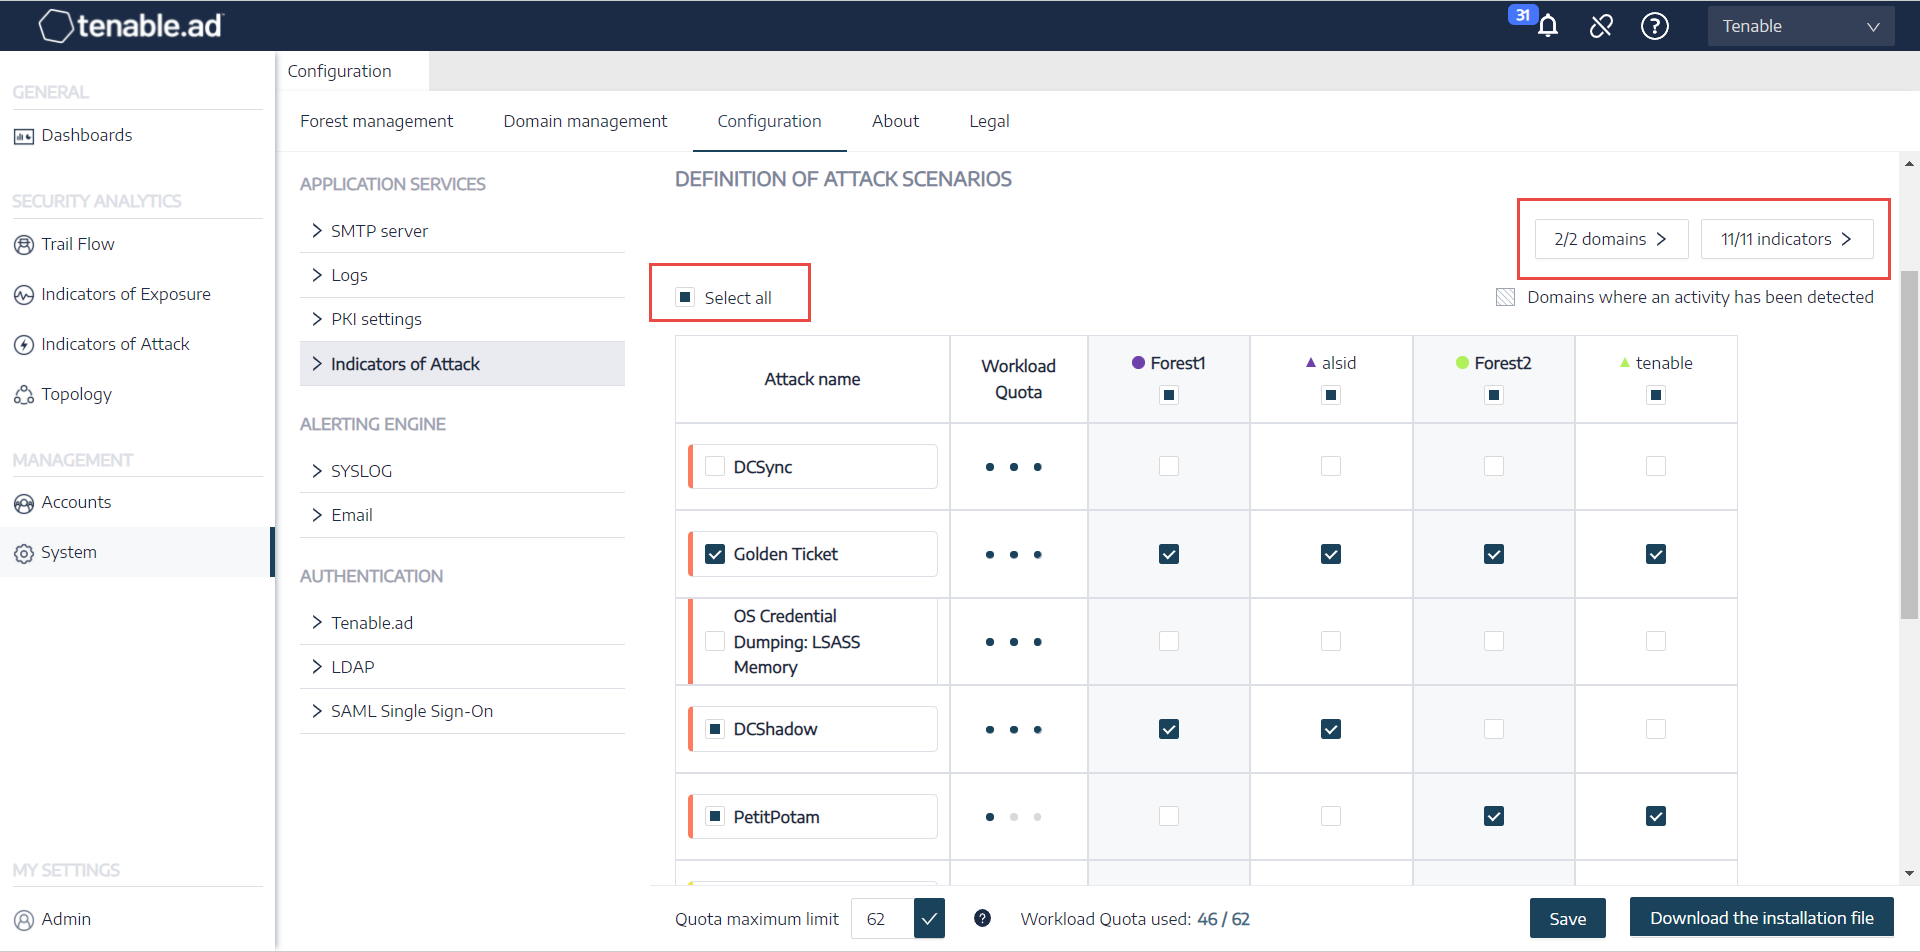
In Tenable Identity Exposure, click on Systems > Configuration > Indicators of Attack.
The Definition of Attack Scenarios pane opens.
-
Under Attack Name, select the attack to monitor.
-
Select the domain on which to monitor for the selected attack.
-
Optionally, you can do one of the following:
-
Click on Select all to monitor for all attacks on all domains.
-
Click on n/n domains or n/n indicators to filter for specific domains to monitor for specific attacks.
-
-
Click Save.
A confirmation message informs you that Tenable Identity Exposure clears the activity status of each attack after you save the configuration.
-
Click Confirm.
A message confirms that Tenable Identity Exposure updated the Indicator of Attack configuration.
-
Click Download the installation file.
-
For the new attack configuration to take effect, run the installation file:
-
Copy and paste the downloaded installation file to the DC in the monitored domain.
-
Open a PowerShell terminal with administrative rights.
-
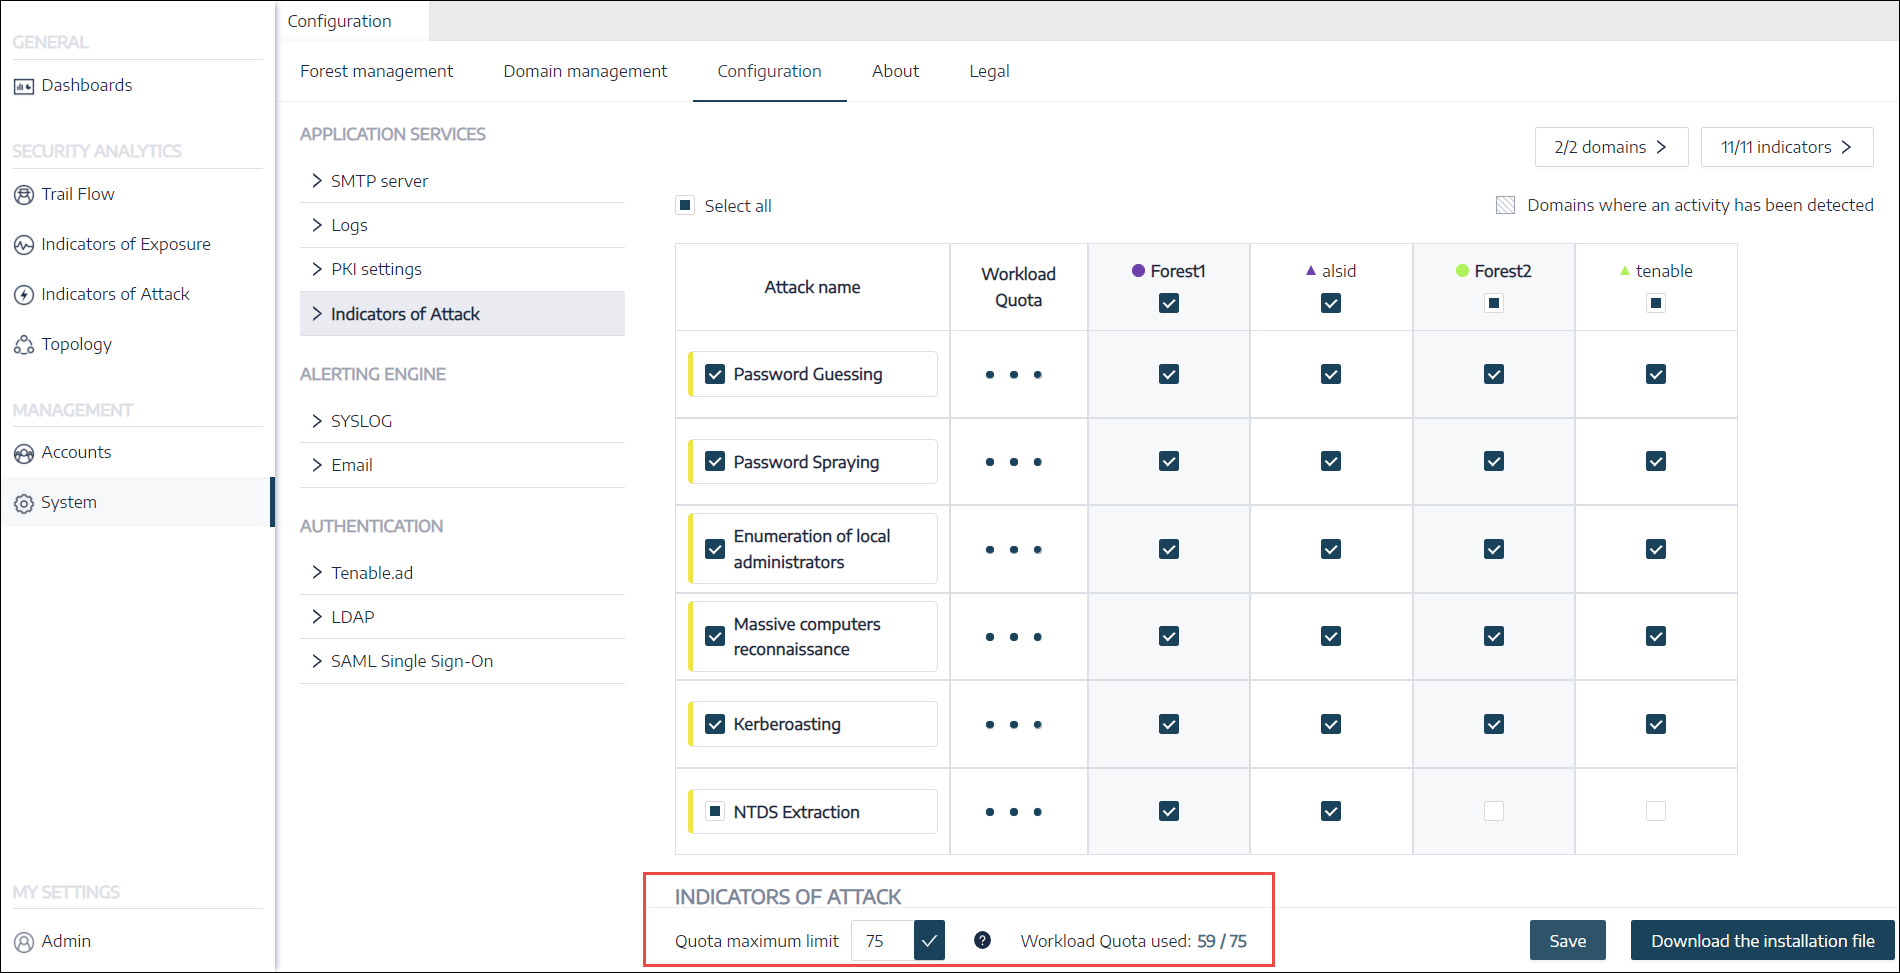
In Tenable Identity Exposure, copy the commands under the Indicators of Attack section at the bottom of the window.
-
In the PowerShell window, paste the commands to run the script.
-
Workload Quota
Each Indicator of Attack in Tenable Identity Exposure has an associated workload quota that takes into account the resources required to analyze data from an attack.
Tenable Identity Exposure calculates the workload quota to limit the number of Indicators of Attack (IoAs) running simultaneously which has an impact on bandwidth and CPU usage for event generation on domain controllers.
After you modify the workload quota limit, do the following:
-
Increase: Monitor statistics following the increase to ensure a comfortable margin.
-
Decrease: Deactivate some IoAs to stay under this quota, which reduces security coverage against attacks.
-
In Tenable Identity Exposure, click on Systems > Configuration > Indicators of Attack.
The IoA configuration pane opens.
-
Select the IoAs you want for your configuration.
-
Under Indicators of Attack, in the Quota maximum limit box, type a value for the workload quota limit.
-
Click the checkmark next to the value you entered.
A message informs you of the modification's impacts on Tenable Identity Exposure.
Note: If you type a quota maximum limit that is smaller than what the current attack configuration requires, you must adjust the number of active Indicators of Attack or raise the limit. -
Click Confirm.
A message confirms that Tenable Identity Exposure updated the quota maximum limit.
-
Click Save.
A confirmation message informs you that Tenable Identity Exposure clears the activity status of each attack after you save the configuration.
-
Click Confirm.
A message confirms that Tenable Identity Exposure updated the Indicator of Attack configuration.
-
Click Download the installation file.
-
For the new attack configuration to take effect, run the installation file:
-
Copy and paste the downloaded installation file to the DC in the monitored domain.
-
Open a PowerShell terminal with administrative rights.
-
In Tenable Identity Exposure, copy the commands under the Indicators of Attack section at the bottom of the window.
-
In the PowerShell window, paste the commands to run the script.
-


