Configure ServiceNow with OAuth
Required User Role: Administrator
Before you can create ServiceNow incidents using OAuth authentication within Tenable One Vulnerability Management, you must configure your ServiceNow account.
Prerequisites
Before you connect a ServiceNow connector using OAuth, you must:
-
Have a ServiceNow administrator user with access to System OAuth > Application Registry.
-
Be able to register an OAuth API endpoint for external clients in your ServiceNow instance.
Create an OAuth 2.0 Application in ServiceNow
To create an OAuth 2.0 application for use with Tenable One Vulnerability Management:
-
Log in to your ServiceNow instance as an administrator.
-
Navigate to System OAuth > Application Registry.
-
Click New.
-
Select New Inbound Integration Experience.
-
Click New Integration.
-
For the application connection type, select Client credentials grant.
-
In the Name field, enter a descriptive name for the integration, for example Tenable Integration.
-
From the OAuth application user drop-down box, select System Administrator (admin).
-
In the Auth scope section, select useraccount from the Auth scope drop-down box.
-
Click Save.
-
Open the integration entry you just created.
The Client ID and Client Secret fields appear.
-
Copy the Client ID directly from the field.
-
Click the copy icon next to Client Secret to copy it. You don't need to unlock or reveal it first.
-
Paste both values into a safe location. You need these, along with your ServiceNow instance URL, to configure the connector.
Enable Inbound OAuth Client Credentials (First-Time Setup Only)
If this is the first OAuth connection source you are configuring in your ServiceNow instance, you must also add a system property before Tenable One Vulnerability Management can connect successfully:
-
Log in to your ServiceNow instance with the admin role.
-
Navigate to System Properties > All Properties, or go directly to https://<your-instance>.service-now.com/sys_properties_list.do.
-
Click New.
-
Configure the following:
-
Name: glide.oauth.inbound.client.credential.grant_type.enabled
-
Type: true | false
-
Value: true
-
Application: Global
-
-
Click Submit.
-
Reload the Application Registry record you created in the previous section.
Configure the Integration
You can connect a ServiceNow connector to Tenable One Vulnerability Management using OAuth instead of API Token. With OAuth, Tenable One Vulnerability Management authenticates using a Client ID and Client Secret issued by your ServiceNow instance, rather than a ServiceNow user name and password.
To connect ServiceNow using OAuth:
-
In the left navigation, click
 Settings.
The Settings page appears.
-
Click the
 ServiceNow tile.
The ServiceNow connector page appears.
-
From the Authentication Method drop-down box, select OAuth.

-
Configure the following credentials:
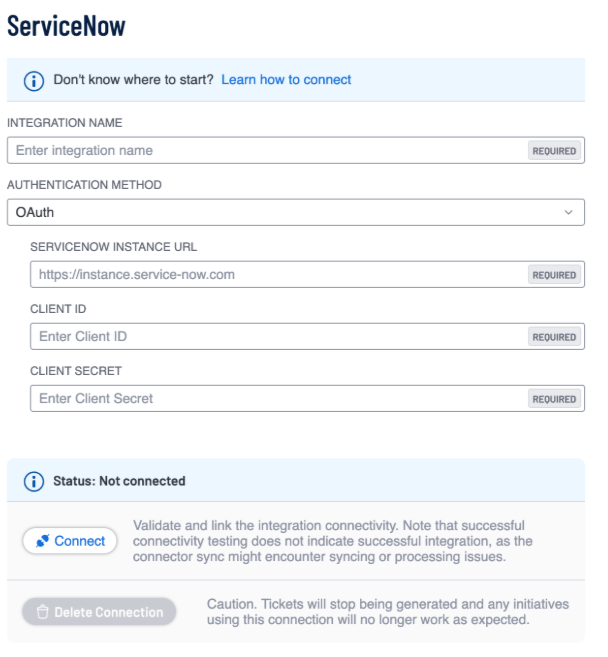
Option Description Integration Name Choose your own ServiceNow integration name. ServiceNow Instance URL The unique web address for your organization's instance of ServiceNow, typically formatted as https://[your-company-name].service-now.com. Client ID The Client ID from the OAuth 2.0 application you registered in ServiceNow. See the prerequisites above. Client Secret The Client Secret from the OAuth 2.0 application you registered in ServiceNow. -
Click Connect.
Tenable validates the Client ID and Client Secret against your ServiceNow instance. No additional login or consent screen appears.
-
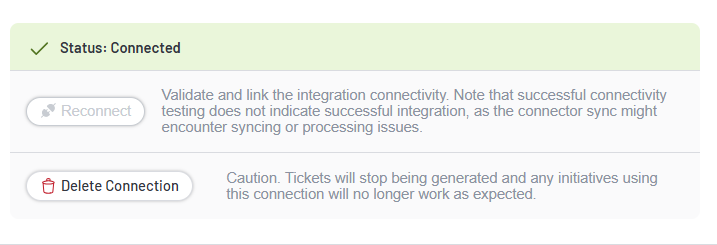
Once the connection succeeds, the Status banner changes to Connected, and Tenable One Vulnerability Management saves the connector automatically.
Troubleshooting
| Issue | Cause / Resolution |
|---|---|
| You click Connect and the connection fails immediately. | The Client ID or Client Secret does not match the OAuth application registered in ServiceNow, or the application registry entry is inactive. Verify the Client ID and Client Secret against the ServiceNow Application Registry entry, confirm the entry is Active, and try again. |
| The connection fails and you're not sure why. | Confirm your ServiceNow Instance URL is entered exactly as it appears in your browser when logged in to ServiceNow (for example, https://your-instance.service-now.com), with no trailing path or typo. |
| The connection succeeds, but incidents aren't created or don't sync as expected. | The account associated with the OAuth application may be missing a required role. Confirm the account has the itil or incident_manager role to create and update incidents, and rest_service for API access. |
Migrate a ServiceNow Connector to OAuth
A connector's authentication method is set when you create it and cannot be changed afterward. If you have an existing API Token ServiceNow connector and want to switch to OAuth, create a new connector rather than editing the existing one.
To migrate a ServiceNow connector to OAuth:
- Follow the steps above to create a new ServiceNow connector, selecting OAuth as the authentication method.
- Update any initiatives or ticketing automation rules that reference the old API Token connector to use the new OAuth connector instead.
- Once you confirm the new connector is working as expected, delete the old API Token connector.
Note: Deleting the old connector does not affect incidents it already created.