Create a Tag via Asset Filters
Required User Role: Administrator
When you filter your assets, you can use the filters as tag rules to create a new automatic tag.
After you create the tag, Tenable Web App Scanning automatically applies the tag to any assets identified through those filters.
You can also create a manual or automatic tag for your assets from the Tagging page.
To create a tag using asset filters:
-
In the upper-left corner, click the
 button.
 The left navigation plane appears.
-
In the left navigation plane, click Explore > Assets.
The Assets workbench appears with the Hosts tile active.
-
In the left navigation, click
 Assets.
The Assets workbench appears.
-
Filter the table, selecting and deselecting filters based on the rules you want to add to or remove from your tag.
The filters you selected appear in the header above the filter plane.
-
In the header, to the left of the first filter, click
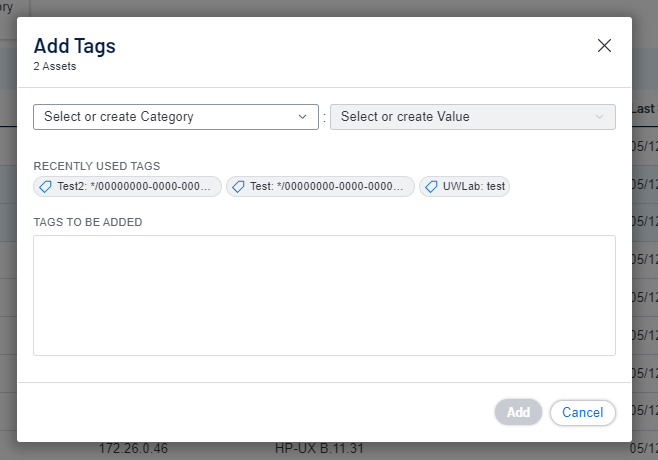
 Add Tags.
 The Add Tags window appears.
-
Under Create/Select Tag, in the first drop-down box, type a category.
As you type, the list filters for matches.
- In the drop-down box, select an existing category, or if the category is new, click Create "category ".
Tip: You can create a generic tag category and apply to different tag values to group your tags. For example, if you create a Location category, you can apply it to multiple values such as Headquarters or Offshore to create a group of location tags.
-
Under Create/Select Tag, in the second drop-down box, type a value for your new tag.
- In the drop-down box, click Create "value ".
-
Click Save.
Tenable Web App Scanning saves the tag and applies it to applicable assets on your account.
Note: It can take up to several minutes for Tenable Web App Scanning to apply a tag to the applicable assets.
